Mockingbird Hill Cottage

Mockingbird Hill Cottage

  • About MHC
    • Disclosure
  • Dollhouses/Minis
    • Hummingbird Cottage
    • The Studio (Formerly TSP)
    • Dove Cottage
    • The Lake House
    • The Folk Art Dollhouse
    • The Modern Dollhouse
    • Dollhouse Source List, Information and Tutorials
  • On the Road
  • Collecting
    • Roseville Pottery
    • McCoy Pottery
    • Egg Cups
    • Bakelite
  • Press
  • Privacy Policy
You are here: Home / Archives for decorating

Defending the Small House #2

November 22, 2011 at 7:00 am by Claudia

{Living Big in 1200 Square Feet}

Week 2: Furniture Placement in a Small Living Room

Welcome back to week number 2 of our series. Brenda and I had so much fun with our first post and now we’re back with the second. Thank you for all of the wonderful comments and suggestions. Before I forget, I’d love for you all to visit Betty Jo at Living Real. She wrote an excellent post last week on living small.

Today we’re tackling the living room in a small house. Let me share my living room with you and I’ll talk about the challenges I faced when decorating the space.

{Highly professional drawing by me.}
Our living room and kitchen are essentially one big room, but they are not entirely open to each other. You can see that there are partial walls between the two spaces. The one on the left is probably about 3 feet wide and the one on the right is about 2 feet wide. But the rest of that ‘wall’ is open. 
The living room wall on the left is 15 1/2′ long. There are two windows and a chimney that break up the wall. The living room wall on the right is 8 3/4′ long.
Okay, now you’re saying, “Wait a minute Claudia, a living room that’s 13 1/2′ by 15 1/2′ is big!”
Here’s the problem. The area from the chimney to the front door is essentially part of the entrance. And the wall on the right is only 8 3/4′ long. The area beyond that is part of a passageway from the front door to the den to the bathroom to the stairs. 
Long story short: The actual seating area is 13 1/2′ x 8 3/4′ – and there are only 2 useable walls in that space.
This is the area from the chimney to the front door. The photo below is of the passageway I was referring to earlier. I wanted to clearly define the passageway, so I did not put any seating there. No one wants someone walking between them and the person they’re talking to in the middle of a conversation. This needs to be a space where you can take off your coat, take off your boots, go upstairs, or walk to the bathroom or den.

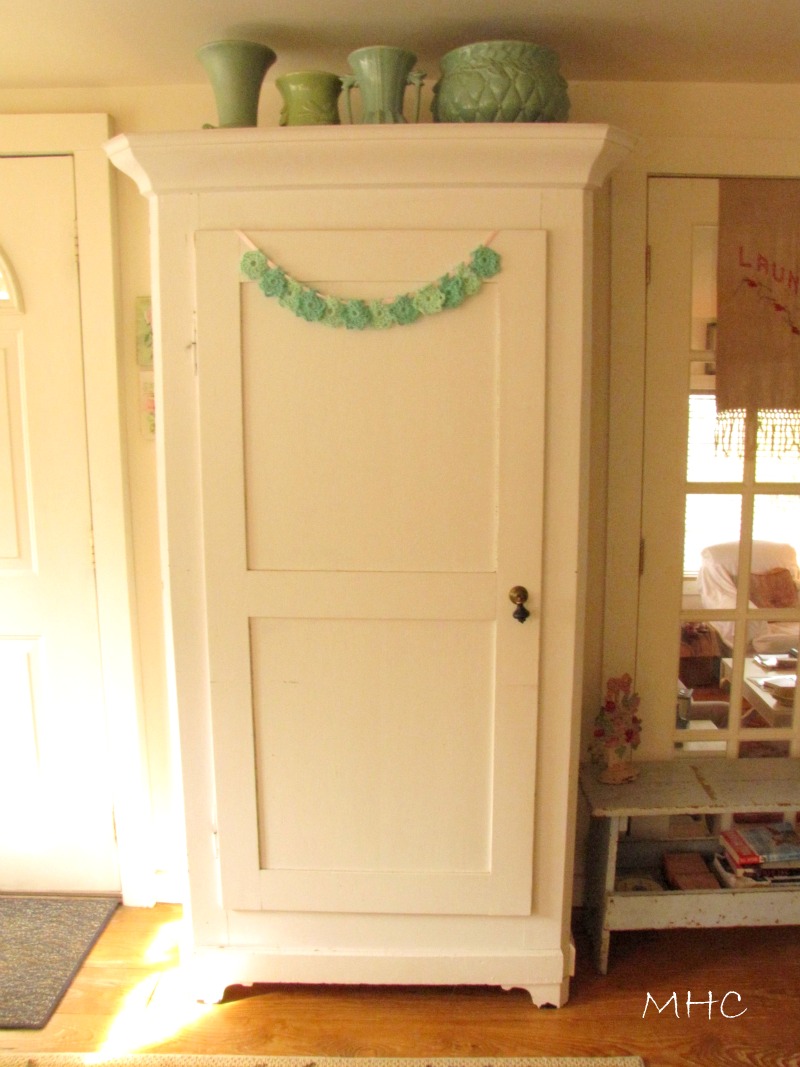
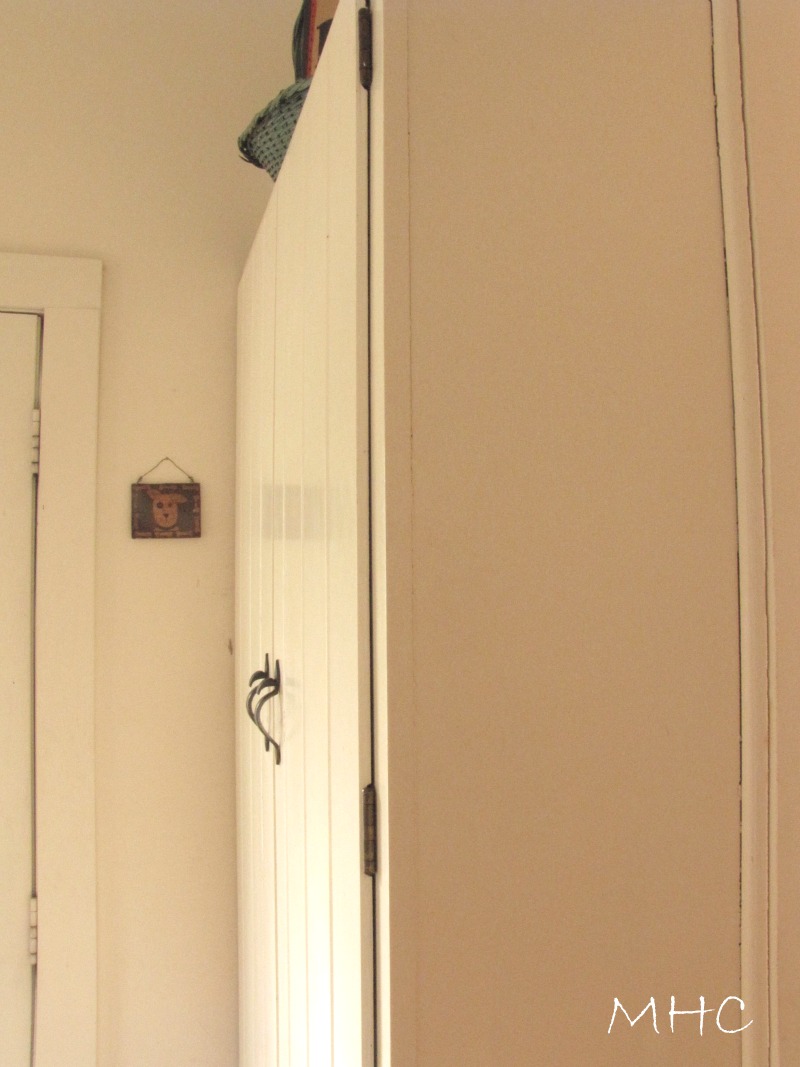
You can see why this particular part of the room has to remain relatively clear of furniture. The large,white cabinet is on the left, and a small spinet desk is tucked into an area by the stairs. That’s a closet on the right and beyond that is the doorway to the bathroom. The rug in the foreground is really Riley’s rug. He has a progressive disease that causes him great pain and he needs to sprawl out on a warm rug. Tip#1: Use what you are given to help define the living space. I’ve used the chimney as a dividing point – it’s directly across from the end of the 8 3/4′ wall, so I’ve used the line between the two points as a invisible fourth wall. It defines the seating space.

Okay, so what do we do? The biggest item in the room is the piano. There is really only one wall to place it against – the 8 3/4′ long wall on the right as we face the living room from the kitchen. There is no baseboard heating there and no windows. You don’t want a piano near any extremes in temperature. So the wall it is.

The piano has been in various positions on this wall. This latest, with it flush against the partition seems to work the best, as it allows some extra room for a chair. The chair and the piano share a floor lamp, as well. So I’ve killed two birds with one stone. Tip #2: Decide where your biggest pieces will go, then fill in the rest.

I now have only one other wall to use. The loveseat has to go there, which means the chair must be placed in the open entrance to the kitchen or on the far side of the loveseat, near the front door. Actually, we’ve done it both ways. Usually, we have our wicker rocker in this space, as well – but we’ve moved it upstairs to the bedroom. (It needs some repair.)

So, the red chair will be positioned in the opening to the kitchen. I like this because it helps to further define the living room, making it clear that it’s an entirely different space than the kitchen.

There’s the red chair. It picks up the red in the kitchen and defines the living room space. The loveseat tucks into the space created by the chimney and the partition wall. I don’t have a lot of room for side tables, so you can see I’ve used a vintage stool and a small green cottagey table.

Truth be told, I much prefer the wicker rocker in the room. Normally it would be in that area between Riley (sleeping on the floor) and the green table. Don likes the space created by its absence. I like cozy.  I wonder who will win?

What about the coffee table? While it may seem large, it actually works beautifully. We love this piece which we’ve had since our San Diego days. It was refinished by a dear friend of ours and we bought it from him for $75. It’s gorgeous. When we lived in our rental we had to put it in storage. When the time came to move to the cottage and get everything out of storage, we had our doubts about whether it would work in the space. But it does. It’s large, yes, but it helps to create the cozy, intimate atmosphere I’m after. It connects the two chairs and the loveseat. Chairs can be pulled up to it, chips and dip and munchies can be laid out on it, feet can be put up on it. It’s fabulous.

Recently, we tried rearranging the space. We moved the sofa so that it was perpendicular to the wall. We replaced the large coffee table with the white coffee table (much smaller) from the den.

It didn’t work. The minute we moved the round coffee table out, the room lost it’s cottage coziness. We learned very quickly that small-sized-everything just looks puny. And it makes the room seem much smaller. Tip #3: Don’t limit yourself to small pieces of furniture. Have one or two large pieces in your small space.

Tip #4: Find balance. Yes, we’ve used big pieces as suggested in Tip #3 – we’ve got a piano and a big old coffee table in here. But those big pieces are balanced with some smaller ones, as well. And it all works together to make a cozy space.

And though I talk of the entrance area as separate, the pieces of furniture that are in that end of the room are part of the greater living area. The sideboard and the white cabinet are large pieces and nicely balance the weight of the furniture in the rest of the room. And the placement of the loveseat and chair is balanced by the chair and piano on the other side of the room. The coffee table ties it all together.

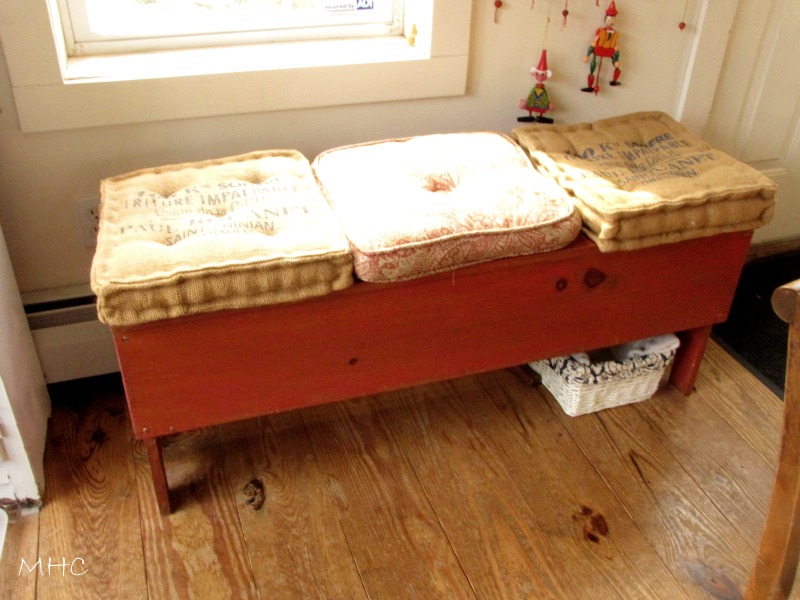
Tip #5: Go with your favorite colors and patterns and don’t think you have to go with neutrals or whites to make the space work or seem bigger. I love color, as you can see. There are some dark wood pieces in the space, but they are balanced by lighter, painted pieces. One chair is a yellow and red check. The other is a red and white check. The loveseat has a pale green and white slipcover. The rugs are floral. There’s lots of green and blue pottery around. The bench by the white cabinet is blue. But it all works. If you want neutrals or whites, go for it. I don’t think, however, that it makes that much difference in the perception of the space. If everything in this space was neutral and/or white, you’d still perceive it as a small, cozy space. And you don’t need to back away from pattern, unless that is your preference. As you can see, I love pattern. It might not be everyone’s cup of tea, but it works in this space.

You have to take what you’re given and make it work. Embrace that small living room and honor it’s size. I think that to deny that this cottage is small is just plain silly. It is small. Why not celebrate it?  Of course I’m biased, but I think we’ve created a charming, cozy living room. We’ve accepted the quirkiness of our space and made it work for us.

Thanks so much for stopping by. Please visit Brenda and see what she has done with her living room.

We look forward to your comments and ideas!  Some of you suggested a linky party and we probably will have one or two along the way. We’ll give you plenty of warning.

Filed Under: decorating, defending the small house, DIY 25 Comments

My Rules for Living Comfortably in a Small Space

November 9, 2011 at 2:00 am by Claudia

My pal, Brenda, recently moved into a little house. Correction: an older little house. She is facing many of the same problems that I have coped with for years: not enough cupboard space, tiny closets, small rooms. We’ve talked about this in our phone conversations and I thought I might share some of my ideas with you.

First of all, I have never not lived in a small space. The house I grew up in wasn’t much bigger than Brenda’s and there were six of us. I shared a bedroom with my two sisters for much of my young life. We had one bathroom. After I left home, I lived in dorm rooms and then moved on to studio apartments. It was a big deal for me when I graduated to a one bedroom apartment. It was still small, however. The house that Don and I lived in when we were in San Diego was small, the cottage we rented when we first moved East was smaller than MHC, and MHC is Small, with a capital S. It only makes sense that I’ve figured out ways to deal with small space living over the years. Here is my personal set of ‘rules’ for living in a small space:

1. Do not fall into the trap of buying apartment-sized furniture.
2. Have many pieces of furniture that can do double duty.
3. Find inventive ways to work around storage problems.
4. Think ‘outside the box.’
5. Have what you love around you. 

I’ll now go into a bit more detail.

Rule #1: Do not fall into the trap of buying apartment-sized furniture. By that, I mean those pieces that are designed and advertised for small space living. Unless you’re living in a closet, it is much better to have normal-sized pieces of furniture in your home. In fact, a few big and/or tall pieces will make your room look even larger. I guarantee it.

I bought this large cupboard at auction a couple of years after we moved to MHC. It has a big presence in the room. I knew it would work and I knew it would make the room seem larger. It does.

We also have a piano in our living room. Would I like it to have its own wall in a larger room? Sure, but it works just fine in our cozy living room.

Back to the cupboard. When you open that door you will see lots of shelves which provide valuable space in which to store paperwork, light bulbs, pay stubs, office supplies, etc. That brings me to my second and most important tip.

Rule #2. Have many pieces of furniture that can do double duty. Except for chairs and sofas, almost everything we have in this house functions in more than one way. In addition to the table top, all occasional tables in this house have either a lower shelf or drawers, providing additional storage space. And the table next to our loveseat is really not just a table, it’s a vintage stool that I commandeer quite often in order to reach high places. Here are some examples of double duty pieces:

This vintage sideboard has lived in all of our houses. It’s just inside the front door here at the cottage. It no longer functions as a sideboard but as a valuable (and beautiful) storage piece in our living room. In addition to the top surface, there are display shelves where pieces of McCoy Pottery do double duty as well. One holds car and house keys. One holds sunglasses. One holds the key to wind the clock. Those 3 drawers provide a lot of storage space. One functions as a file drawer, the others hold a host of essentials.

I knew I wanted a bench in the kitchen but I was very clear that it had to be a storage bench. Why waste valuable space? Inside this bench are all sorts of tools and DIY supplies. I don’t know what we would do without it. It’s attractive and functional. We also store dog towels in that basket underneath the bench.

We bought this music cabinet at auction right after we moved in. My first thought was to use it for what it was intended – to hold my collection of sheet music and music books. But in addition to that, it now holds many things we want to keep flat: maps, vintage movie posters, large photographs. This little cabinet has proved to be invaluable for a whole host of hard-to-store-properly items.

And, apparently, some old remotes.

We have no space to store linens here. There is no quaint built-in linen closet like so many older homes have. Here’s another piece we bought at auction for $20. This cabinet is upstairs in the guest room. It took about a year for me to realize that the two shelves inside those doors would be perfect to store linens and towels. So our ‘linen closet’ isn’t conveniently located next to our main bathroom. In fact, it’s on the second floor. But it solves a major problem, as well as providing additional storage for quilts in the basket on top. (That’s a guitar case on the right. Guitars are everywhere here at MHC.)

Rule #3 – Find inventive ways to work around storage problems: This cottage was completely gutted and remodeled in 2000 by a previous owner. That gave us up-to-date wiring, a skylight, and a couple of neat ideas in the kitchen and bathroom. (I can’t take credit for these. I’m grateful for them every day because they have been lifesavers for us.)

Our kitchen is big. It’s filled with light. We love that. Unfortunately, that means that most of the wall space is taken up by windows. We have very little cupboard space. Thank goodness for this tall cupboard which is just inside the kitchen door and is about a foot deep.

See? Pretty narrow. But when you open it up, here’s what you get:

Shelves, shelves and more shelves – on both sides. There is a lot of storage packed into this narrow space. What a great idea for small kitchens – in very little space you can get a great deal of storage. I don’t know what we would do without this pantry. It’s Don’s favorite thing in the kitchen.

We have no basement. We don’t have a laundry room. (Having a laundry/mud room is a little dream of mine.) In the meantime, let’s take a trip to the downstairs bathroom.

Right inside the door is another door. If you didn’t know better you would most likely assume it was the linen closet. But you already know we don’t have a linen closet.

It holds our washer/dryer. This little closet is a great way to incorporate extra space in a useful way – especially in a bathroom where there is already plumbing installed.

This last one was my idea. I bought this kitchen cabinet when we lived in our first tiny rental here in the East. There was even less cupboard space there.

It’s not a very deep cupboard, but it holds quite a bit of china. And I store cleaning products and dog grooming essentials inside those lower doors. When we first toured this house, I made sure there was enough wall space in this corner of the kitchen for our little cabinet. Find storage where you can. If you don’t have it and like us, don’t have the money to completely remodel your kitchen, be creative. Haunt auctions, look at pieces with a fresh eye.

Rule #4: Think outside the box: Find inventive ways to use space or the lack thereof. I have two examples. The first has received a lot of play already on this blog and in a national magazine, so I won’t talk too much about it. Briefly, I needed space for me. I wanted to sew, to craft, to have a sort of studio space. There are only two bedrooms in this house and they’re both booked. So, I thought outside the box and made the upstairs hallway my studio. You can click on “Studio” at the top of the blog and you will find a link with all sorts of photos. To give you an idea of the space, here’s one photo:

And another:

It solves a lack-of-space problem and adds a lot of personality to that formerly bland upstairs hallway.

The other example takes us back to the kitchen. I’ve already said we don’t have enough cupboard space. We also don’t have enough counter space. To solve both those problems, I trotted off to my trusty friend, the auction, and for $60 bought an old, darkly stained sideboard. I painted it, added beadboard to the back and now I have a kitchen island.

The top provides valuable work space. The cupboards and drawers provide valuable storage space. What did I do before this kitchen island came into our home?

Rule #5. Have what you love around you: Yes, some editing is usually necessary. Every once in a while, I edit. But, I am a believer in having what you love around you. In your small space, make sure to have the things you treasure, that make you smile, that warm your heart in every room. If it gets a little cozy, so what? I would not be able to exist in a space that had been purged of my favorite things in order to look more spacious. Let me tell you a quick story.

In our first little rental out here in the East, we lived in a cottage on the grounds of a larger home. This place was tiny. I did my usual thing of filling the space with things we loved: quilts on the wall, the piano, cozy throws everywhere. a china cabinet, photos and framed art. Our first landlord had to sell the property. Consequently, a lot of prospective buyers traipsed through our house. What did we hear repeatedly? This place is so charming! Oh my god, I love this little cottage! How did you make it so homey? The cottage got more compliments than the big house!

Believe me. We used every inch of space in that house. But it was filled with color and beloved treasures and cozy furniture and that made all the difference. If you love what you have around you, it will make all the difference in the world. Even if it’s in a small space.

Whew! This was a long post. I hope that some of these ideas help those of you who are trying to find ways to make your small space work for you. It can be done.

Hey, we’d love a slightly bigger space. There are two of us. I’m 5’9″ and Don is 6’4″ – we could use a bit of extra room. But we cope. And frankly, I think living in a small space forces you to be creative. I’m always thinking about ways to make this space work for us.

Filed Under: decorating, DIY 44 Comments

Color Serendipity

November 2, 2011 at 5:00 am by Claudia

I’ve noticed a certain color combination appearing in my home, specifically in the kitchen.

This combination of red and aqua/robins egg blue/turquoise/sea glass – whatever you want to call it.

I didn’t plan it this way. As most often happens in my decorating life, these things just evolve over time. When we moved into the cottage 6 years ago, though I’m not especially enamored of window coverings, I ordered these roman shades. The kitchen has so many windows and Don was going to be away working and I didn’t feel entirely comfortable being on display as I cooked and washed dishes in the evening.

The red came long before the blue.

Then I started to fall in love with blue. But not dark blue. No, I fell for all of the various manifestations of aqua in my McCoy Pottery collection. Those particular blues made me very happy, indeed. Soon, the chalkboard was painted in that color.

Then I painted the hanger for the jumping jacks in a slightly different shade of blue.

And one day, not so long ago, I realized that I had combined it with red. It’s there in the jumping jacks. And the bench. And a pillow.

It’s there in the red chair in the living room that we’ve had for years.

Funny how these things happen.

Then I looked at my blog yesterday.

And there it is again!

Now I see it everywhere. On Pinterest, on blogs – especially this one.

I am officially smitten. And it appeared in my home by happy accident. Serendipity.

Pretty neat.

Do you have a favorite color combination?

Remember tomorrow is Reality Shot Thursday. And once again, I find myself scheduled for 2 posts as I’m also doing a book review. Double the pleasure!

Filed Under: blog, decorating, McCoy pottery 17 Comments

  • « Previous Page
  • 1
  • …
  • 68
  • 69
  • 70
  • 71
  • 72
  • …
  • 90
  • Next Page »
  • Email
  • Instagram

Welcome!

Welcome!

I live in a little cottage in the country with my husband. It's a sweet place, sheltered by old trees and surrounded by gardens. The inside is full of the things we love. I love to write, I love my camera, I love creating, I love gardening. My decorating style is eclectic; full of vintage and a bit of whimsy.

I've worked in the theater for more years than I can count. I'm currently a voice, speech, dialect and text coach freelancing on Broadway, off Broadway, and in regional theater.

Thanks for stopping by.

Searching?

The Dogs

The Dogs

Scout & Riley. Riley left us in 2012. Scout left us in February 2016. Dearest babies. Dearest friends.

Winston - Our first dog. We miss you, sweetheart.

Lambs Like to Party

Lambs Like to Party

A Note

Thanks for visiting! Feel free to browse, read and enjoy. All content is my own; including photos and text. Please do not use anything on this site without permission.

Disclosure/Privacy Policy can be found in the Navigation Bar under ‘About MHC.’

Also, I love receiving comments! I do, however, reserve the right to delete any comment that is in poor taste, offensive or is verging on spam. It’s my blog. If you’re a bot or a troll you’ll be blocked. Thanks!

Archives

All Content © 2008 - 2025 Mockingbird Hill Cottage · Log in