Mockingbird Hill Cottage

Mockingbird Hill Cottage

  • About MHC
    • Disclosure
  • Dollhouses/Minis
    • Hummingbird Cottage
    • The Studio (Formerly TSP)
    • Dove Cottage
    • The Lake House
    • The Folk Art Dollhouse
    • The Modern Dollhouse
    • Dollhouse Source List, Information and Tutorials
  • On the Road
  • Collecting
    • Roseville Pottery
    • McCoy Pottery
    • Egg Cups
    • Bakelite
  • Press
  • Privacy Policy
You are here: Home / Archives for defending the small house

Defending the Small House #6

December 20, 2011 at 7:00 am by Claudia

{Living Big in 1200 Square Feet}
Welcome to week number 6 of Defending the Small House. Today’s topic: Displaying Collections in a Small House. Most of us collect something or other; many of us have multiple collections. How do we show off our beloved collections in a small space?
I collect china and pottery. And I just seem to accumulate more and more. I can’t help it! I collect hand-painted china, china hat pin holders, Roseville Pottery, Fiesta and, my largest collection, McCoy Pottery. I have many pieces of McCoy, scattered throughout the house. How do I display them?
Tip #1: Find furniture pieces that will hold your collections, whether they are cabinets, shelves, boxes or something else. Grouping collections together in a cabinet or on shelves will make a big statement. I have a few cabinets that hold and display my china.

This cabinet is in the kitchen.

This cabinet is in the den.
Putting the china and pottery in a cabinet protects the pieces and also brings pieces made by different manufacturers together so that they have more impact. This particular cabinet has a mix of McCoy and my good china, as well as some hand-painted pieces that I treasure. By the way, the interior of this cabinet used to be the same color of wood as the outside. It was too dark in there. So I painted the inside a pale pink. Now the china doesn’t get lost in the dark interior of the cabinet and the pieces really pop.
Tip #2: Use your collections to create vignettes, like the one below. The birds are singing, they are on the piano, and the little white bird is perched on a dictionary of musical terms. Everything works together to make a sweet vignette.

Tip #3: Display your collectibles in like groupings. What does that mean? Well, for example, here I grouped together 3 McCoy bird planters – 2 the same color and one in a contrasting color. This group makes a statement. To top it off, I added a bird nest that I found in our yard.

You can also display things in color groupings:

Here I have 3 pieces of McCoy in yellow and a Fiesta pitcher in yellow. That makes a statement.

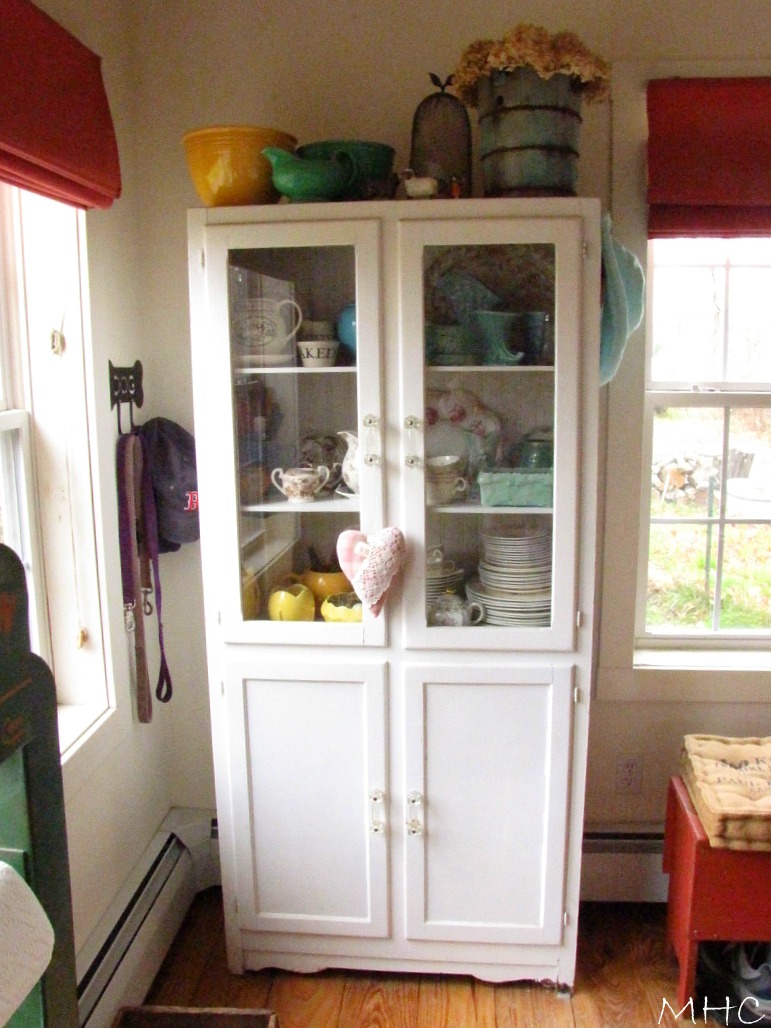
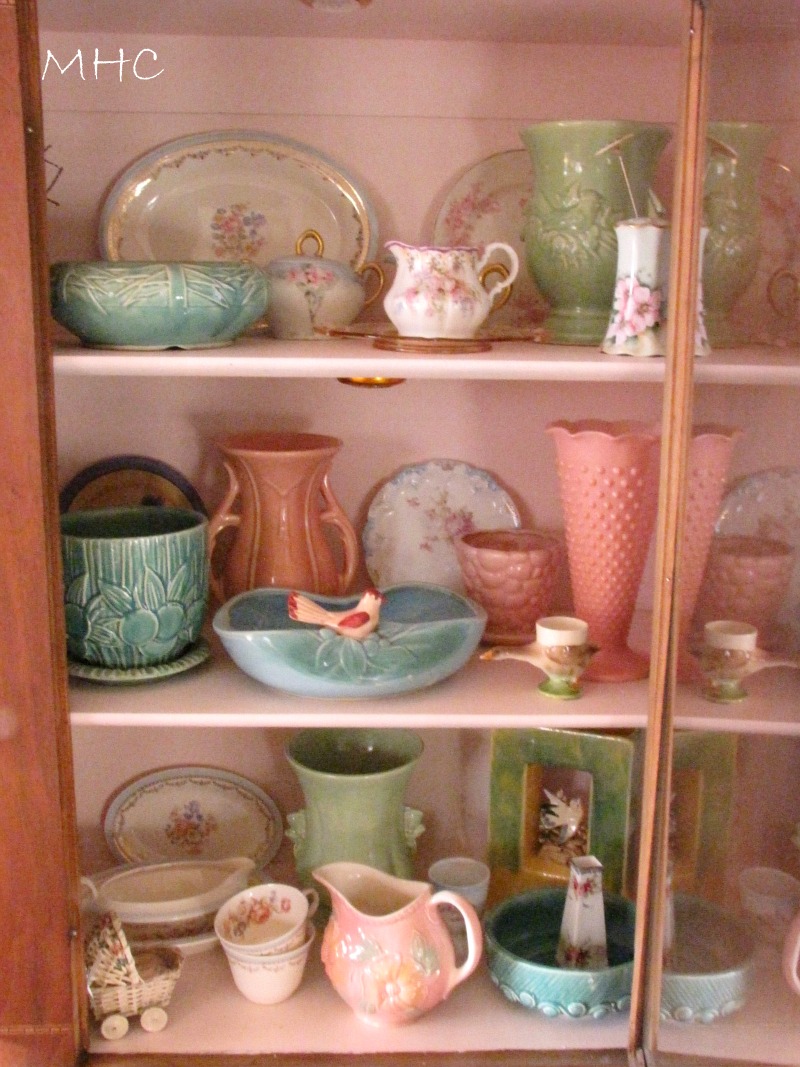
And here I have 3 pieces of aqua McCoy Pottery, alongside my good china, which has an aqua rim. If you were to look on the shelf above, you would find 3 more pieces of aqua McCoy grouped together.

If you collect something like vintage kitchen utensils or rolling pins, you could hang them on the wall in a group, creating a striking, graphic look.

Tip #4: Think up. Boy, do I ever ‘think up.’ I have a lot of pottery displayed on the top of my cabinets. This is the hutch in the den that you saw earlier. I used to have this Roseville Pottery scattered around the house. But when I grouped it together and placed it on top of the hutch, it all worked. I have a special fondness for these pieces and they make sense together. They are also nicely protected up there.

Here are some more examples of thinking up:

On top of the white cabinet in the living room, also grouped by color.

On top of the kitchen cabinets.

On top of the white china cabinet in the kitchen.

This works especially well with pottery because it tends to be large. Because of that, it doesn’t get lost up there.
Tip #5: Smaller collectibles pack more of a punch when grouped together. I have some collections that are small in stature. I group them together.
I collect egg cups:
The vast majority of them are on this shelf unit that I found in an antique shop. Grouping them together tells the story of the collection. And it makes me smile.

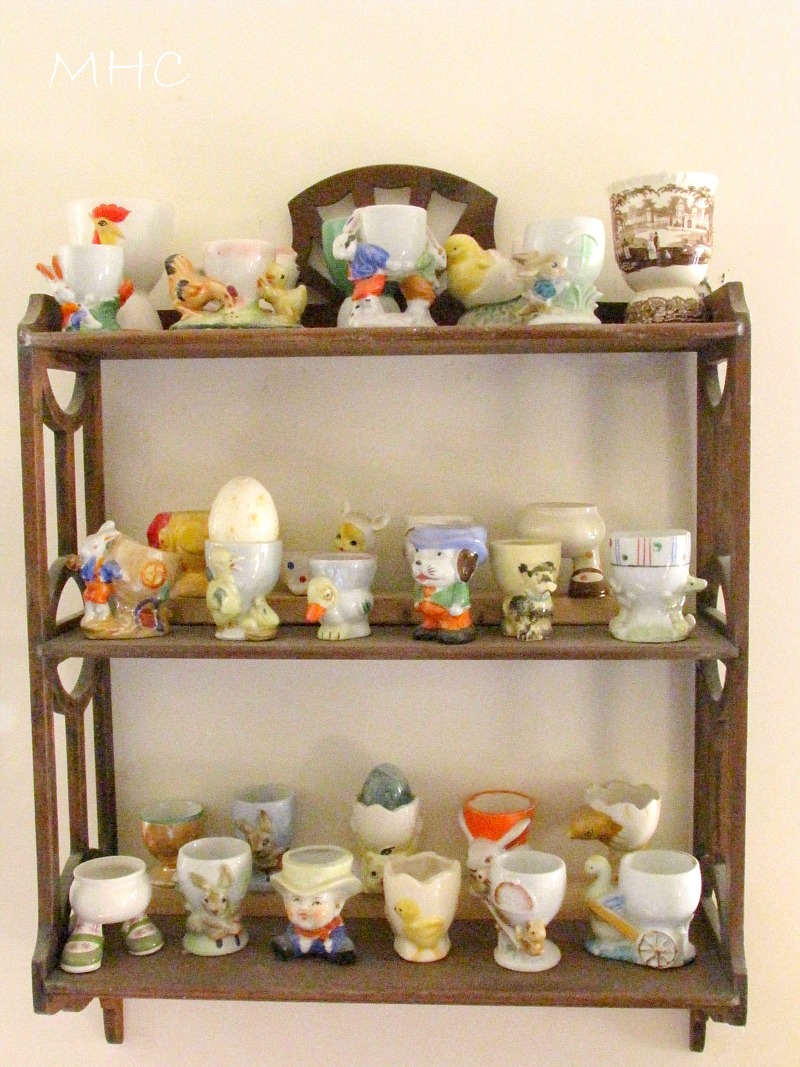
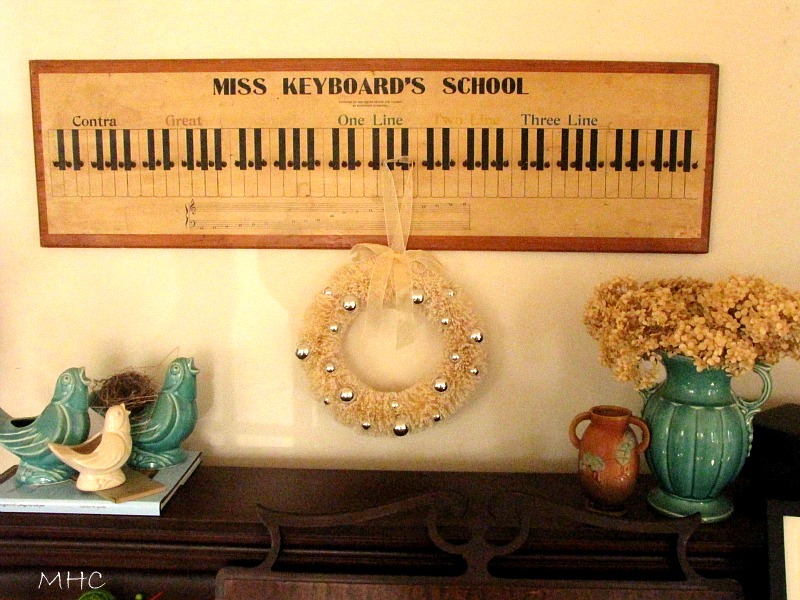
Look for interesting pieces on which to display your collections. This shelf is a favorite of mine; I picked it precisely for this purpose and I think it enhances the egg cup collection. The rest of my egg cups are on a sweet little shelf in the den:

My husband’s jumping jack collection is displayed by our side door.

See? Hard to keep a frown on your face when you see these! Grouping them together tells a story.

Same with my bakelite flatware:

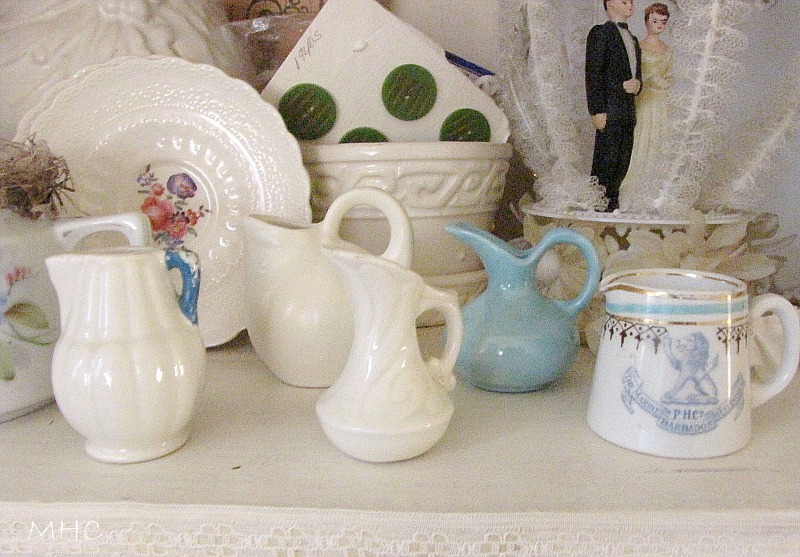
I also have a few mini collections. These are the beginnings of new collections. All grouped together to make more of a statement.

Miniature pottery.
My bride and groom cake toppers.

Tip #6: Don’t hide your collections. Live with them. Use them. I’m very visual. I love seeing my favorite things around me. I don’t rotate my collections, storing some of them away, while others remain on display. No way! I’m proud of my collections and they say a lot about me. Heck, collecting McCoy Pottery set me on a new path with color and it shows in my decorating.

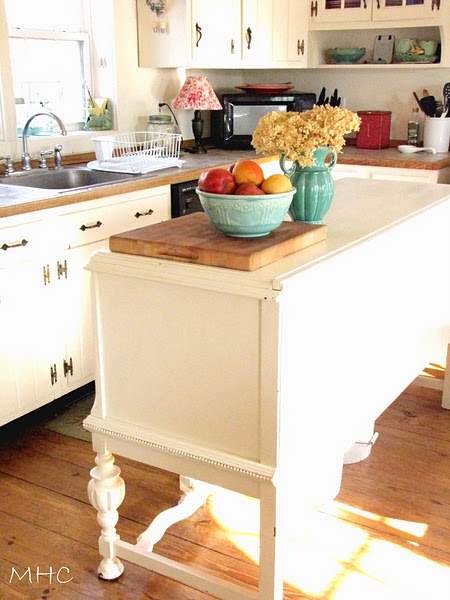
I use my pottery to organize things in my studio. I put fresh flowers in my vases. I use my china. I tuck one type of collectible in another type of collectible.  I don’t know about you, but I love nothing more than exploring someone’s collections. If I visit a home for the first time, I immediately gravitate toward collections and books. And sometimes, the books are a collection.

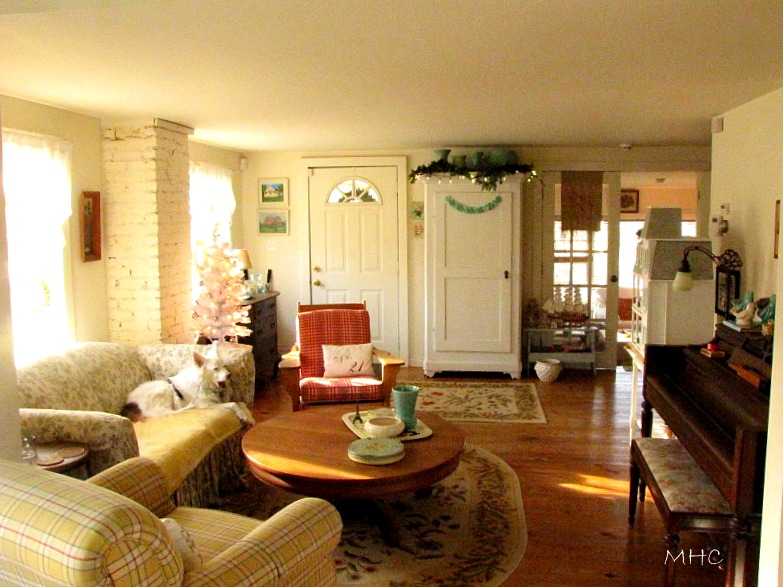
Tip #7: Don’t think for a moment that having a small house means you can’t display everything. You can. You should. As long as you find a way to group your pieces so that they make a kind of sense, your home will not look cluttered. Group by color, group by size, group by type of collection – as long as it makes sense, it will work.

Thanks so much for stopping by. I hope these tips are helpful for you. Make sure you visit Brenda for her take on displaying collections in a small house.

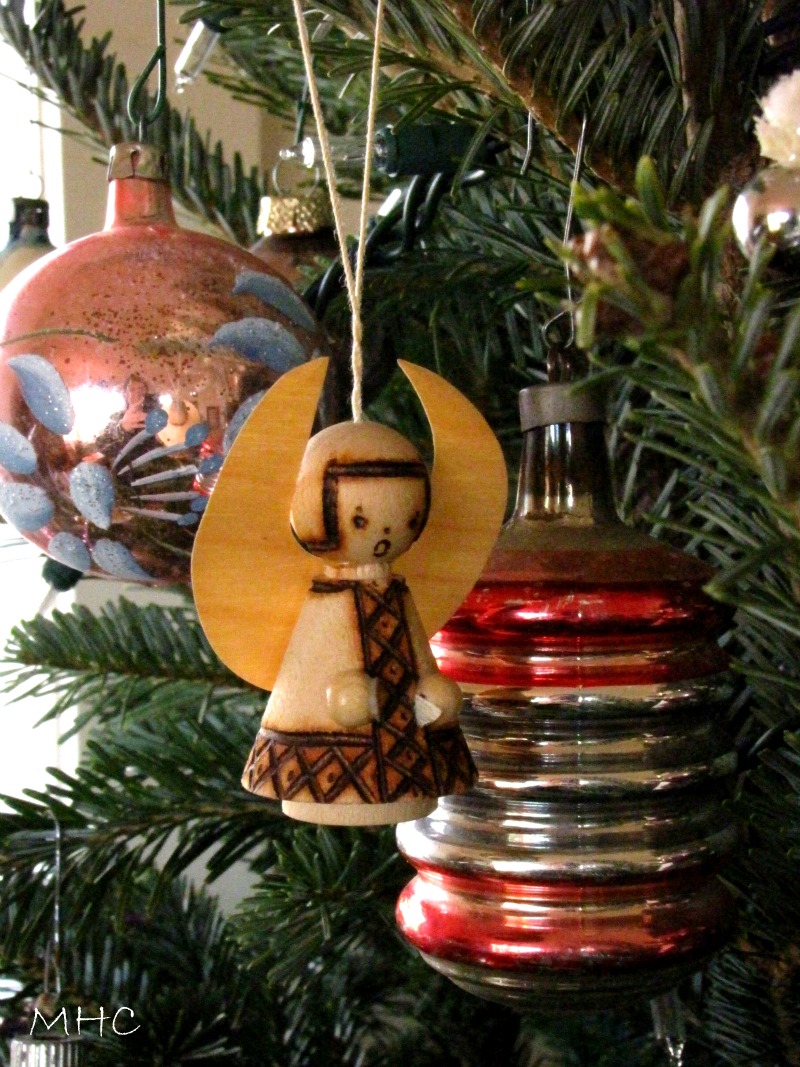
And finally, Happy Holidays to everyone – if you celebrate Christmas or Hannukah, please have a wonderful, magical holiday!

We’re going to take a couple of weeks off from this series. We’ll be back on January 10th.

Filed Under: collecting, decorating, defending the small house 20 Comments

Defending the Small House #5: Holiday Edition

December 13, 2011 at 1:02 am by Claudia

{Living Big in 1200 Square Feet}

Welcome to Defending the Small House, number 5: Christmas Decorating in a Small House. I’m so glad you’ve taken some time to visit during this holiday season. Brenda and I are really looking forward to this special edition linky party!

I am not someone who decorates for Christmas with a ‘theme’ or a different color palette every year. I couldn’t care less about that kind of thing. For me and my husband, Christmas decorating is about using favorite decorations that we cherish. Some of them are mine from my childhood. Most of them we’ve collected together. They each have meaning, even the ones we had to buy at the local drugstore when we first moved out East and realized that all our boxes of ornaments had inadvertently been put in storage!

If you’ve learned anything about me from reading this blog, you’ve learned that decorating and adorning our house is only done with things that have meaning to us, with a history or an interesting story to tell. Likewise with Christmas decorations. Even if it involves me digging frantically through every bin at Big Lots a few years back to find my bottlebrush wreaths – that’s a story I’ll tell for years to come! Tip#1: If you decorate with the things you love and that have meaning to you, you can’t go wrong.

I suspect this happens in most homes – I’m absolutely sure it happens in small homes. Furniture has to be rearranged. In our case, the dollhouse had to move up to the living room because it usually lives in the corner of the den where we put the big Christmas tree. So –  up comes the dollhouse, the yellow chair moves near the kitchen, the red chair moves to the other side of the loveseat. I like the chairs in this new arrangement. Tip #2: As you decorate for Christmas and have to move things around, look at it as an opportunity to view your space with fresh eyes – you just might discover something you like.

For instance: I’m rather liking the dollhouse is this new place. As Don says, he sees it more clearly here because there is a lot more light. What do you think?

The Big Lots bottlebrush wreaths. I have 4 of them. The others are hanging in the living room windows. Tip #3: Repetition of an item or shape can tie a room together. The wreaths are hung in the kitchen, above the piano and on the living room windows, connecting both parts of what is essentially a large room.

I just added the reindeer.

The dollhouse has been decorated.

We have a little white tree in the living room. I won a beautiful small tree skirt a couple of years ago in a blog giveaway, so I had to buy a little tree to go with it. It looks prettier with the lights on.

The other day, I chained stitched a garland for the tree. Simple and sort of homespun. No cost, since it was yarn I had on hand. Tip #4: Look at the things you have on hand and incorporate them into your decorating. In this case, I thought about the pink ornaments on the tree and the garland that hangs on the white cabinet (see below) and a little light bulb went on – so I grabbed the same yarn and made the garland.

I always use the branches we’ve trimmed from the bottom of the tree to decorate the house. They work beautifully on top of the white cupboard. Whoops! I have to tuck that light in.

These are on the windowsill above the kitchen sink. I have more in two glass milk bottles on another window sill. Tip #5: Use live greenery wherever you can. It is beautiful in its simplicity. If you live in a very tiny space, some boughs or garlands may be all you need to create your holiday home. Don’t underestimate their power to transform your space.

I just posted about this snow scene yesterday. I used a vintage jar, some kosher salt, a putz house and bottlebrush trees. Tip #6: Make your own snow scene with a jar and some small Christmas ornaments. You can use any size jar, any size ornament or bottlebrush tree. Make a few and group them together.

On to the den. Monty is dressed for the holidays. Tip #7: Sometimes a simple bow works wonders.

I usually crop the television out of my Christmas tree photos, but since this is a series about small houses, I’m going for truth in advertising! There it is, right next to the television. As you can see, I have a lot of vintage ornaments – lots of old Shiny Brites. And I have my big bottlebrush ornaments that I got  a few years back from my friend’s shop. I kept buying them every time I went in there. I think I have 9 of them. I. love. them. They add so much to the tree. I don’t know what I’d do without them, so I guard them with my life.

This is an early evening shot. I’ve given up on trying to take photos of the tree in the dark. It never works.

We always have a real tree. We don’t have room to store a large artificial tree; besides, I can’t imagine a Christmas with my husband without a real tree. That’s just our preference. But, I’ve had plenty of Christmases with a small tree, usually artificial, in the various apartments I’ve lived in. You can make anything work and look beautiful. Maybe you could buy a small live tree and plant it at the end of the season.

I try to keep things simple. This is a small house; I have a lot of pottery everywhere, most every available surface has something on it already. We don’t have the luxury of storing those things to make way for the Christmas decorations because we don’t have an attic or a basement. I’m careful about what I use because I want the decorations to stand out, but in a classic, simple way. So I decorate with a light hand and try to enhance what I already have. Tip #8: Sometimes less is indeed more. If there are a lot of things fighting for attention, they make less impact.

Of course, in the end, holiday decorating is all about the things you love and treasure, about your very own holiday traditions. Have fun!

Be sure to visit Brenda to read about her Christmas decorating ideas for a small space.

Grab a cup of coffee or hot chocolate, sit down in a cozy chair and pay everyone a visit. I know I will be visiting everyone. Let’s spread some holiday cheer! With great thanks and holiday wishes from my little cottage. Blessings to you all.

———————————————-
Links will remain open for two days, so if you need some extra time to link up, you’ve got it!

To link up to our party:

1. Publish your post and please remember to link back to my blog.
2. Click on the title of your post and copy the post’s URL from the top of your browser.
3. Use the linky tool at the bottom of this post and paste the URL into the appropriate box. The directions are easy to follow.

Filed Under: Christmas, decorating, defending the small house, DIY 31 Comments

Defending the Small House #4

December 6, 2011 at 7:00 am by Claudia

{Living Big in 1200 Square Feet}
Week #4: Storage in a Small Kitchen

Welcome to week number four in our Defending the Small House Series. Brenda and I were chatting about our small kitchens the other day. I’ve lived with mine for 6 years now and Brenda, with a recent move, is just getting used to hers. I had to live with my space for a while to figure out what I needed. 
Here are some of my solutions.

The kitchen itself is a large room,  but one half of the room is meant for a table and chairs. There are large windows on all the walls. Consequently there isn’t a lot of wall space. The cupboards are at the other end of the room. There aren’t many of them and there is very little counter space.

Tip#1: Create additional storage space with stand alone furniture. I’ve done this with 3 large pieces of furniture. Not long after we moved in, we bought a storage bench that sits just inside our door. It provides additional seating, as well as storage for those things that I need to have on hand but don’t use very often.

I use the space underneath the bench to store a basket that holds dog towels (required for muddy paws!) If the basket was sitting on the floor by itself, it would look out of place. But by tucking it underneath the bench, it looks as if it was designed for that spot.

This kitchen cupboard came with us when we moved here from our rental cottage. There was even less space in that kitchen, but there was a bit of available wall space between the cupboards and the refrigerator. We found this cupboard which has proved invaluable in both kitchens. It holds a lot of china, including my entire set of good dishes. There is no space for them in the kitchen cupboards. Behind the doors are dog brushes and combs, cleaners, swiffers, dusters, window cleaner, lint brushes…if you don’t have enough cupboard space, find a piece that has cupboards built in.

And the third piece is the kitchen island. I’ve written about it in past posts. I was desperately in need of more storage space and more counter space. I purposely looked for an old sideboard that would fit in our space. Once I found it, a little paint transformed it into a kitchen island.

This is a life saver for us. Not only does it provide additional counter space but look at those cupboards and drawers! I store pots and pans in the cupboards, as well as my Kitchen-Aid mixer and blender. The top drawer holds linens and dish towels, the bottom holds all sorts of baking pans. I didn’t have room for these before the kitchen island came into being.

Now we have a fair amount of floor space, so I was able to go for something long. But I’ve seen smaller versions of these sideboards. I’ve also used a butcher block, a rolling metal cart, and a rolling wooden cart for extra counter space in other kitchens.

Under the island? Big containers of dog food. They would look very unattractive if they were out in the open. Since they are stored under the island, that isn’t a problem.

Tip #2: Look at pieces of furniture in a fresh way. Think about how you can repurpose them for your small kitchen. I cannot tell you how vital this old sideboard turned kitchen island has become to our daily kitchen life. I use it all the time. Don uses it all the time. If we had to rely on counter space, we’d be in trouble. If you look at the photo above, you’ll see the large black microwave that came with this house. I’m too cheap to get rid of a perfectly good microwave (though I look forward to the day I can get a smaller one) and it takes up a lot of counter space. The island gives that space back to me, and more.

Tip #3: You can have a pantry in a small kitchen. And it doesn’t have to be a walk-in pantry. I can’t take credit for ours. It was here when we moved in. But, oh my gosh, it holds so much! It’s about 3 ft wide, only 12 inches deep, but when you open it:

Not only are there the shelves you see here, the inside of each door has shelves as well. They aren’t deep but they hold a lot. (I’m trying to talk Brenda into building something like this in her kitchen.) I’m  showing you this because it doesn’t take up a lot of space. Perhaps you can find a bit of available wall space or a corner where you could build something like this.

Tip #4: Sometimes the strangest thing can be repurposed for storage. Not long after we moved in here, we went to a small local auction. Because we love old signs and graphics, we bid on this old chain display piece – simply because we liked the fonts and the colors. We had no idea what we were going to do with it. The next day, I had a moment of inspiration, cut some dowels and came up with this:

Our paper towel holder. It may not be for everyone, but we love it. It’s a great conversation piece that looks like a piece of folk art and it keeps plenty of paper towels on hand. I like the idea that this piece which used to live in a hardware store now lives and functions very nicely in our kitchen.

Tip #5: Pottery, baskets and boxes make for great storage in a small kitchen. I use my pottery to hold all sorts of things.

This pitcher holds my collection of bakelite-handled flatware.

This old wooden box holds bottles of distilled water for the dogs.

Back to this photo: there’s a piece of McCoy pottery on the window sill that I use to hold utensils, even paint brushes; there’s an old jar that holds dog biscuits, I store a large Fiesta serving piece on top of the microwave, that vintage red canister holds cookie cutters, and a large white crock holds utensils that we use constantly when cooking.

Use vases to hold utensils, wooden boxes to hold plates or placemats, baskets to hold spices or napkins – the possibilities are endless.

Storage problems can be solved. How I wish I had a photo of our kitchen in the rental we lived in before we moved to the cottage. It was teeny-tiny. Both my current kitchen and Brenda’s look huge compared to that space.  I had an old butcher block that I used for a kitchen island. It was about 2 feet by 2 feet. (We just sold it recently through Craigs List. I feel sort of sad.) I managed to fit in the kitchen cupboard. I hung pots and pans from a metal rack hung on the wall. Somehow we managed to make it work and make it work efficiently.

You can, too.

Thanks so much for stopping by. Be sure to visit Brenda for her tips.

Next week: Christmas decorating in a small house. We’re going to have a linky party, as well! So get ready to share your decorating ideas for a small space with us. The links will be at the bottom of my post. Next Tuesday, December 13th!

Filed Under: decorating, defending the small house 18 Comments

  • « Previous Page
  • 1
  • 2
  • 3
  • 4
  • Next Page »
  • Email
  • Instagram

Welcome!

Welcome!

I live in a little cottage in the country with my husband. It's a sweet place, sheltered by old trees and surrounded by gardens. The inside is full of the things we love. I love to write, I love my camera, I love creating, I love gardening. My decorating style is eclectic; full of vintage and a bit of whimsy.

I've worked in the theater for more years than I can count. I'm currently a voice, speech, dialect and text coach freelancing on Broadway, off Broadway, and in regional theater.

Thanks for stopping by.

Searching?

The Dogs

The Dogs

Scout & Riley. Riley left us in 2012. Scout left us in February 2016. Dearest babies. Dearest friends.

Winston - Our first dog. We miss you, sweetheart.

Lambs Like to Party

Lambs Like to Party

A Note

Thanks for visiting! Feel free to browse, read and enjoy. All content is my own; including photos and text. Please do not use anything on this site without permission.

Disclosure/Privacy Policy can be found in the Navigation Bar under ‘About MHC.’

Also, I love receiving comments! I do, however, reserve the right to delete any comment that is in poor taste, offensive or is verging on spam. It’s my blog. If you’re a bot or a troll you’ll be blocked. Thanks!

Archives

All Content © 2008 - 2025 Mockingbird Hill Cottage · Log in