Mockingbird Hill Cottage

Mockingbird Hill Cottage

  • About MHC
    • Disclosure
  • Dollhouses/Minis
    • Hummingbird Cottage
    • The Studio (Formerly TSP)
    • Dove Cottage
    • The Lake House
    • The Folk Art Dollhouse
    • The Modern Dollhouse
    • Dollhouse Source List, Information and Tutorials
  • On the Road
  • Collecting
    • Roseville Pottery
    • McCoy Pottery
    • Egg Cups
    • Bakelite
  • Press
  • Privacy Policy
You are here: Home / Archives for DIY

Defending the Small House #3

November 29, 2011 at 6:00 am by Claudia

{Living Big in 1200 Square Feet}

Week #3: Cozy Lighting in a Small House

Welcome to week number three of our ‘Defending the Small House” series. Brenda and I thought we would chat about cozy lighting this week.

(Apologies to those of you who thought I published this post last night! I hit publish accidentally – with no text other than our logo. Yikes.)

Let me say, right at the top, I do not like most overhead lighting in a room. I’m not talking about chandeliers, necessarily. I’m really speaking about those fixtures that sit in the ceiling in the middle of a room. We all have them. Each bedroom in the house I grew up in had a ceiling fixture and even at a young age, I begged for a lamp instead. The light from those fixtures is harsh and doesn’t create a cozy, warm space.

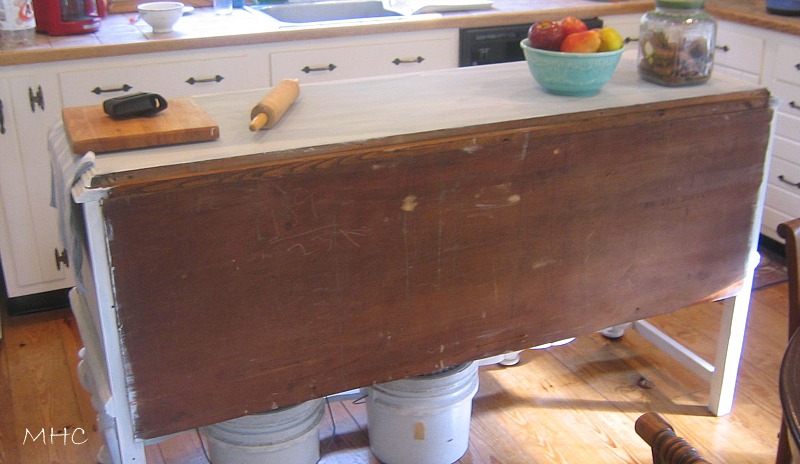
Tip#1: Avoid relying on overhead fixtures. Create a warm look and feel with lamps scattered around the room. The only overhead lights I use are the 6 pot lights in the kitchen ceiling. And in the evening, I warm up the light in the kitchen by using this lamp.

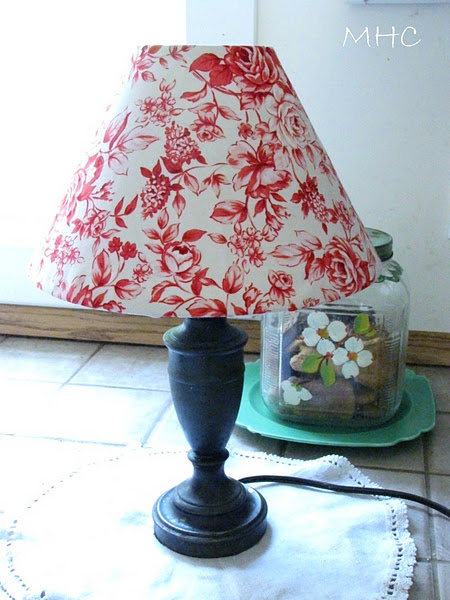
I find myself turning it on even when the overhead lights are on. It somehow softens the light and adds warmth to the room. After I’m done in the kitchen for the night, off go the pot lights and this little lamp stays on. (By the way, I covered the shade with fabric from my stash. It has so much more personality now.)

The other overhead lights in this house are in the hallway and upstairs bathroom. Still haven’t found something for the bathroom (I’m looking) but in the hallway, which is also my studio, I use this lamp in the evening.

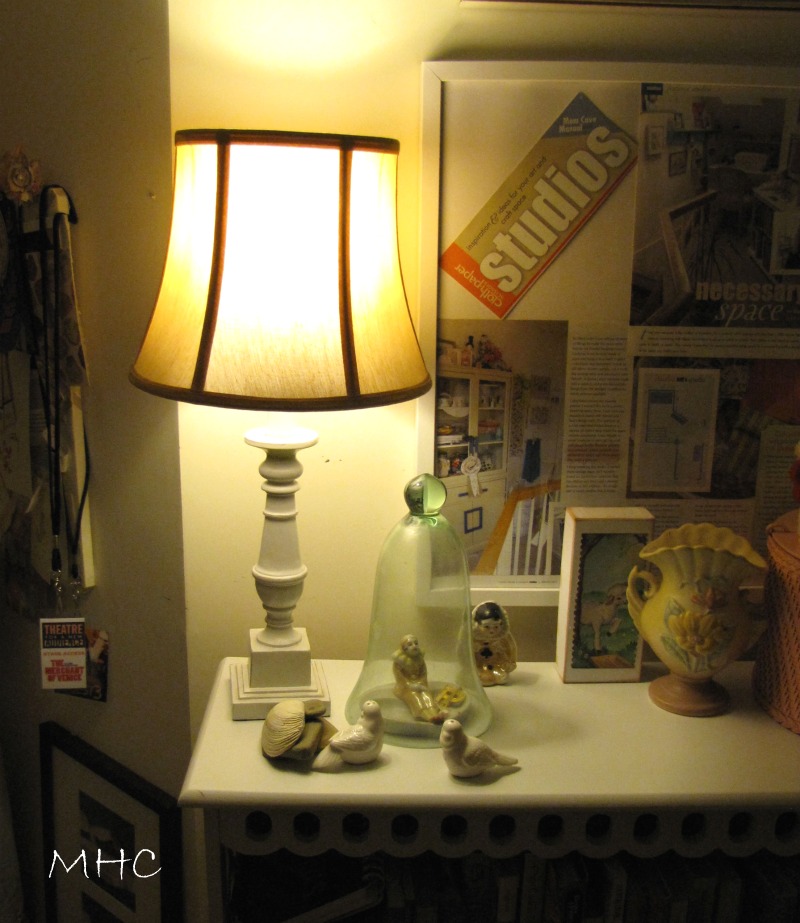
It sits on the bookcase and immediately adds warmth to the the hallway/studio. Be gone, overhead light!

I like the soft pools of light that lamps produce. Overhead lights,  even the ever popular chandeliers, just don’t do that.

Tip #2: Reading lamps should be plentiful. They should provide good, strong light for you and your family and guests. I’ve been a guest at a few homes where there weren’t enough lamps available for reading. Sometimes there’s a lamp available but the lightbulb isn’t a high enough wattage to provide good light. If you’re worried about the wattage being too strong, get one of those 3-way bulbs. Or put the lamp on a dimmer. I’d rather have too many lamps than too few.

I don’t know about you, but I need reading glasses now and I need good light!

In our home we have reading lamps by all the main seating pieces.

There’s a floor lamp that you can’t see by the loveseat. You’ll see it later. It lights the reading area for both the loveseat and the chair. There’s another floor lamp between the piano and the yellow chair. It works nicely for reading or playing the piano. As you look through the french doors into the den, the lamp that is lit is by my blogging chair. We also have lamps on either side of the sofa.

By the way, I bought this lamp (in the den) when I was in my early twenties at Hudson’s warehouse sale. Hudson’s used to be the major department store in the Detroit area. Unfortunately it has been swallowed up by Macy’s. Just wanted to mention that it has had many shades and has been with me for, ahem, many years and it still works like a charm.

Is this the time for me to say I detest CFLs? I know they are supposedly good for the environment, although the fact that they need special clean-up and disposal because they have mercury in them is worrisome. But until the light is softer and warmer I will be staying with incandescent bulbs – even if I have to order them from some far-off place.

Tip #3: Add small lamps that are wonderfully quirky and bring warmth to a corner or two. I call these personality lamps. I have a few of them. I love placing them in a corner where they add to the evening ambiance.

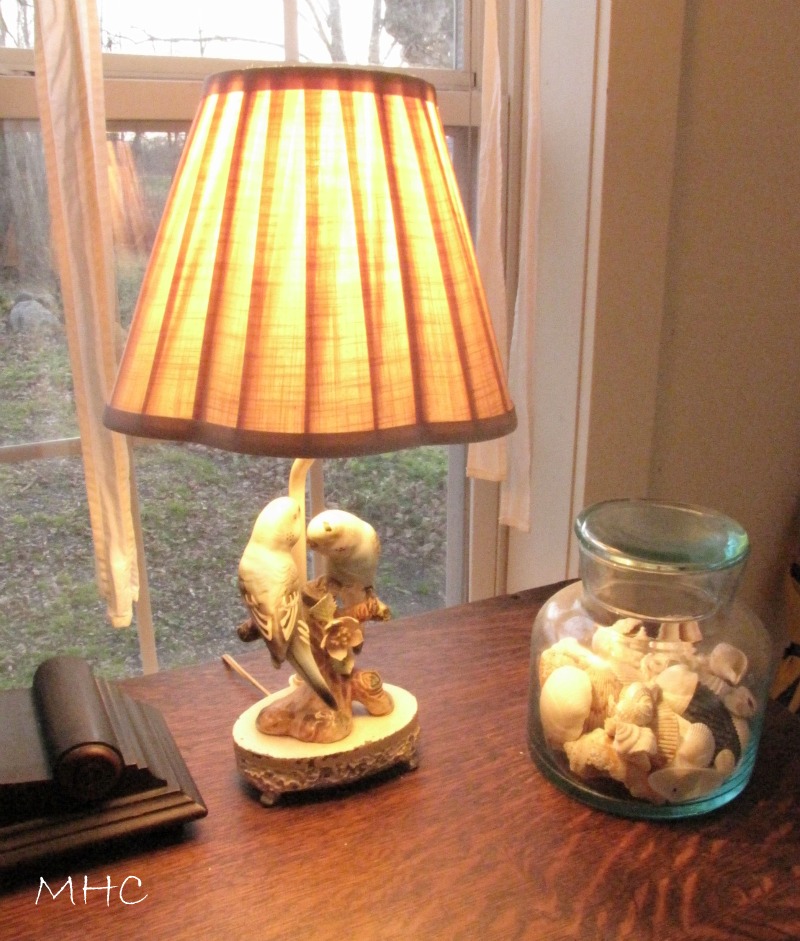
This is my parakeet lamp. It provides a soft, subtle glow.

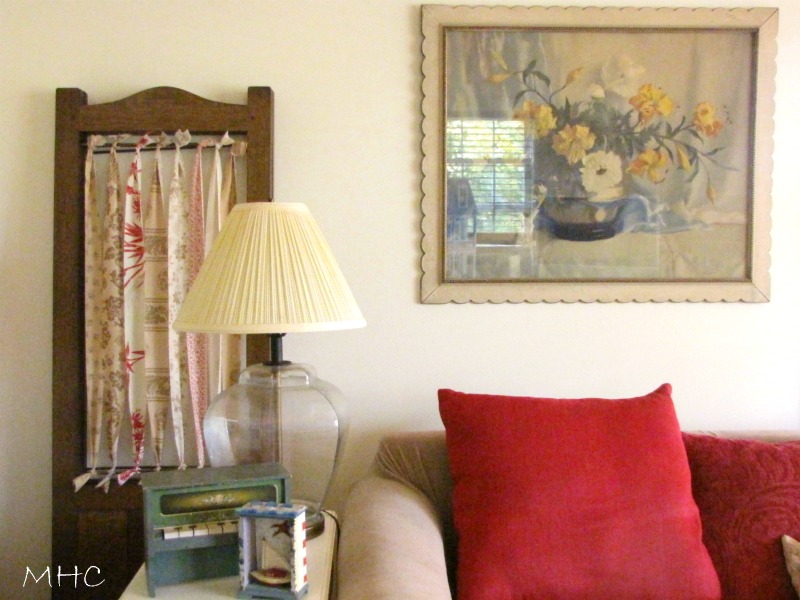
Don and I found this little lamp several years ago and fell in love with it. Eventually I found the perfect red shade. It sits on our spinet desk and softly lights the base of the staircase.

Tip#4: Take your standard issue lamps and add shades that make them stand out. We have a floor lamp that I bought many years ago from Pottery Barn. It’s had several shades over the years and frankly, I wasn’t happy with any of them. Two years ago, I was working in California and I found this shade at Christie Repasy’s shop. I fell in love with it.

Beautiful, vintage – it changes the whole room. (Don isn’t as crazy about it as I am, but it’s staying.)

Here’s what it looks like in the evening. (Still haven’t painted the base white. I will.)

Our other floor lamp was missing it’s original glass shade when we bought it. It came with a paper shade that just didn’t work. But the lamp itself had beautiful green glass in the stem and base. I carried the measurements with me for months until I found the right shade. The green (which is around the rim of the shade) perfectly matches the green glass on the base.

Tip#5: Grab that glue gun and decorate your lampshade! Take a run-of-the-mill lampshade and add buttons or flowers or fabric or burlap or vintage hankies and change it out completely. That’s what I did with the kitchen lamp. The shade was old and stained and one day I grabbed some fabric from my stash and covered it. It made a huge difference.

Add some buttons or lace around the rim. What about some fringe? A bit of whimsey can completely change the look of a standard shade.

What’s on my wish list? Sconces for the sides of the cupboards on either side of the kitchen sink. A small light in the upstairs half bath. It would have to take up very little space and be hung on the wall because of the size restrictions in that room. That’s it. We can’t have a chandelier because this is an old house with low ceilings and my husband is 6’4″ – that would be disaster. Though I love the look of them, they really aren’t a good fit for this little cottage.

I just have to add: I’ve been watching a lot of House Hunters in the evenings. Don’s been working late. Am I the only one who’s sick of seeing young buyers look at a large walk-in closet and say it’s too small? Or complain, yet again, that the appliances aren’t stainless? They really haven’t a clue, have they?

I hope you’ve enjoyed this week’s edition of Defending the Small House. We love to hear your comments, ideas and suggestions. Make sure you visit Brenda and see her ideas on cozy lighting. See you next week!

Filed Under: decorating, defending the small house, DIY 32 Comments

Defending the Small House #2

November 22, 2011 at 7:00 am by Claudia

{Living Big in 1200 Square Feet}

Week 2: Furniture Placement in a Small Living Room

Welcome back to week number 2 of our series. Brenda and I had so much fun with our first post and now we’re back with the second. Thank you for all of the wonderful comments and suggestions. Before I forget, I’d love for you all to visit Betty Jo at Living Real. She wrote an excellent post last week on living small.

Today we’re tackling the living room in a small house. Let me share my living room with you and I’ll talk about the challenges I faced when decorating the space.

{Highly professional drawing by me.}
Our living room and kitchen are essentially one big room, but they are not entirely open to each other. You can see that there are partial walls between the two spaces. The one on the left is probably about 3 feet wide and the one on the right is about 2 feet wide. But the rest of that ‘wall’ is open. 
The living room wall on the left is 15 1/2′ long. There are two windows and a chimney that break up the wall. The living room wall on the right is 8 3/4′ long.
Okay, now you’re saying, “Wait a minute Claudia, a living room that’s 13 1/2′ by 15 1/2′ is big!”
Here’s the problem. The area from the chimney to the front door is essentially part of the entrance. And the wall on the right is only 8 3/4′ long. The area beyond that is part of a passageway from the front door to the den to the bathroom to the stairs. 
Long story short: The actual seating area is 13 1/2′ x 8 3/4′ – and there are only 2 useable walls in that space.
This is the area from the chimney to the front door. The photo below is of the passageway I was referring to earlier. I wanted to clearly define the passageway, so I did not put any seating there. No one wants someone walking between them and the person they’re talking to in the middle of a conversation. This needs to be a space where you can take off your coat, take off your boots, go upstairs, or walk to the bathroom or den.

You can see why this particular part of the room has to remain relatively clear of furniture. The large,white cabinet is on the left, and a small spinet desk is tucked into an area by the stairs. That’s a closet on the right and beyond that is the doorway to the bathroom. The rug in the foreground is really Riley’s rug. He has a progressive disease that causes him great pain and he needs to sprawl out on a warm rug. Tip#1: Use what you are given to help define the living space. I’ve used the chimney as a dividing point – it’s directly across from the end of the 8 3/4′ wall, so I’ve used the line between the two points as a invisible fourth wall. It defines the seating space.

Okay, so what do we do? The biggest item in the room is the piano. There is really only one wall to place it against – the 8 3/4′ long wall on the right as we face the living room from the kitchen. There is no baseboard heating there and no windows. You don’t want a piano near any extremes in temperature. So the wall it is.

The piano has been in various positions on this wall. This latest, with it flush against the partition seems to work the best, as it allows some extra room for a chair. The chair and the piano share a floor lamp, as well. So I’ve killed two birds with one stone. Tip #2: Decide where your biggest pieces will go, then fill in the rest.

I now have only one other wall to use. The loveseat has to go there, which means the chair must be placed in the open entrance to the kitchen or on the far side of the loveseat, near the front door. Actually, we’ve done it both ways. Usually, we have our wicker rocker in this space, as well – but we’ve moved it upstairs to the bedroom. (It needs some repair.)

So, the red chair will be positioned in the opening to the kitchen. I like this because it helps to further define the living room, making it clear that it’s an entirely different space than the kitchen.

There’s the red chair. It picks up the red in the kitchen and defines the living room space. The loveseat tucks into the space created by the chimney and the partition wall. I don’t have a lot of room for side tables, so you can see I’ve used a vintage stool and a small green cottagey table.

Truth be told, I much prefer the wicker rocker in the room. Normally it would be in that area between Riley (sleeping on the floor) and the green table. Don likes the space created by its absence. I like cozy.  I wonder who will win?

What about the coffee table? While it may seem large, it actually works beautifully. We love this piece which we’ve had since our San Diego days. It was refinished by a dear friend of ours and we bought it from him for $75. It’s gorgeous. When we lived in our rental we had to put it in storage. When the time came to move to the cottage and get everything out of storage, we had our doubts about whether it would work in the space. But it does. It’s large, yes, but it helps to create the cozy, intimate atmosphere I’m after. It connects the two chairs and the loveseat. Chairs can be pulled up to it, chips and dip and munchies can be laid out on it, feet can be put up on it. It’s fabulous.

Recently, we tried rearranging the space. We moved the sofa so that it was perpendicular to the wall. We replaced the large coffee table with the white coffee table (much smaller) from the den.

It didn’t work. The minute we moved the round coffee table out, the room lost it’s cottage coziness. We learned very quickly that small-sized-everything just looks puny. And it makes the room seem much smaller. Tip #3: Don’t limit yourself to small pieces of furniture. Have one or two large pieces in your small space.

Tip #4: Find balance. Yes, we’ve used big pieces as suggested in Tip #3 – we’ve got a piano and a big old coffee table in here. But those big pieces are balanced with some smaller ones, as well. And it all works together to make a cozy space.

And though I talk of the entrance area as separate, the pieces of furniture that are in that end of the room are part of the greater living area. The sideboard and the white cabinet are large pieces and nicely balance the weight of the furniture in the rest of the room. And the placement of the loveseat and chair is balanced by the chair and piano on the other side of the room. The coffee table ties it all together.

Tip #5: Go with your favorite colors and patterns and don’t think you have to go with neutrals or whites to make the space work or seem bigger. I love color, as you can see. There are some dark wood pieces in the space, but they are balanced by lighter, painted pieces. One chair is a yellow and red check. The other is a red and white check. The loveseat has a pale green and white slipcover. The rugs are floral. There’s lots of green and blue pottery around. The bench by the white cabinet is blue. But it all works. If you want neutrals or whites, go for it. I don’t think, however, that it makes that much difference in the perception of the space. If everything in this space was neutral and/or white, you’d still perceive it as a small, cozy space. And you don’t need to back away from pattern, unless that is your preference. As you can see, I love pattern. It might not be everyone’s cup of tea, but it works in this space.

You have to take what you’re given and make it work. Embrace that small living room and honor it’s size. I think that to deny that this cottage is small is just plain silly. It is small. Why not celebrate it?  Of course I’m biased, but I think we’ve created a charming, cozy living room. We’ve accepted the quirkiness of our space and made it work for us.

Thanks so much for stopping by. Please visit Brenda and see what she has done with her living room.

We look forward to your comments and ideas!  Some of you suggested a linky party and we probably will have one or two along the way. We’ll give you plenty of warning.

Filed Under: decorating, defending the small house, DIY 25 Comments

Turning a Buffet/Sideboard into a Kitchen Island

November 12, 2011 at 6:00 am by Claudia

Since I’ve had my kitchen island for over 3 years, I tend to take it for granted. Then it will appear in a post, like it did this past week, and it will get lots of comments. I think it’s time to talk about it again and share some more details on just how the transformation came about.

I wanted an island and I had this idea. I was on the lookout for a vintage buffet or sideboard. I wanted one rather like the one in the photo below – long, with drawers and cupboards. I’ve had to use this photo from Pinterest because for some reason, I didn’t take a photo of the sideboard in its original state.

        source
Mine was much like this, but not nearly as pretty. It had a very dark finish. What this one has in common with mine is all the wonderful detail and carving that really pops when it’s painted, as well as the decorative carved piece at the rear of the top surface. I found it on my local auction’s website, measured to make sure it would fit, then bid and got it for $60. It is a very heavy piece. When Don and I first brought it in the house, he thought it was going to be too big. But I knew he only thought that because it was so dark and appeared bigger than it really was.
I took off the old, dark hardware, cleaned it and immediately slapped on a coat of primer because I wanted to show Don that it would work in the space.
Once the primer was on, he relaxed. Mission accomplished. You just have to be able to visualize what a piece can become. A couple of coats of primer later and I was able to start painting the top coat. Meanwhile, here was the back:

Not a problem if the piece was being used for its original intention – then it would have been placed against a wall. What to do? I immediately thought of beadboard. I love beadboard. I went on a little trip to Lowe’s, had two pieces cut to fit the back, and bought some trim. I nailed it on with finishing nails and then cut the trim to fit.

You recall there was a piece of decorative trim at the back of this piece. I didn’t want it there, so I took it off. That piece of trim (which was awfully pretty) became this:

Reuse. Recycle. One old, dark piece of furniture became two pieces – a beautiful island and a chalkboard.

I replaced the old hardware with glass knobs. See how painting it this creamy color really makes the details pop?

Here it is today. The paint gets chipped from all the banging around the kitchen we do. So every year or so, I give it another coat of paint. Then I don’t let Don touch it for a while. Eventually, I give up being the “island monitor” and Don can relax once again.

It also separates the eating area from the rest of the kitchen. I painted the kitchen table the same color. (I’m not sure why the floor appears to be slanting down and to the right in this photo, but I assure you it isn’t.)

And there’s all sorts of fun decorating possibilities with the beadboard backing. Like this banner. Or you could hang a chalkboard on the back. Or a yard-long rose painting. Or a sign.

I’ve seen this type of sideboard everywhere. Often, you’ll find them at Goodwill or the Salvation Army. I found mine at an auction. Because they look dark and heavy to the average shopper, they are passed by. So, you benefit! You can get one for very little money.

It’s one of my favorite transformations. And it’s pretty darned easy.

Filed Under: DIY, kitchen island 48 Comments

  • « Previous Page
  • 1
  • …
  • 19
  • 20
  • 21
  • 22
  • 23
  • …
  • 33
  • Next Page »
  • Email
  • Instagram

Welcome!

Welcome!

I live in a little cottage in the country with my husband. It's a sweet place, sheltered by old trees and surrounded by gardens. The inside is full of the things we love. I love to write, I love my camera, I love creating, I love gardening. My decorating style is eclectic; full of vintage and a bit of whimsy.

I've worked in the theater for more years than I can count. I'm currently a voice, speech, dialect and text coach freelancing on Broadway, off Broadway, and in regional theater.

Thanks for stopping by.

Searching?

The Dogs

The Dogs

Scout & Riley. Riley left us in 2012. Scout left us in February 2016. Dearest babies. Dearest friends.

Winston - Our first dog. We miss you, sweetheart.

Lambs Like to Party

Lambs Like to Party

A Note

Thanks for visiting! Feel free to browse, read and enjoy. All content is my own; including photos and text. Please do not use anything on this site without permission.

Disclosure/Privacy Policy can be found in the Navigation Bar under ‘About MHC.’

Also, I love receiving comments! I do, however, reserve the right to delete any comment that is in poor taste, offensive or is verging on spam. It’s my blog. If you’re a bot or a troll you’ll be blocked. Thanks!

Archives

All Content © 2008 - 2025 Mockingbird Hill Cottage · Log in

This website uses cookies to improve your experience. We'll assume you're ok with this, but you can opt-out if you wish.Accept Reject
Privacy & Cookies Policy

Privacy Overview

This website uses cookies to improve your experience while you navigate through the website. Out of these, the cookies that are categorized as necessary are stored on your browser as they are essential for the working of basic functionalities of the website. We also use third-party cookies that help us analyze and understand how you use this website. These cookies will be stored in your browser only with your consent. You also have the option to opt-out of these cookies. But opting out of some of these cookies may affect your browsing experience.
Necessary
Always Enabled
Necessary cookies are absolutely essential for the website to function properly. This category only includes cookies that ensures basic functionalities and security features of the website. These cookies do not store any personal information.
Non-necessary
Any cookies that may not be particularly necessary for the website to function and is used specifically to collect user personal data via analytics, ads, other embedded contents are termed as non-necessary cookies. It is mandatory to procure user consent prior to running these cookies on your website.
SAVE & ACCEPT