Hi there, everyone! I am not a carpenter. Let’s just get that out in the open. I do lot of small jobs around the house and I have made a plate rack and the chalkboard. I’d like to do more in the future, including building a wall of bookshelves in the den. But I digress. Here, as best I can, is what I did to build the chalkboard.
I started with this:

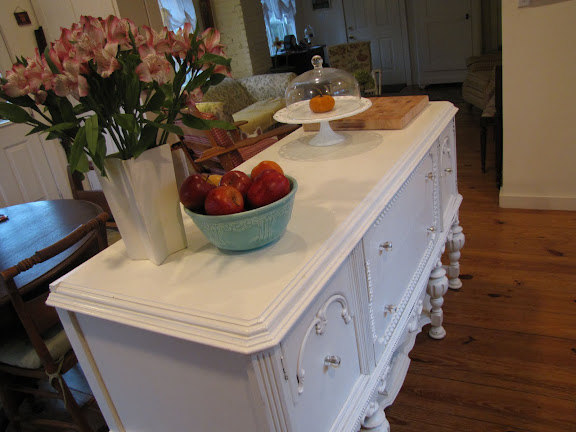
which was originally a piece on the rear of my sideboard-turned-kitchen-island:
 It consisted of three pieces that were screwed into the back of the sideboard and attached to each other with metal connections that were about the size of a razor blade. I had to have my husband help pull them apart. After much head scratching, I finally figured out how to remove the metal pieces. I then filled the screw holes with wood putty.
 I positioned the three pieces the way I wanted them and used wood glue to hold them together. Originally I thought I would nail them together, but I ended up getting some mending plates which I used to screw them together in the back. Those, along with the wood glue, did the trick.
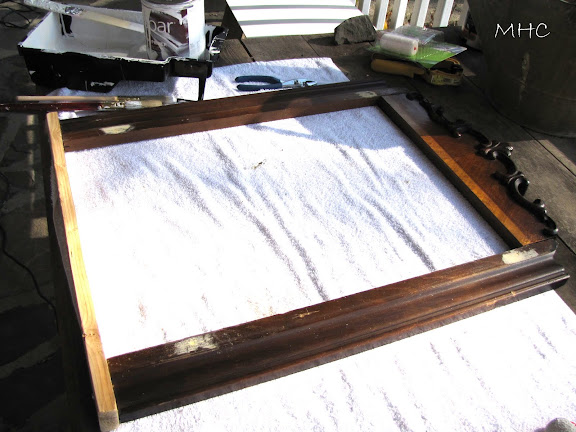 This is the point where I mention one of my errors. I had planned to use some neat molding on the bottom to form the fourth edge of the chalkboard. I trotted off to Lowe’s and came home with a big long piece of what I thought was the perfect choice. As I was measuring and cutting a piece to use, I realized that there was no flat surface on the top side of the molding. It had a lot of neat curves (that I had planned to use to hold an eraser and chalk), but there was no flat edge wide enough to screw to the frame. After several curse words, I scrambled around looking for piece of scrap wood. I found one in the shed, measured and cut again, and that is what you see in this photo. I attached it to the rest of the frame with wood glue and screws.
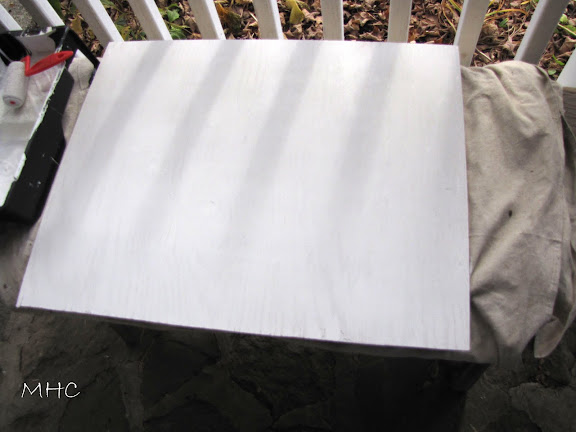 In the meantime, I measured and cut (with a hand saw) a piece of plywood for the chalkboard. I sanded and painted it with 2 coats of primer. Okay, time for another error: As I looked at the sanded plywood, the slight ridges in the wood began to worry me. I ran to my laptop, googled ‘chalkboards’ and ‘wood.’ In one of the posts, a warning against using anything but the smoothest wood was given. Apparently, if the surface is uneven it is harder to erase the board. Uh oh. Fast forward to the next morning. I went to the shed, got some of the beadboard paneling left over from the sideboard redo and cut a piece to fit the frame. The back side of the beadboard is very smooth. Again, I painted and primed.
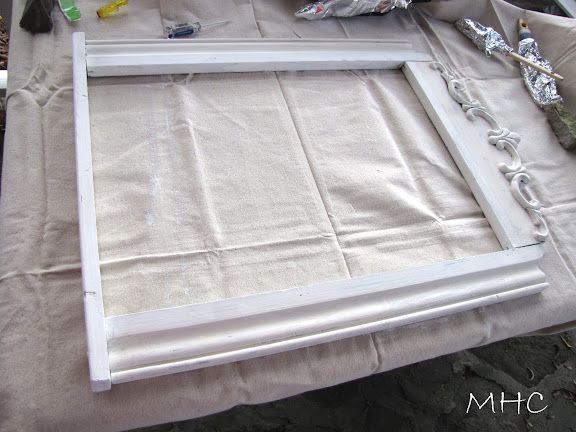 I also primed the frame. Two coats.
 Time for the chalkboard paint. I used Valspar, but there are many different manufacturers out there. I used a foam roller, but you can also use a spray.
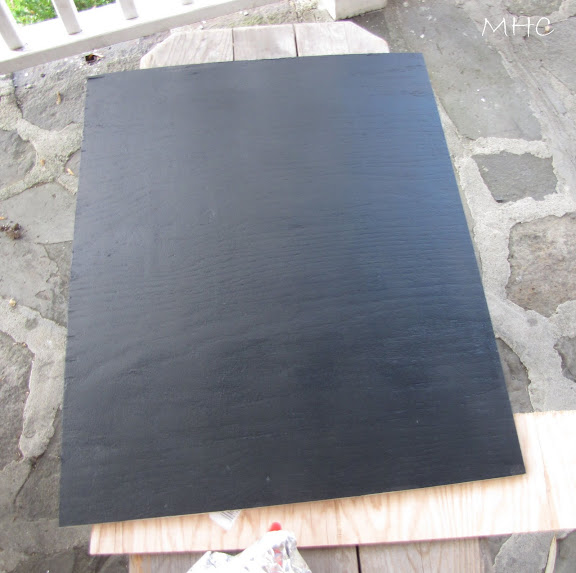 Here it is on the plywood. I did it all over again for the smooth version. I used 2 coats of chalkboard paint and it was more than enough. You are supposed to wait quite a while between coats, but I just waited 2 hours (because at this point I was on my second piece of wood.)
 Time for the paint. I used this paint on the mantel shelf in my sewing area. It is one of those 8 oz. Valspar sample cans. The color is Mermaid’s Song in Satin. This time I mixed in a little ivory paint to mute it a bit. However, when I looked at it under the kitchen lights (which are built-in ceiling lights) the color seemed too intense. What to do? Antique it. I didn’t want to run to the store again (at this point, I was in my flannel pajamas) so I looked through my acrylic paints and found this:
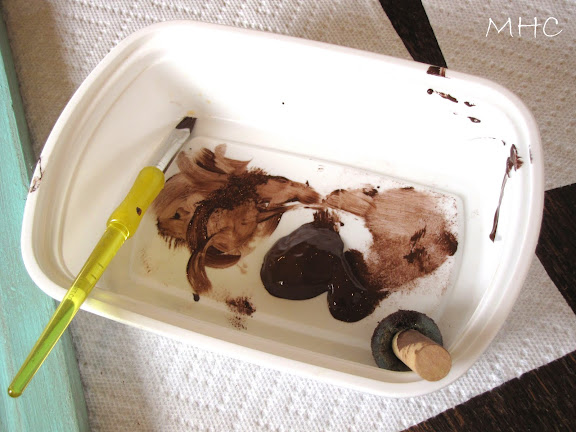
Using a foam brush, I painted the stain on in small sections, immediately wiping it off with a rag. You have to play around with it, but it works beautifully. I took the paint brush and filled in all the crevices in the carved design, still wiping much of it off. If you fill in these crevices, the carving stands out beautifully. I decided the whole thing is like putting on stage makeup. Many is the time I had to highlight and shadow my face to create wrinkles where there were none. Same idea.
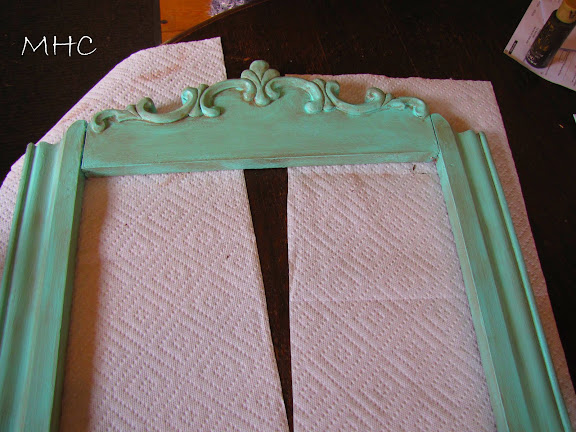
 Once it was dry, I screwed the chalkboard into the back of the frame, added a hanger and I was done! A word about the chalkboard paint: you should let it dry for 48 hours before you put the whole thing together. And you need to cure the chalkboard before you write on it. Take the side of a piece of chalk and rub it all over the chalkboard, then erase it. You’ve cured it and now you can write wonderful little messages on your chalkboard!
Like this:
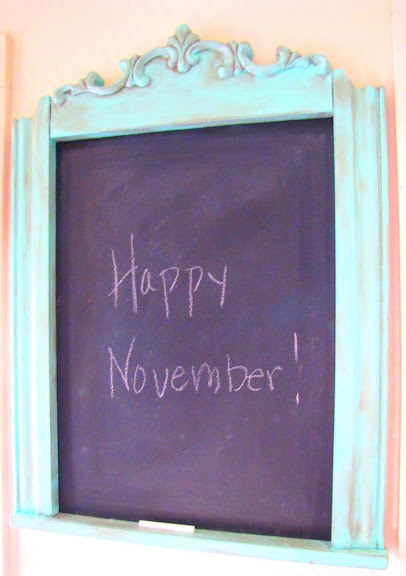
I am off to Charlotte, NC for a few days to work on the National Tour of South Pacific. But I have a post or two up my sleeve in the meantime. Have a great Monday!
Edited to add: I am linking up to this party at Cottage Instincts.



FABULOUS! I love it, Claudia!
Oh Claudia!
Sweetie How Devine. I absolutely love it, and am so thrilled that you shared with us too. How lovely of you that is.
I love the seafoam green color. (Aqua) It is just perfect. Happy November right back at you sweetie. Have a great Monday.
Country hugs, Sherry
Good Morning, Claudia!
Just checking in with you. After reading this post again and seeing your great results, I’ve decided that I might try and do this. It looks like a fun project. I love yours. It was the perfect thing to do with that neat decorative piece of wood. I just need to find something cool to use.
XO,
Sheila
P.S. Sally and I will definitely rasie a toast to good blogging friends like YOU! :-)
Fantastic tutorial, Claudia!! Your chalkboard turned out beautiful!
Have a great time in NC!
Hugs,
Marsha
Claudia —
The chalkboard may be “cured”, but I think we are hooked on this project, hee hee!
I think I have the perfect pieces … see what I mean about not being cured!
Hugs and thanks for sharing …
Betty :)
ps can I use a pic and link back to this tutorial on an upcoming post?
Oh my goodness Claudia….I Love it!
It is wonderful!
I just made a chalkboard out of a huge old frame I will be posting that soon!
Hugz,
Dolly
hi claudia,
this is such an awesome post filled with my kind of real-life DIY adventures: the excitement, the mishaps, the cursing, the PJs, and the awesome result!
the paint color with the brown wash is PERFECT!!!
the glimpses of your home are amazing! so evident that it is the home of brilliant little artisans. :)
have fun in the “south pacific”!
xo
Akkk!! Charlotte is just 2.5 hours away from Raleigh…any chance of a detour??
ps South Pacific is one of my favorite musicals of all time right after Cats and Guys and Dolls!
EXCELLENT! Isn’t creating things so rewarding??
That is a perfect use for the piece of moulding!
Congratulations! Now, on to the lampshades! ;)
~Ruth
Now I’m going to have to add that project to my list of “things to do before I die”, sugar!!! Why did you do that to me???? Just darling. I even love the color and may do one in that same color. Sheeeesh….will my projects never end, chick?!?!?!?!?!
xoxo,
Connie
WONDERFUL post Claudia!!!! I love this, thank you so much for sharing this with us, you are so sweet! It looks amazing! I just adore the color and I love your tutorial!
Hugs,
Amy
Hi Wonderful Claudia!
This is charming–love the green glaze! And the frame and ALL! It is SOOOOOOOOO You!
love, kelee
Claudia,
This is awesome!!
Great job,and love the color.
Thanks for coming by for visit.
blessings
barbara jean
THAT is SO very COOL!!!!…Great job and Excellent directions!!..LOVE it!!!…HUGS, Lizzie
Claudia,
The chalkboard is wonderful. I have antique frames up north that I will make in to chalk boards next summer! You did an awesome job!
Hi Claudia,
Have a safe trip! And thanks for the chalkboard tutorial. Your chalkboard turned out awesome….However I did cringed a bit when you talked about the metal, blade-like thingies that attached the three pieces. I discover some of those on a frame while trying to pull it apart and ended slashing my hand…ouchy. 13 stiches it took to put my back together. :-) Anyway, thank you again for the tutorial. Have a wonderful time in Charlotte. Until next time.
Smiles and hugs,
♥Ana
GREAT BLOG, STOP BY & SAY HI :) GIO
Wow it is beautiful. Great job.
looks beautiful! I did a chalkboard too and I have enjoyed it so much. your’s is a little more impressive than mine though. I didn’t build my own frame so props to you!
Claudia,
Thanks for stopping by my blog. Your chalkboard is fab! I see you used plywood too but actually took the time to sand it, etc. I was in too big of a hurry. I’m impatient like that. So far, it’s working ok. I just have to use a wet rag to erase. Live and learn. Love your blog! Have a great week.
Great job!! Thanks for sharing.
Hugs
Charo
Claudia, that’s a great idea and you did it quite well. We all learn by doing. You go girl! Have fun in NC!
Hugs and glitter, Patti
Claudia,
Oh, how pretty…love the color you used…thanks for showing us how you did it. Hope you have a FUN week!
Blessings,
Linda
So pretty and I like that you did it in a fun color! Great job.
pk @ ROOM REMIX
What a wonderful idea !!! I love the color of the finished piece. Thanks for stopping by my blog for Cottage Monday – have a great week.
Great work and thank you for all the good info. Have you seen the magnet black paint yet? After about 3 coats you will be able to attach a magnet and I cheat….I use it as chalk paint too, double use. Have a great week, we miss you in Cali. Ciao Rita
goodness thats gorgeous!!! thank you so much for coming by and wishing me a happy birthday, i really appreciate it!
That is just plain fantastic! I especially LOVE your coloring and staining effect! Perfect! Suzie
Impressive and fantastic! Safe journey!
Claudia – this was brilliant! Thanks for sharing the steps in detail. I will be keeping my eyes open for some old molding! :)
Zuzu
Hey Claudia,
Thanks for your visit and sweet comments yesterday> Very much appreciated>
I’m following you, please stop by and follow me too.
Dena
I love it!!! Your colour choice is amazing! What talent you have…you always inspire me. Thank you for all your well wishes!
looks fab!!Miss Claudia:)
Wonderful:)
Happy Fall~~~
Smiles,
kayellen
It looks great in this photo too! I really ove your sideboard-turned-kitchen-island…I’m drooling over that!!!! Gorgeous!
Claudia I love, love love your chalkboard and thanks a million for the tutorial. Have a safe trip. :) Nancy
Claudia, you are so clever! I just happen to buy a can of chalkboard paint recently, but haven’t tried it yet. I’m glad you mentioned using a roller. I wasn’t sure what application to use, but yours looks so nice. Thank you for taking the time to share the tutorial with us.
I still love the sideboard as an island. It’s such a wonderful and affordable solution, and much more interesting than other solutions would have been.
Fantastic job, Claudia! Have a blast in Charlotte!!!… Donna
Beautiful. Thanks for the tutorial and sharing such a wonderful project. You did a suuper good job! I love it.
Unbelievable!!!! Saving this to show to Mr. Wonderful adding it to his Honey Do List….
Claudia, this is just perfection. Love aqua anything, and love that you upcycled the pieces. Do you think the paint-on chalkboard paint is easier than the spray on kind? I’ve only used the spray, but I’m not happy with the inconsistency of the finish.
Thanks for linking up!
peace.
Very nice! Love the green color you picked out!
I love it!!!
Love this idea and that buffet as a center island is a great idea!