Mockingbird Hill Cottage

Mockingbird Hill Cottage

  • About MHC
    • Disclosure
  • Dollhouses/Minis
    • Hummingbird Cottage
    • The Studio (Formerly TSP)
    • Dove Cottage
    • The Lake House
    • The Folk Art Dollhouse
    • The Modern Dollhouse
    • Dollhouse Source List, Information and Tutorials
  • On the Road
  • Collecting
    • Roseville Pottery
    • McCoy Pottery
    • Egg Cups
    • Bakelite
  • Press
  • Privacy Policy
You are here: Home / blogging tips / Blogging Tips: Making a Banner in Picnik

Blogging Tips: Making a Banner in Picnik

February 25, 2012 at 12:46 pm by Claudia

Picnik is no more, but making banners in PicMonkey works much the same way. Ribbet is virtually the same as Picnik.

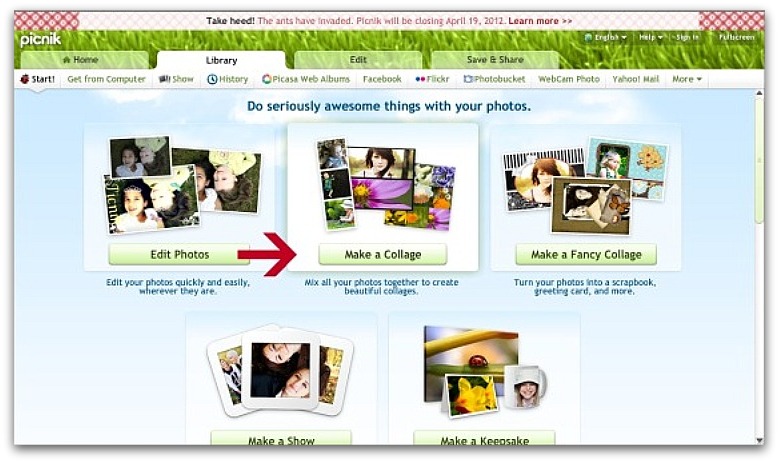
I had a request from Jennifer for a tutorial on making a banner using Picnik. Since Google has decided to close our beloved Picnik in April, many bloggers are creating banners using the collage tool and stockpiling them for the future. Good idea!

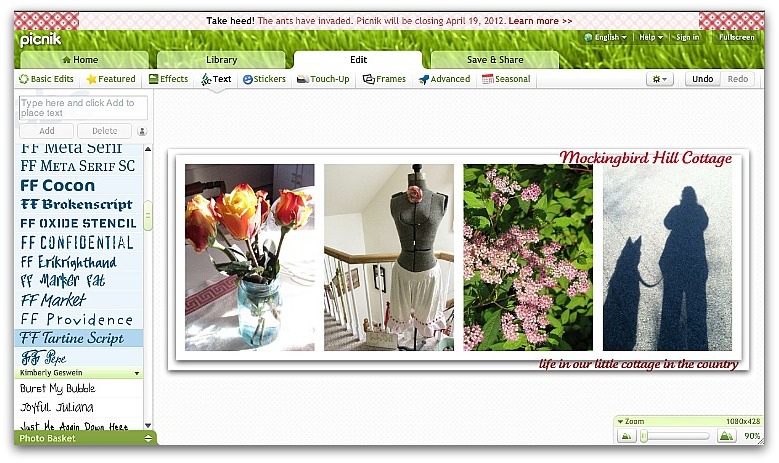
I will base this tutorial on the way in which I’ve created mine. If you, dear readers, have additional tips, please share them with us in the comments section. Sorry for the somewhat blurry photos – they are screenshots and this is as sharp as I could make them.

The first thing to do is to go to Picnik, upload and edit the photos you want to use in your banner. In my case, I chose 4 photos that were vertical, rather than horizontal (or landscape) size, because that’s the shape I wanted in my collage. You can use whatever size you want. Crop your photos and do whatever color editing you want at this point because once you upload them into the collage, you won’t be able to edit them individually any more. I edit the photos, save them on my desktop and leave the last edited photo on Picnik as I go to Library.
Click on the Library tab and then click on Start (on the left.) You’ll see these options. Click on Make a Collage.

This screen will appear. On the left you will see various shapes and configurations for your collage/banner. Choose your option. I chose the series of 4 photos at the bottom of the second column.
And this is what came up on the screen. In the lower left hand corner of the screen is the Picnik Basket. You can see that the last photo I edited before moving on to Collage is there. Drag it to one of the 4 openings. When you do this, you can use your mouse to zero in on the area of the photo you want in the frame.

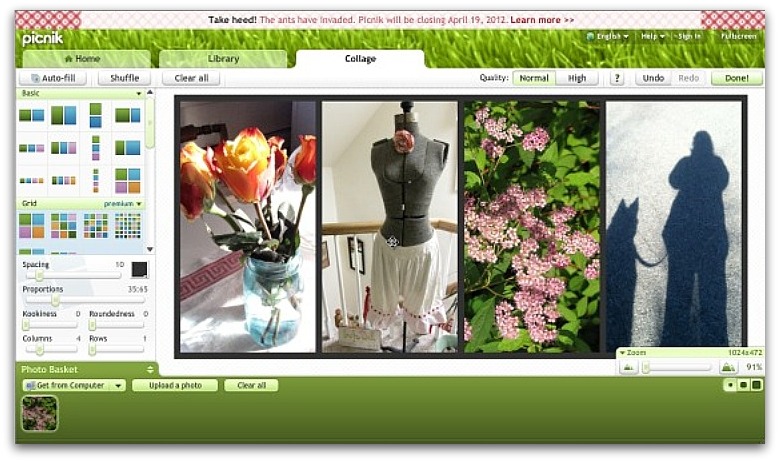
Then upload your next photo by clicking on Upload a Photo.

At this point, I’ve added 2 photos to my collage. I did this in a hurry, so I didn’t do as much playing around with each photo in its frame as I would do normally.

Okay. All four photos have been added. Now I want to play with the color of the border. I don’t want a black border, so I’m going to go over to the left and play around in this area:
By clicking on the color box, another box will appear with all sorts of color options. I chose white. By playing with the slide on Spacing and Proportions, I can control just how wide the border is and the eventual size of the banner. I want something rectangular that won’t take up too much space at the top of my blog. I don’t want my banner as tall as the photos are in the above screenshot, so I will play with all of this until I come up with:

When you’ve come up with something that you like, go to the upper right hand corner and click Done. You will be taken back to the Edit. At this point you can click save and leave Picnik, or do as I did and add a frame to your collage.

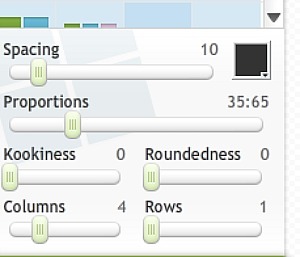
Explore all the options. I used the Drop Shadowframe. If you click on Drop Shadow, you can control the color and depth of the shadow in the box that comes up at the left.

There’s my first Drop Shadow. I, however, like two Drop Shadow frames, so I’m going to click Drop Shadow one more time.

Now I have two. I like to have some white space to use when adding text. If you want to add text, my advice is to save the collage as is to your computer first. That way you have the original in case you want to go back and change the text at some point. So, save the collage to your desktop. It will most likely save it as PicnikCollage.jpeg. Note the dimensions below. If these are too big for your banner space, go back into Edit mode and resize your banner.

Then go back into Picnik, upload your collage and add text.

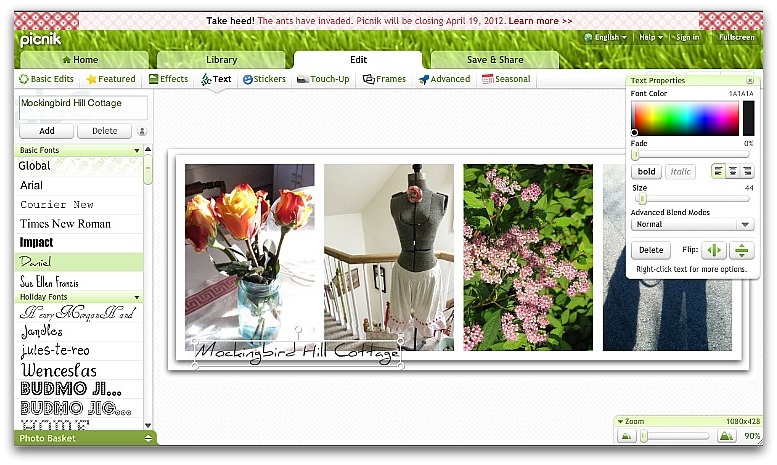
I’m playing with the font. (What else is new? I’m font-crazy.)

And here’s what I came up with. Now I’ll save it again. This time I’ll save it as PicnikCollage1.jpeg. Adding another character will save it as a new collage. Therefore, your original collage will remain intact on your desktop.

Some of you might want to add your text via another photo editor – Photoshop, Photoscape or something else. If that’s the case, you can ignore this last step and upload your collage/banner to the other editor and add your text there.

I went to Pixlr and added text – they have a lot more font options available:

I hope this is useful for you. Now is the time, if there ever was one, to make a lot of banners for the future.

I still can’t believe Picnik is closing. I’m in mourning.

Filed Under: blogging tips 21 Comments

Comments

  1. Plushpussycat says

    February 25, 2012 at 1:36 pm

    Hi Claudia! Wow! This is an awesome tutorial that I can follow! Thank you so much!!! I created a new banner a couple of weeks ago, but the colors didn’t come out as sharp as I would have liked, and the images are a little blurry–all because I just did a make-shift, fly-by-the-seat-of-my-pants version. Now that I know about the real tools within Picnik for making banners, I’m sure it will come out much better. Thank you again–it really means a lot! :-) BTW, I’m mourning over the loss of Picnik too! :-( Jennifer

    Reply
  2. NanaDiana says

    February 25, 2012 at 1:39 pm

    I have never had any idea how to do this. This is something I am going to try…say a prayer that I don’t screw everything up permanently!;>) Thank you so much! xo Diana

    Reply
  3. Nola says

    February 25, 2012 at 1:49 pm

    I’ve never made a collage, but I love the look of them. If I ever DO begin another blog (a possibility after we get moved), I’ll definitely want one. Do you know of anywhere else that I can make one (for free I hope)?
    Have a great weekend. Not to rub it in (well maybe a little bit) it’s warm and sunny here today!

    Reply
  4. Connie says

    February 25, 2012 at 2:00 pm

    You did that very well—the instructions AND your banner. It looks “balanced”, sugar, and that’s important! It also suits you to a T.
    xoxo,
    Connie

    Reply
  5. BEACH BUNGALOW says

    February 25, 2012 at 2:02 pm

    I can’t believe it either!

    So stupid.

    S
    xo

    Reply
  6. Beth Leintz says

    February 25, 2012 at 2:35 pm

    Wow- I thought I knew Picnik pretty well, but I didn’t know you could do THAT.

    Making banners and stockpiling them is a good idea.

    I did a little digging and found that SOME of the features of Picnik will still be available through Google Albums “creative kit”- so all is not lost- but I WANT MY ORIGINAL PICNIK.

    Reply
  7. Julie says

    February 25, 2012 at 2:48 pm

    Oh Claudia – thank you, thank you, thank you, thank you!

    I’ve been wanting to do this and wasn’t sure where to start. You are a total star!

    Reply
  8. Jillian's Bella Rosa Antiques says

    February 25, 2012 at 3:09 pm

    Hi Claudia, thanks so much for this post…I would love to make a few banners before they close it. I am usually too busy to spend time working on graphics for my blog but this may motivate me now.

    Love it!

    Reply
  9. Tracie~MyPetiteMaison says

    February 25, 2012 at 3:47 pm

    Thank you, Claudia! I’m going to try this some time this weekend. I quickly looked at your directions, and I believe I can follow them as you make it sound easy AND fun. I love the shadow one of you and your pooch!!
    xoxo

    Reply
  10. delightfuleclecticabode.com says

    February 25, 2012 at 4:17 pm

    Claudia, I’m sad that they are closing too. By the time I discovered this program and made a decision to purchase the premium option, they announced they were closing. I did a whole posting about it last month. I’m one of those that is stockpiling images and banners for later use. Photoshop is just too complicated for me but I may be forced to finally use it.

    This is a great tutorial for those who have never used it. By the way, I love the little birds that you have at the end of this posting.

    ~Sandy

    ~Sandy

    Reply
  11. Elaine @ Sunny Simple Life says

    February 25, 2012 at 7:18 pm

    You are such a sweetie helping all us novice bloggers.

    Reply
  12. The Garden Bell - Kate says

    February 25, 2012 at 7:22 pm

    Stockpiling. What a great idea. Thanks for the tip. Hope you can relax and enjoy the weekend too. We got out for a cold walk today, at least the sun was out.

    Reply
  13. Kim@Snug Harbor says

    February 25, 2012 at 8:19 pm

    Thank you SO much for this! Changed my banner today and you couldn’t have made it easier!

    Reply
  14. LizlovesVintage says

    February 25, 2012 at 8:50 pm

    Me too my Friend!! Me too. I made my banner on picnik also. Great tutorial you gave here for those who want to try.
    I was thinking about you today! The Saugerties HS. had an indoor Flea. One vendor sold Hull and MCoy pottery. What a Beautiful collection he was selling.
    xxx Liz

    Reply
  15. camp and cottage living says

    February 25, 2012 at 11:14 pm

    Claudia
    This is great! I’ve been hoping someone would do a tutorial on this
    I can’t wait to try it!
    Thanks-Kimberly

    Reply
  16. blhitchcock901 says

    February 26, 2012 at 1:24 am

    I’m so glad you posted this. I’ve done and saved, but how do I get this to transfer to my blog. Need step by steps there. Thanks so much for your help. At least I’ve made a start. You are great help!

    Reply
  17. ImSoVintage says

    February 26, 2012 at 7:52 am

    I made my banner in Picnik. I love it. Now I think I will take your idea of making more and stockpiling them for the future.
    Laura

    Reply
  18. debi huntsman says

    February 28, 2012 at 4:39 am

    Great tutorial Claudia!

    I’m a picnik user too, and broken hearted that they are closing down. I recently discovered a new online photo editing program called ipiccy.com. It’s a beta program, which means it’s still in the testing stage, but it’s so close to picnik, I couldn’t believe it.

    Reply
  19. Bunny Jean says

    February 29, 2012 at 12:02 pm

    Hi Claudia!

    We will all miss Picnik… darn that Google!

    I usually don’t care for the drop shadow effect, but it is great how you used it… after making the collage. It makes a great frame, and two or three really gives it some impact.

    Thanks for taking the time to share this technique with us.

    xoxo Bunny Jean

    Reply
  20. Dagmar says

    March 10, 2012 at 10:16 am

    Hi Claudia,
    Love you tutorial..I have been using picnik for years to make my banners and just found that the new download of 3.9 for Picasa is pretty good..now has a place to add frames..I read your readers comments and always helpful to learn that Ll might not be lost with picnik!
    BTW..I do love your header! ❤

    Reply
  21. Plushpussycat says

    March 13, 2012 at 4:09 pm

    Hi Claudia! Thank you again for this beautiful tutorial! I just used it to massively improve the banner I’d made without knowing how to do it! ;-) This one is sharp and clear–I love it! Now I’m going to make a bunch of other ones for safekeeping! :-D Jennifer

    Reply
Please check back to follow the conversation!

Leave a Reply to ImSoVintage Cancel reply

Your email address will not be published. Required fields are marked *

  • Email
  • Instagram

Welcome!

Welcome!

I live in a little cottage in the country with my husband. It's a sweet place, sheltered by old trees and surrounded by gardens. The inside is full of the things we love. I love to write, I love my camera, I love creating, I love gardening. My decorating style is eclectic; full of vintage and a bit of whimsy.

I've worked in the theater for more years than I can count. I'm currently a voice, speech, dialect and text coach freelancing on Broadway, off Broadway, and in regional theater.

Thanks for stopping by.

Searching?

The Dogs

The Dogs

Scout & Riley. Riley left us in 2012. Scout left us in February 2016. Dearest babies. Dearest friends.

Winston - Our first dog. We miss you, sweetheart.

Lambs Like to Party

Lambs Like to Party

A Note

Thanks for visiting! Feel free to browse, read and enjoy. All content is my own; including photos and text. Please do not use anything on this site without permission.

Disclosure/Privacy Policy can be found in the Navigation Bar under ‘About MHC.’

Also, I love receiving comments! I do, however, reserve the right to delete any comment that is in poor taste, offensive or is verging on spam. It’s my blog. If you’re a bot or a troll you’ll be blocked. Thanks!

Archives

All Content © 2008 - 2025 Mockingbird Hill Cottage · Log in

This website uses cookies to improve your experience. We'll assume you're ok with this, but you can opt-out if you wish.Accept Reject
Privacy & Cookies Policy

Privacy Overview

This website uses cookies to improve your experience while you navigate through the website. Out of these, the cookies that are categorized as necessary are stored on your browser as they are essential for the working of basic functionalities of the website. We also use third-party cookies that help us analyze and understand how you use this website. These cookies will be stored in your browser only with your consent. You also have the option to opt-out of these cookies. But opting out of some of these cookies may affect your browsing experience.
Necessary
Always Enabled
Necessary cookies are absolutely essential for the website to function properly. This category only includes cookies that ensures basic functionalities and security features of the website. These cookies do not store any personal information.
Non-necessary
Any cookies that may not be particularly necessary for the website to function and is used specifically to collect user personal data via analytics, ads, other embedded contents are termed as non-necessary cookies. It is mandatory to procure user consent prior to running these cookies on your website.
SAVE & ACCEPT