Mockingbird Hill Cottage

Mockingbird Hill Cottage

  • About MHC
    • Disclosure
  • Dollhouses/Minis
    • Hummingbird Cottage
    • The Studio (Formerly TSP)
    • Dove Cottage
    • The Lake House
    • The Folk Art Dollhouse
    • The Modern Dollhouse
    • Dollhouse Source List, Information and Tutorials
  • On the Road
  • Collecting
    • Roseville Pottery
    • McCoy Pottery
    • Egg Cups
    • Bakelite
  • Press
  • Privacy Policy
You are here: Home / Archives for DIY

Evolution of the Dollhouse – Part 5

May 29, 2014 at 9:30 am by Claudia

dhevolutiongraphic
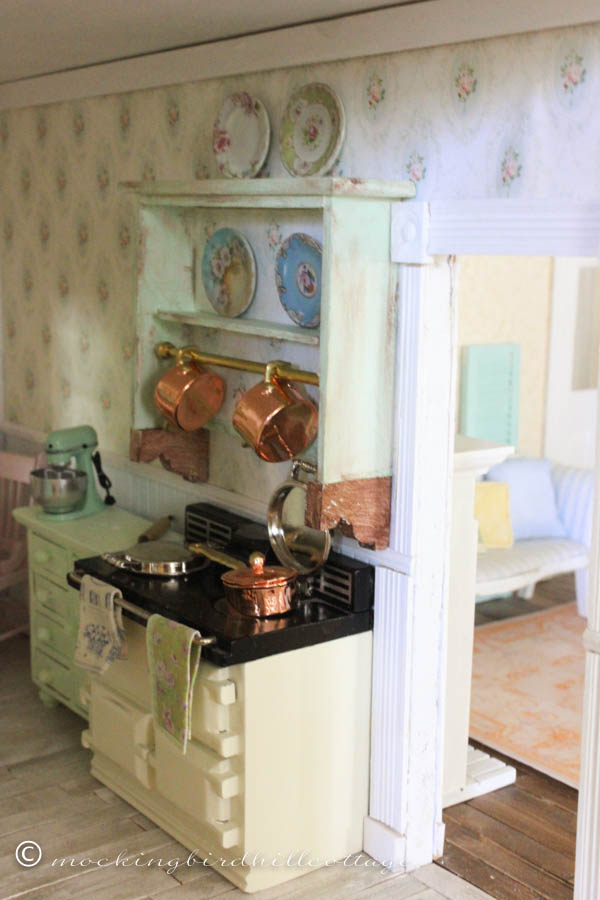
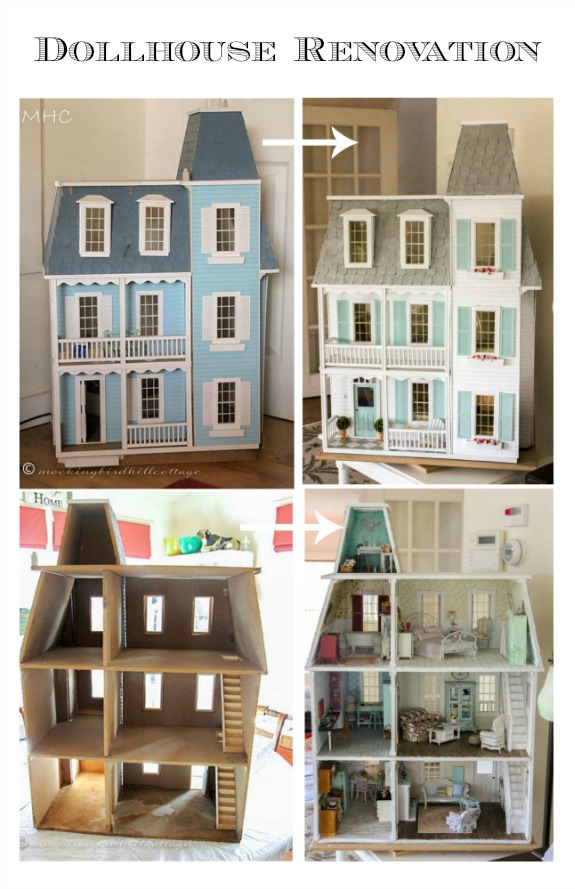
It’s no secret that I’m jealous of the owner of the dollhouse. She has several things that I – let’s just say it – covet. A fireplace, an AGA oven, a wrought iron bed, a potting room/shed and….an office/studio in its own enclosed space. Yes, I have a studio/craft area here at MHC but it’s in the upstairs hallway. So, charming as it is, I can’t go in there and close the door. You see? Envy.

I decided early on that the room on the left on the second floor would be an office/studio. I knew that much. But getting to it took a long time. I didn’t have a specific look in mind, so I wasn’t sure where to start. I decided to start with the floor.

frilayout4

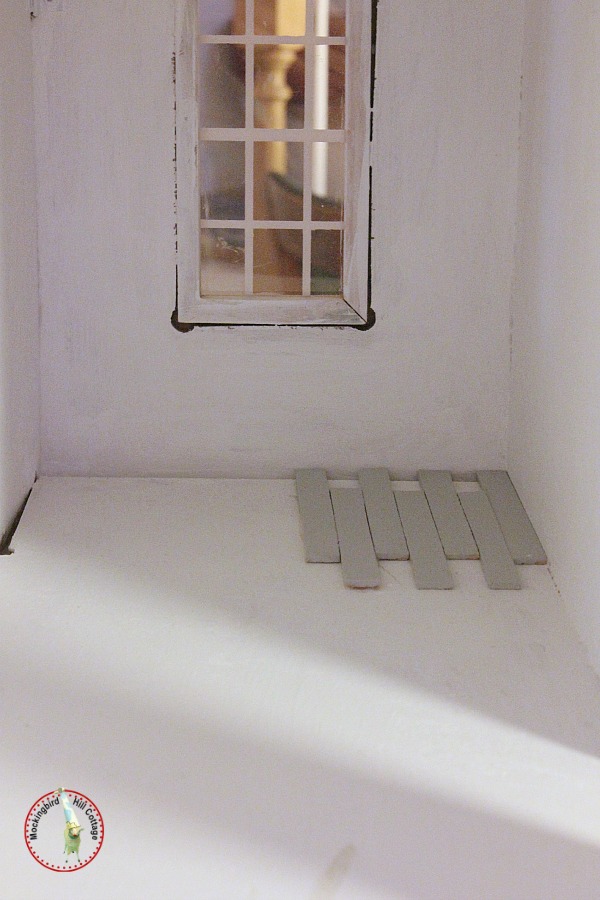
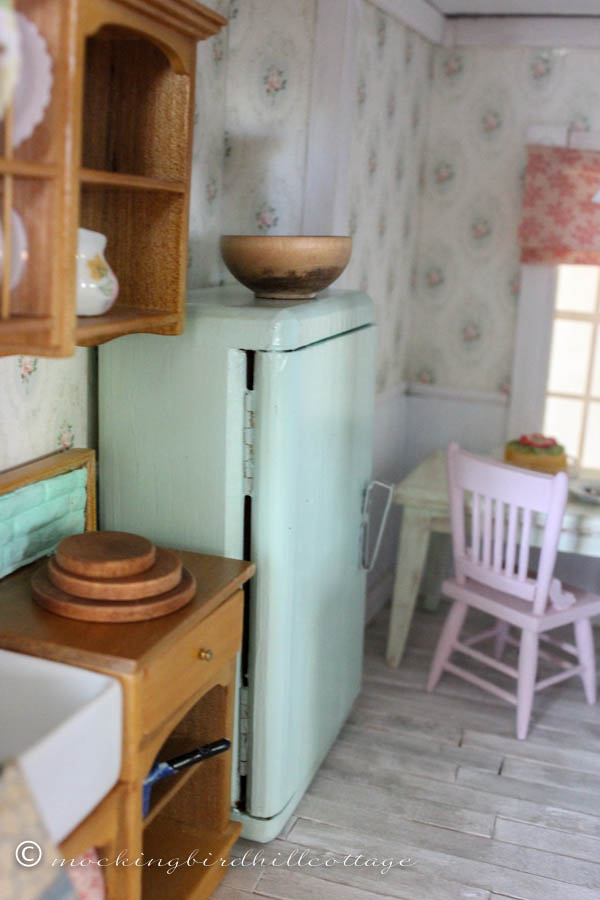
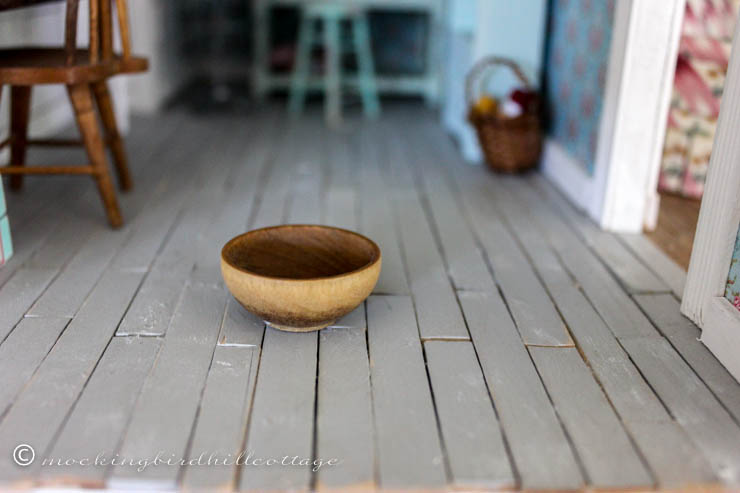
I wanted a painted floor so I went with gray. The idea is that the house is old and a fixer-upper, so sometimes the owner paints the floors, like in the kitchen and bedroom, rather than have them redone.

frilayout3

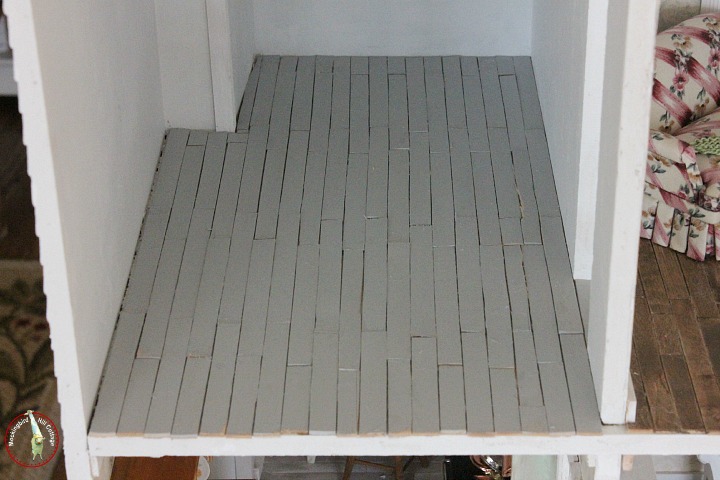
There are several irregularities in this room. You can see that the corner is a bit wonky. That made for some fiddling with the sticks that make up the floor – cutting and shaping them so they would work.

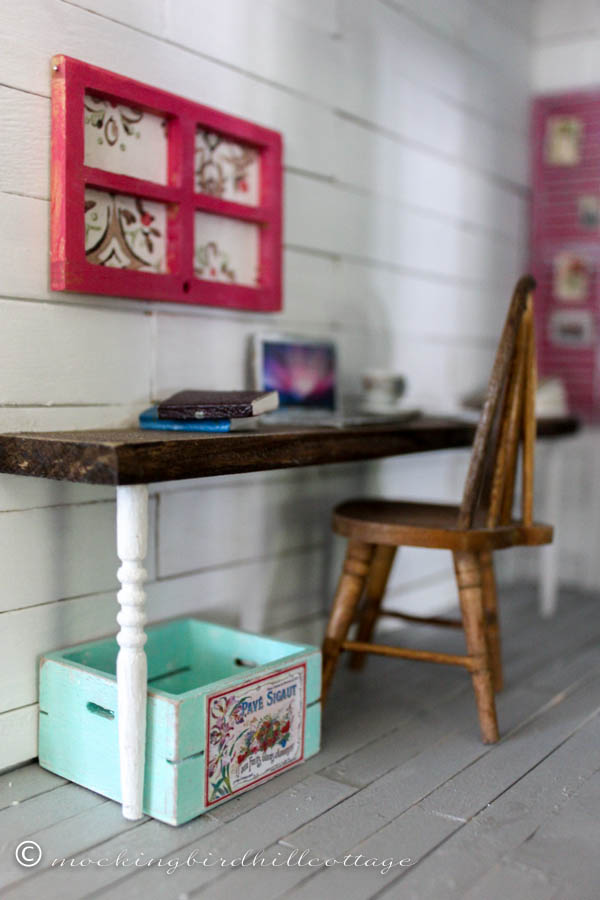
Still uninspired, the room stayed in this condition for a while, until one day I had an idea. I thought about it for several days before I went for it. I wanted one of the walls to be a planked wall. I see them all over blogland and I love that look. Using craft sticks, this time the ones that are the size of a tongue depressor, I went for it.

dhplankwalls1

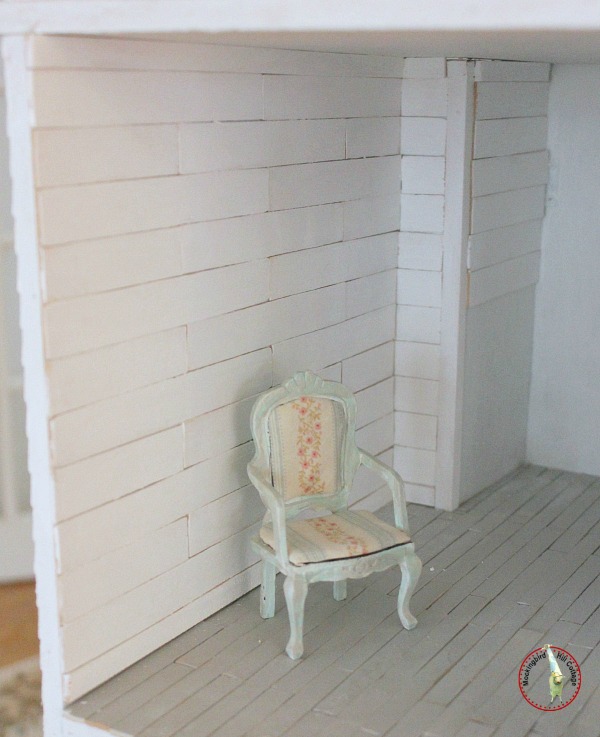
And there is the finished product. Adding this really made a difference. Though I flirted with the idea of doing all the walls that way, I decided to stay with one planked wall. So it was time to pick some wallpaper.

tueswallpaper3

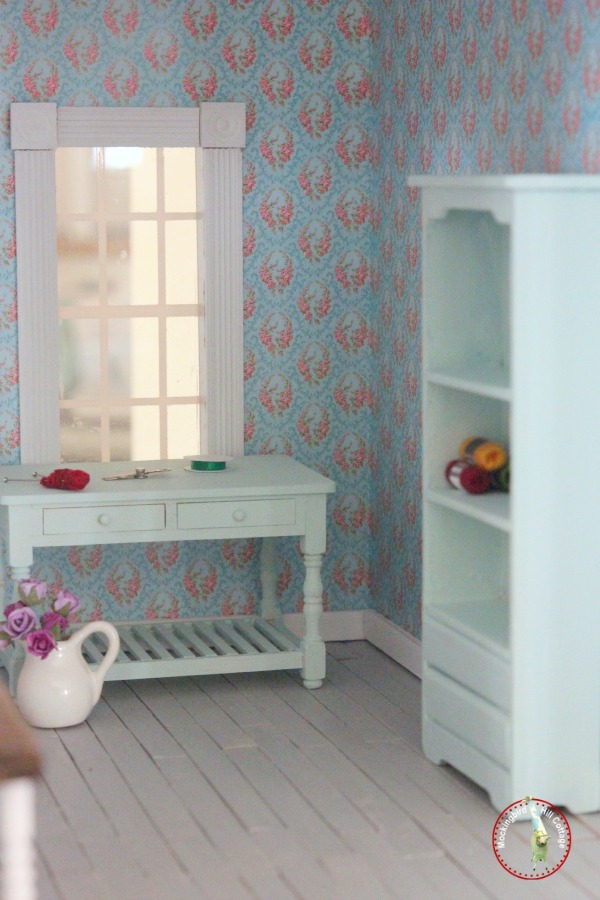
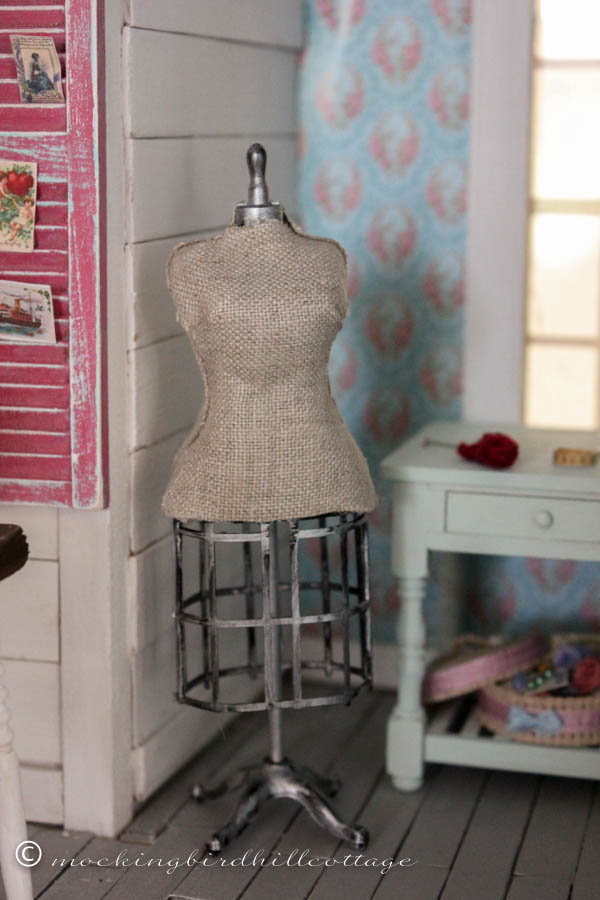
I found this French-inspired design on Itsy Bitsy Mini. It would have been too busy for an entire room, especially one without wainscoting, but thanks to the planked wall, it works.

tueswallpaperwholeroom

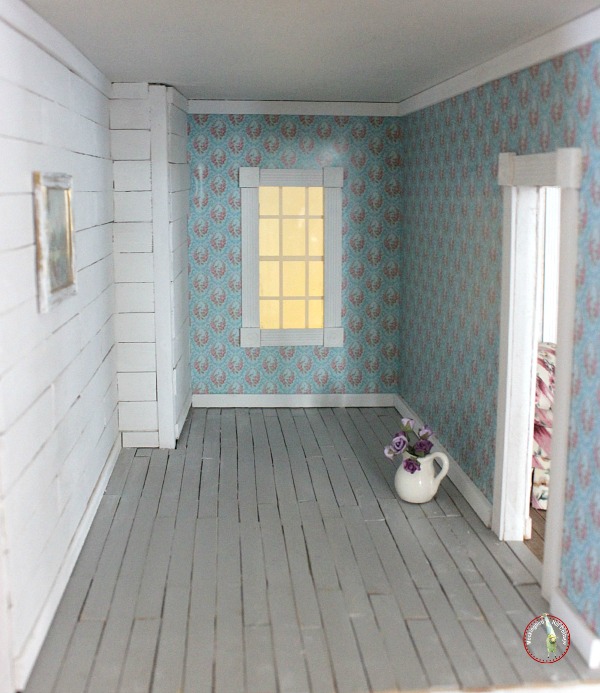
Then I added the window and door trim, baseboard and molding.

What next? Another little idea I’d had noodling around in my head: a work surface that would extend the length of the planked wall. I measured and cut a thick piece of wood I found in a hobby shop, stained it, and this is what I came up with:

desk1

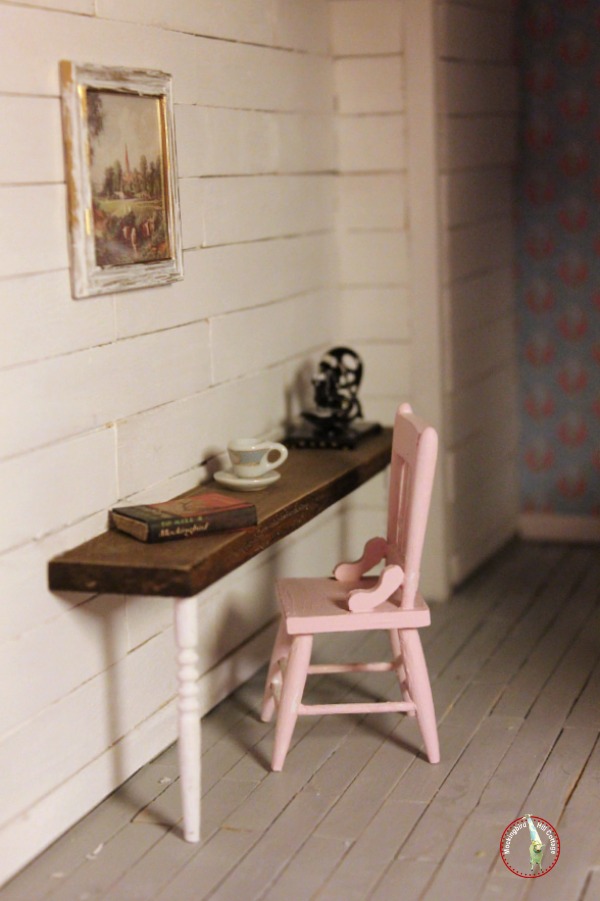
I used leftover spindles for the legs. My concept was that of a long desk that could be used for office work and sewing.

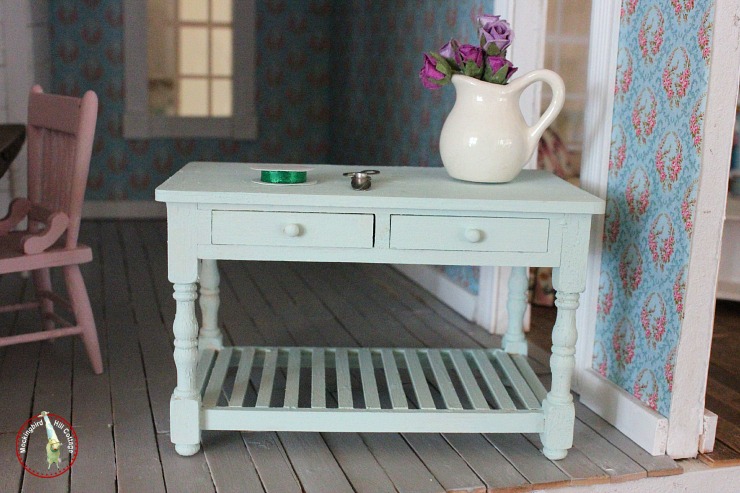
After that, the rest of the room took shape rather quickly. I bought an unfinished work table and painted it.

worktable

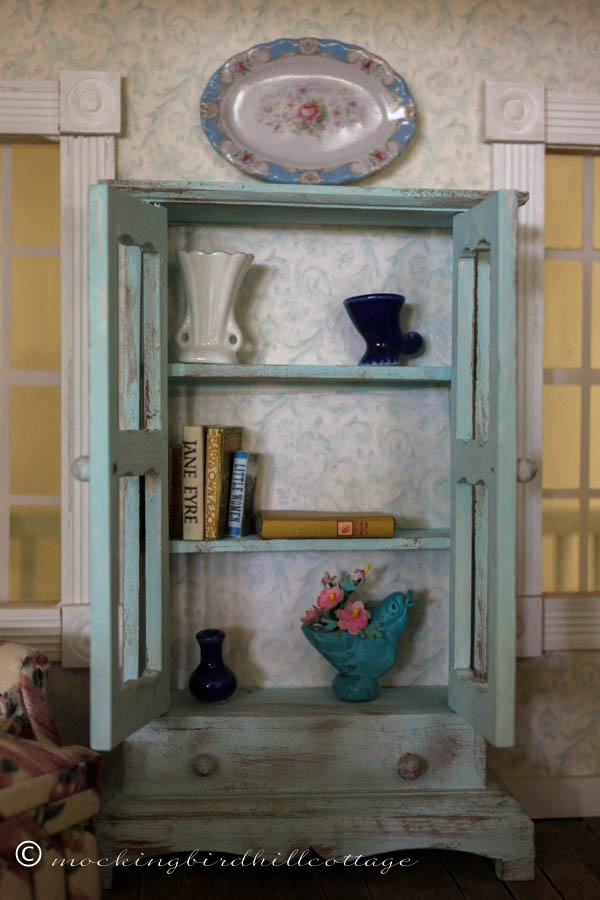
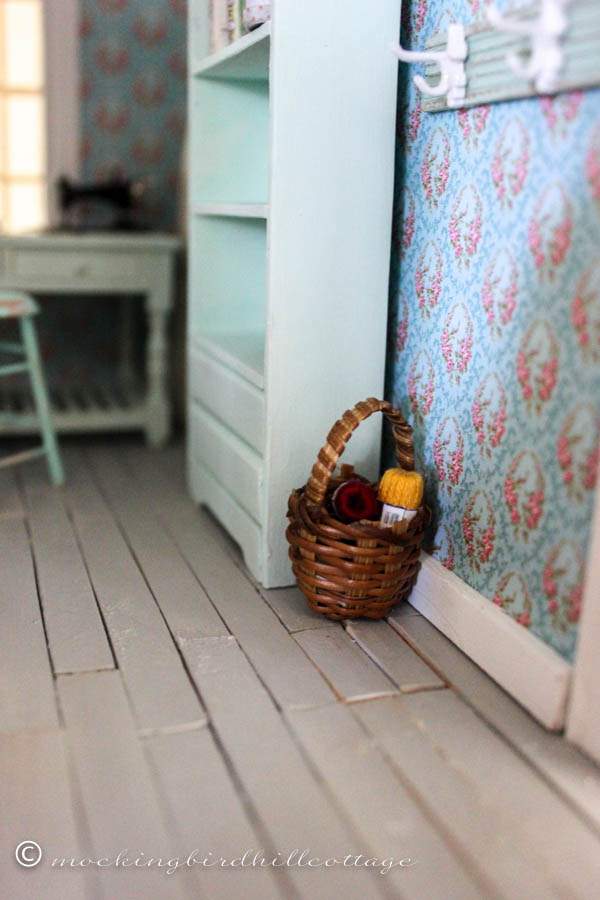
And then I found a bookshelf that was in my stash and painted it to match the worktable.

worktablebookshelf

Then it was time to add some fun details – all from my stash. I love the deep pink/rose color of the flowers in the wallpaper, so I played around with my paints until I came up with something close to that shade. I grabbed one of the many shutters I have in my stash. This one had already been painted aqua (from the early days when I was experimenting with colors for the shutters on the outside of the house,) so I painted it in the new shade, sanded it to reveal some of the blue and hung it on the wall.

mondhshutter

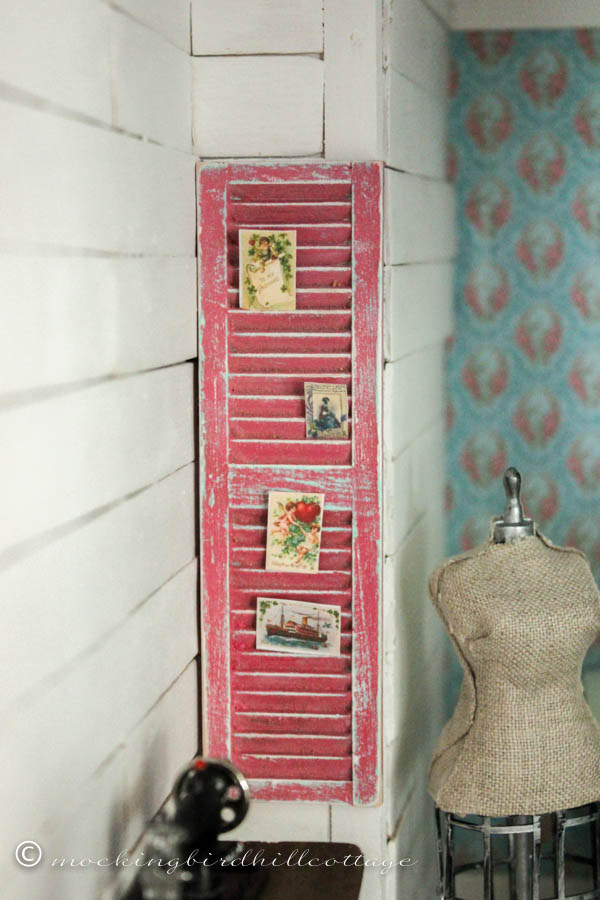
It can be used to hold postcards and notes and mementos. (Don thinks we should do something like this in MHC. I’m inclined to agree with him.)

Since I had the paint already mixed, I grabbed the other ‘window’ that I had on hand from an earlier project. It, too, got a coat of paint and was backed by some vintage wallpaper Elyse had given me.

mondhpinboard

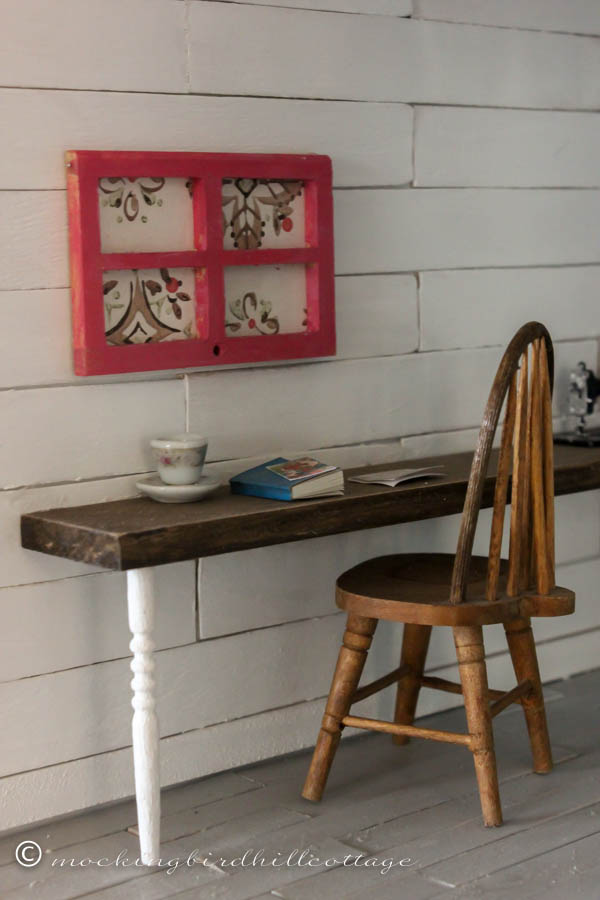
Voilà! A pinboard for the owner, handily positioned above the desk.

And, of course, one of my favorite additions:

mondhdressformunfinished

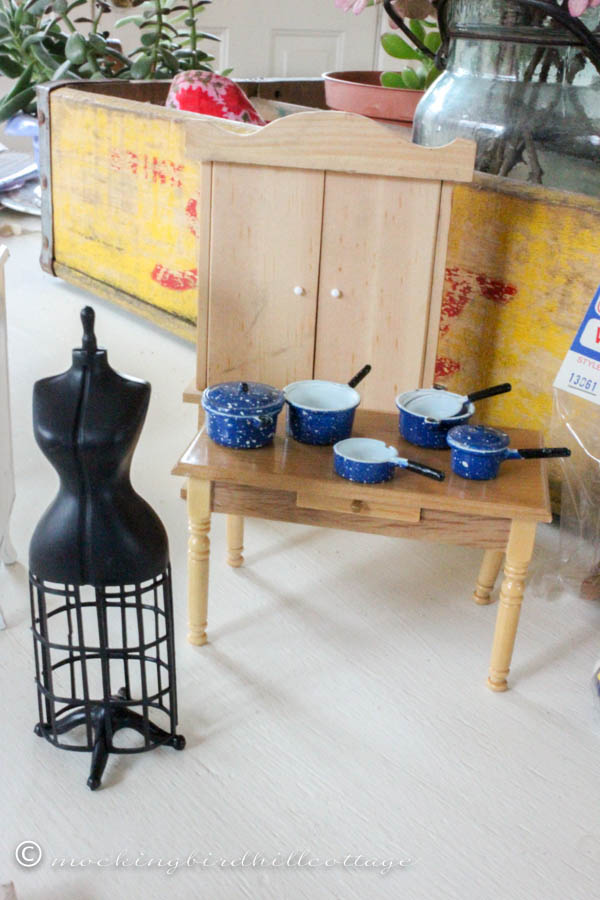
That black plastic dress form that I fashioned into this:

mondhdressform

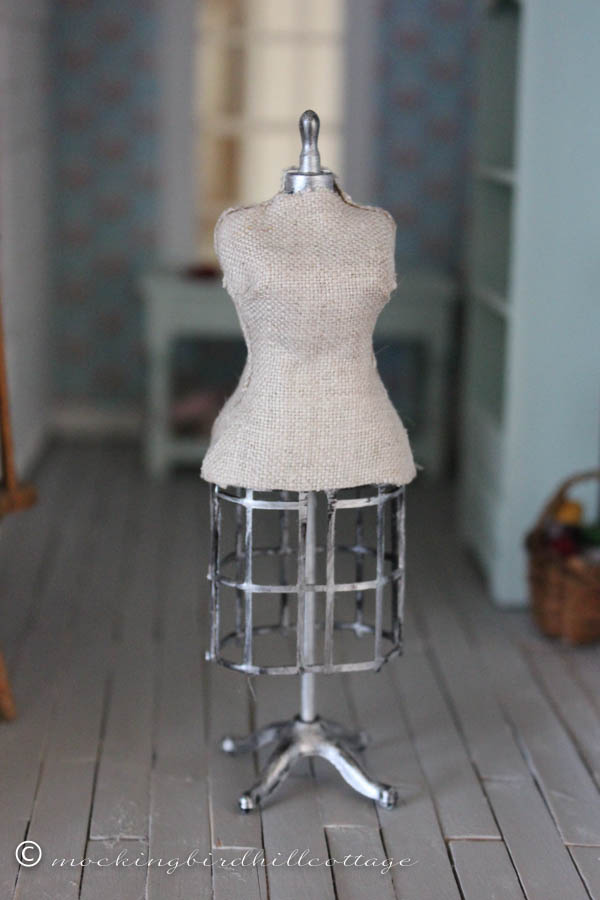
Speaking of fiddly work, this definitely falls in that category! But it was worth it. I painted the ‘metal’ part of the dress form with Rub n’ Buff in silver, made a spindle out of the wooden part of a Q-tip, and used some linen fabric that I had in my stash to cover the body.

mondhdressforminplace

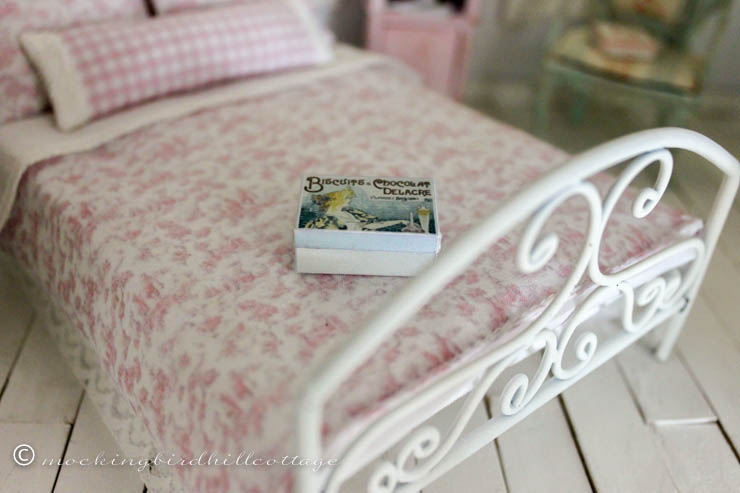
I’ve also been making miniature books:

dhbooks

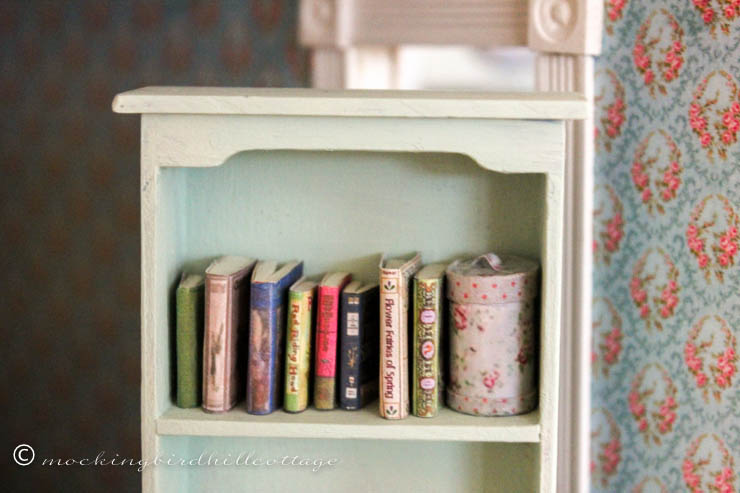
I have a lot more to go!

dollhouse-acupoftea

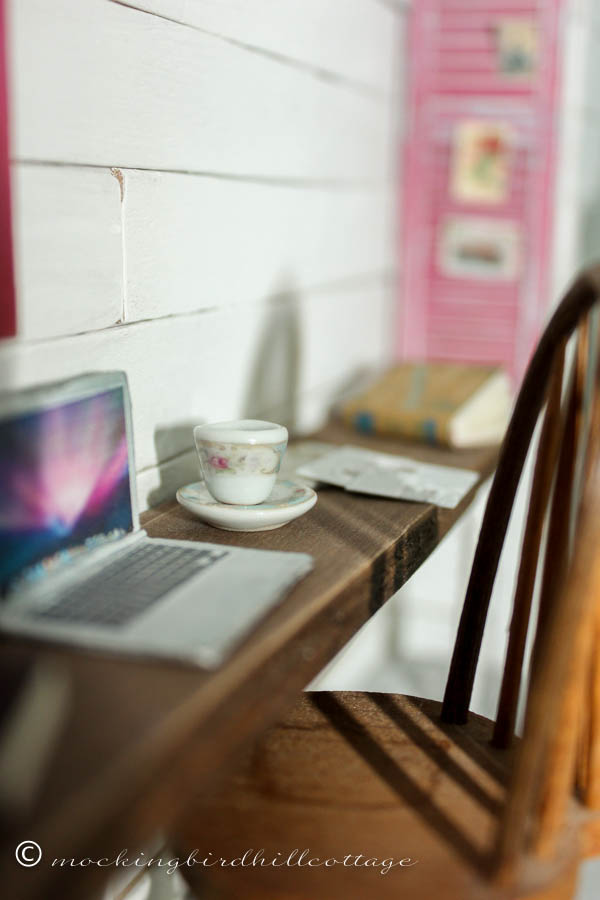
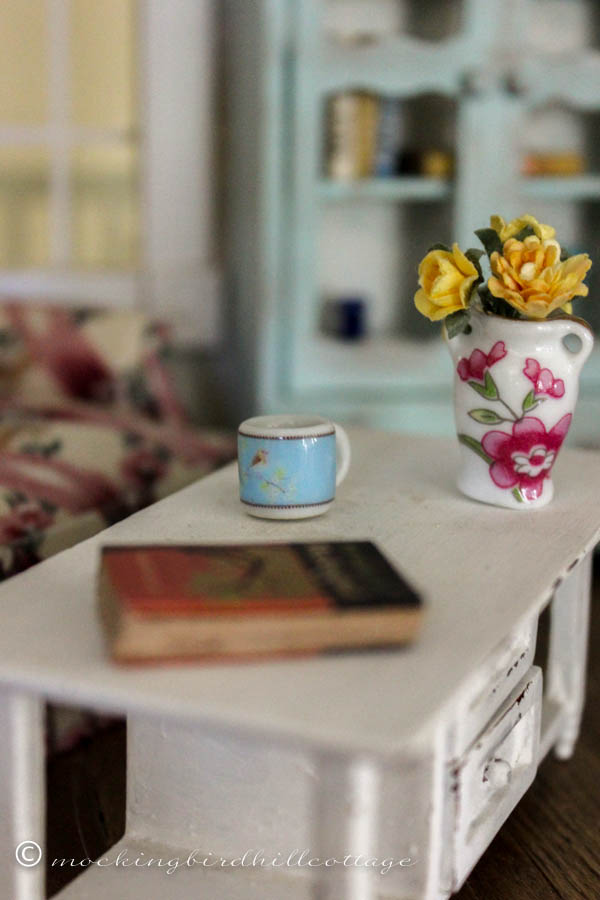
I made a MacBook Pro laptop (like the one I use to write this blog) from a printable I found online. Added a teacup and saucer and some paperwork. And, of course, the coat hook/rack that I made for the Mini Swap that I’m a part of.

dollhousestudio

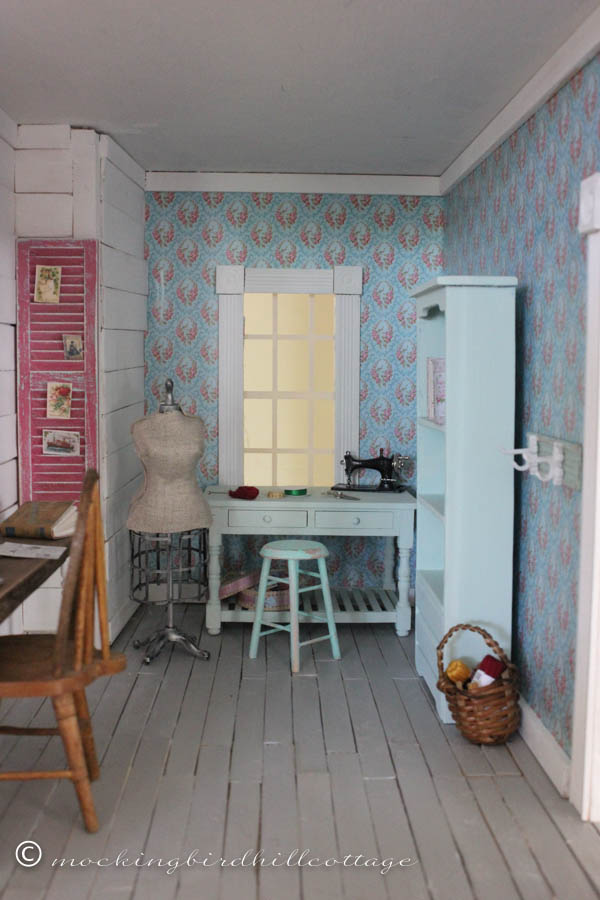
And here you go! This is pretty much the current state of the room. Oh! I forgot the work stool that is a very recent addition. I got it unfinished from miniatures.com and painted/sanded it to make it look nicely aged.

Still have to get a rug. And some lights. And some bolts of fabric. And make more books. And….and….

You get the picture. It’s always a work in progress.

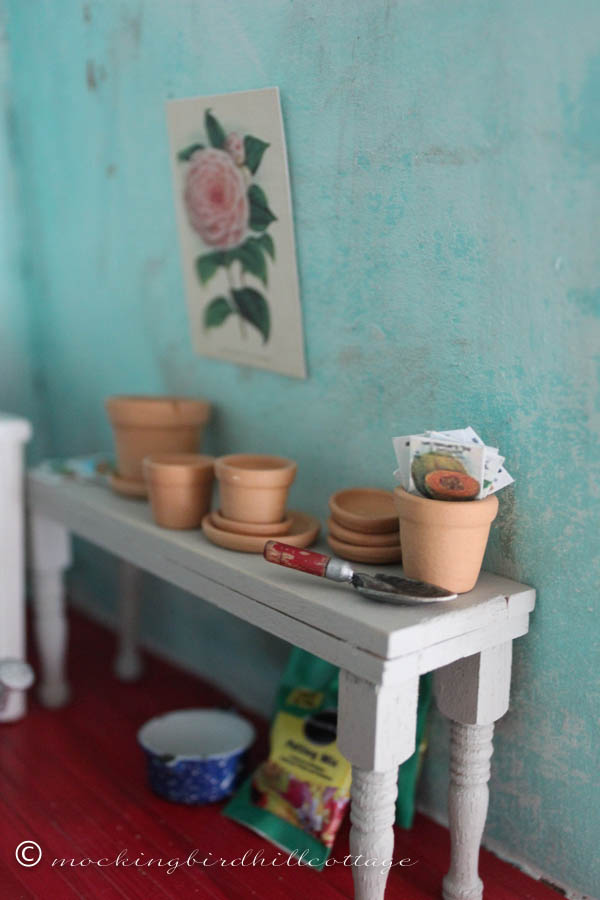
Part 6 will concentrate on the Potting Room/Shed.

Happy Thursday.

ClaudiaSignature140X93

Tagged With: decorating, dollhouseFiled Under: decorating, DIY, dollhouse 50 Comments

Your Dollhouse Questions Answered (An Occasional Series)

May 24, 2014 at 9:42 am by Claudia

dollhousequestions

I often get questions from you concerning dollhouses and miniatures. Many of you are just about to rehab an existing dollhouse or are searching for a dollhouse of your very own. Most of you are beginners, just like me (though I can now say I have a little experience under my belt!)

Not long ago, I asked you to email me with any questions you might have and Debbie from Oregon did just that. Today, I will focus on her questions and, hopefully, provide you with some basic information.

Okay, Debbie, take it away!

1. When you did your wallpaper, how did you keep it from sticking to your already installed doors and windows?

Good question! If you’re assembling a dollhouse, you are often advised to paint the walls and/or wallpaper before you put a room together. But what about those of us who find a used dollhouse, already assembled? We have to work with what we’ve got. In my case, the windows are doors were already there, but were untrimmed. So I made a template of each wall and cut the wallpaper to match the template. I used dollhouse wallpaper paste and attached the wallpaper, smoothing it with the side of a credit card. Then I took an exacto knife and cut around the window frames, as well as the doors. The only door that might have been a potential problem was the front door but I managed to work around it without any paste getting on the door. Then I attached the window and door trim.

You can also make a template that allows for the windows and doors. Take a piece of paper, trace the dimensions of the wall on the paper and at the same time, trace each window and door. Make sure you also take measurements so that when you fine-tune your template, the dimensions of the windows and doors are accurate. Then cut out your template. You can then take an exacto knife and cut out the openings for the doors and windows and transfer all of that to the wallpaper itself, making the same cuts for the windows and doors.

Some miniaturists attach wallpaper to card stock and paste the card stock to the wall.

2. Do you recall the name of the glue you used to do your repairs/re-gluing of things like your outside shutters and such? I have quite a few repairs to make to the outside of my dollhouse. Even though it was packed well for shipping, my entire front porch fell off! None of the pieces are broken, but I want to use a good adhesive when I start the repairs.

glues for miniatures

There are many adhesives out there and miniature websites carry a wide variety of them. Early on, I searched the web for advice on just this subject and ended up using these products.

Quick Grip is an all-purpose permanent adhesive with the consistency of airplane glue and I use it all the time. You can find this at any craft store.

Tuff & Tacky is a white glue that dries clear.

I tend to use Quick Grip for the heavy duty things – I used it when I moved the tower at the top of the house to its proper place. I used it on all of the shutters. I used it when I replaced the front door. I’m pretty sure I used it when I was building the staircases. And I used it when I installed the skylight in the ceiling of the potting shed.

I use Tuff and Tacky, too. It just depends on the job. I like the white glue for working on furniture.

Every miniaturist has a favorite adhesive and a quick search of Google will give you even more possibilities.

3. How do you decide what to attach permanently and what to attach with the sticky museum wax stuff? Did you permanently attach your fireplace? Your kitchen sink/counter unit?

Oh, what a good question! The answer will most likely be different for everyone. I have not attached the kitchen unit or the fireplace permanently. I want to be able to get to them and the kitchen unit is in a very confined space. Adding things to it is tricky – my fingers can’t always reach the areas under the sink. Being able to pull it out and add things is much easier.

Same for the fireplace. It has little shelving nooks on the far end and I could never get to them if it was glued in place.

I think you have to allow yourself the room to be flexible. What if I wanted to move the fireplace to another wall? If it was glued in place, moving it would impact the wallpaper and the floors.

Having said that, I use this stuff all the time:

wax

I got it through miniatures.com and it lasts a long time. You can also use museum wax. This particular wax doesn’t leave any residue on floors or wallpaper. I use it to hang plates and pictures, to keep little things like vases and cups from falling from table surfaces. Since my dollhouse is still in the ‘creation’ stage, I don’t always attach things because I often haven’t settled on a permanent solution. I’m still playing. But this reminds me that I want to use some wax to attach those planting pots to the surface of the potting table. I’ve already had a couple of them break.

If you move your dollhouse around a lot, then you might want to attach furniture and pieces like the fireplace with some wax. Sometimes Don or I bump into the dollhouse and all the little pieces that are on tables and countertops fall and that can be annoying!

4. What did you use to attach the flowers to your window boxes? And where did you find the flowers you used? I’ve looked for flowers at Michael’s and in the craft section of Walmart, but can’t find what I like that is small enough.  I know they have a lot of options on miniature sites, but those flowers seem a bit spendy.

Another good question, Debbie! Early on, I was fortunate to be given a gift by a blogger who is a fantastic miniaturist. She sent me all sorts of things that she had in her stash and among them were lots of flowers. Wasn’t I lucky? I quickly learned that there is a difference between the kind of small flowers you can get at Michael’s and flowers that match the 1:12 dimensions of a dollhouse.

contrasting flower sizes

On the left, sweet flowers that many of us use for crafting. I used to add some of these to all my Etsy packages. I love them. And they can be used in a dollhouse but they’ll always be a bit off in scale. The flowers on the right were purchased through miniatures.com. They are the same as some of the miniature flowers I found among the flowers that Jayne sent me. I grabbed a vase from the dollhouse to show you the difference:

min vase with large flowers

(The light around here has been less than perfect. It’s been raining for 3 days. Sorry!)

The Michael’s kind of flower in the vase. They’re okay but not to scale. And they don’t look all that real, nor are they meant to.

min vase with smaller flowers

The mini flowers. This isn’t the most artful arrangement because I didn’t want to cut the stems for this shot. But it gives you an idea of the difference in scale.

Yes, they are spendy. But you can also buy kits to make flowers and there are lots and lots of tutorials on the web on how to make flowers for your dollhouse.

As for attaching the flowers to the window boxes, the window boxes that came with this house are really solid blocks of wood. Unlike other window boxes, there’s no well in which to sink the flowers. So I cut the stems off of several different varieties of flowers and attached them with the wax I mentioned in #3. Fiddly work, but worth it. If you have a window box with a well, I bet you could use small pieces of floral foam as well.

5. Could you remind me of the phrase/words you use to find your good miniature images? For some reason, I’ve not hit on a good word combo.

Of course. I google “Free dollhouse printables.” You will be surprised at how many printables pop up on your screen!

I hope this answers your questions, Debbie. I’ve learned by googling, visiting the blogs of miniaturists and dollhouse enthusiasts and reading lots of tutorials. And by trial and error.

Keep your questions coming!

Happy Saturday.

ClaudiaSignature140X93

Tagged With: dollhouse, miniaturesFiled Under: DIY, dollhouse, miniatures 18 Comments

Interiors

May 21, 2014 at 8:14 am by Claudia

Because I’m in the mood…some interior views of the dollhouse:

mirrorindollhousebedroom

dollhousestudio

boxofbiscuitsondollhousebed

The box of biscuits was made by Norma.

dollhouse-acupoftea

dollhousearmoireinden

dollhousecrateunderdesk

dollhouseaga

dollhousekitchenandbowl

dollhousewoodenbowl

A closer look at that wooden bowl. From Weston Miniatures/Etsy.

dollhousepottingtable

dollhouse-bluebirdcup

dollhouseknittingbasket

Capturing dollhouse details can be a challenge, but it’s awfully fun. I haven’t done very much with the dollhouse in the past week or two. Funds are a little tight at the moment; in fact, I had a potential Etsy order all ready to be submitted when I decided to put it on hold. And, of course, the outdoors and my garden are calling me much of the time. As it should be.

We took another five mile hike yesterday. The last quarter mile or so is the hardest. At that point, both Don and I find ourselves hoping against hope that the end of the trail is just around the bend. But we did it. It was a gorgeous day and perfect for hiking.

The county is doing some work on our road in preparation for repaving it in the next month or two. So they’ve been working on all the culverts that run beside the road. We have one in front of our house. As I saw the machinery they were using yesterday (they haven’t reached our culvert yet) I got a little panicked because the peonies and a hickory tree and our bridalwreath spirea are all right next to the culvert. Don talked to the guys and they assured us that all would be safe, but not before I had made a little sign asking them to be careful when working around the plants. The peonies have been there for years and I couldn’t bear it if something happened to them.

I mean, look what I saw yesterday:

peonybud

Peony buds, complete with the obligatory ant.

Soon!

Happy Wednesday.

ClaudiaSignature140X93

Filed Under: decorating, DIY, dollhouse, Peonies 60 Comments

  • « Previous Page
  • 1
  • …
  • 3
  • 4
  • 5
  • 6
  • 7
  • …
  • 33
  • Next Page »
  • Email
  • Instagram

Welcome!

Welcome!

I live in a little cottage in the country with my husband. It's a sweet place, sheltered by old trees and surrounded by gardens. The inside is full of the things we love. I love to write, I love my camera, I love creating, I love gardening. My decorating style is eclectic; full of vintage and a bit of whimsy.

I've worked in the theater for more years than I can count. I'm currently a voice, speech, dialect and text coach freelancing on Broadway, off Broadway, and in regional theater.

Thanks for stopping by.

Searching?

The Dogs

The Dogs

Scout & Riley. Riley left us in 2012. Scout left us in February 2016. Dearest babies. Dearest friends.

Winston - Our first dog. We miss you, sweetheart.

Lambs Like to Party

Lambs Like to Party

A Note

Thanks for visiting! Feel free to browse, read and enjoy. All content is my own; including photos and text. Please do not use anything on this site without permission.

Disclosure/Privacy Policy can be found in the Navigation Bar under ‘About MHC.’

Also, I love receiving comments! I do, however, reserve the right to delete any comment that is in poor taste, offensive or is verging on spam. It’s my blog. If you’re a bot or a troll you’ll be blocked. Thanks!

Archives

All Content © 2008 - 2025 Mockingbird Hill Cottage · Log in

This website uses cookies to improve your experience. We'll assume you're ok with this, but you can opt-out if you wish.Accept Reject
Privacy & Cookies Policy

Privacy Overview

This website uses cookies to improve your experience while you navigate through the website. Out of these, the cookies that are categorized as necessary are stored on your browser as they are essential for the working of basic functionalities of the website. We also use third-party cookies that help us analyze and understand how you use this website. These cookies will be stored in your browser only with your consent. You also have the option to opt-out of these cookies. But opting out of some of these cookies may affect your browsing experience.
Necessary
Always Enabled
Necessary cookies are absolutely essential for the website to function properly. This category only includes cookies that ensures basic functionalities and security features of the website. These cookies do not store any personal information.
Non-necessary
Any cookies that may not be particularly necessary for the website to function and is used specifically to collect user personal data via analytics, ads, other embedded contents are termed as non-necessary cookies. It is mandatory to procure user consent prior to running these cookies on your website.
SAVE & ACCEPT