Mockingbird Hill Cottage

Mockingbird Hill Cottage

  • About MHC
    • Disclosure
  • Dollhouses/Minis
    • Hummingbird Cottage
    • The Studio (Formerly TSP)
    • Dove Cottage
    • The Lake House
    • The Folk Art Dollhouse
    • The Modern Dollhouse
    • Dollhouse Source List, Information and Tutorials
  • On the Road
  • Collecting
    • Roseville Pottery
    • McCoy Pottery
    • Egg Cups
    • Bakelite
  • Press
  • Privacy Policy
You are here: Home / Archives for DIY

Evolution of the Dollhouse – Part 2

April 29, 2014 at 9:34 am by Claudia

dhevolutiongraphic

weddollhouse3

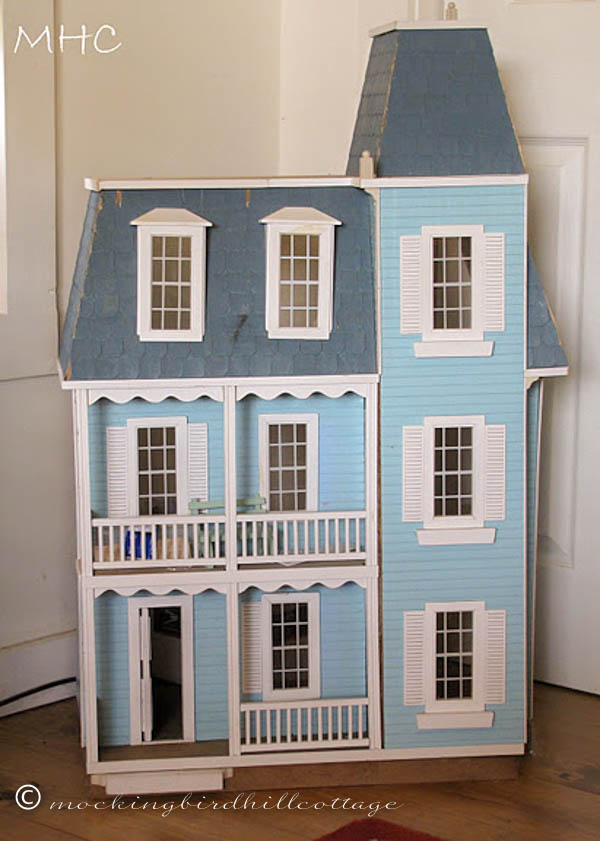
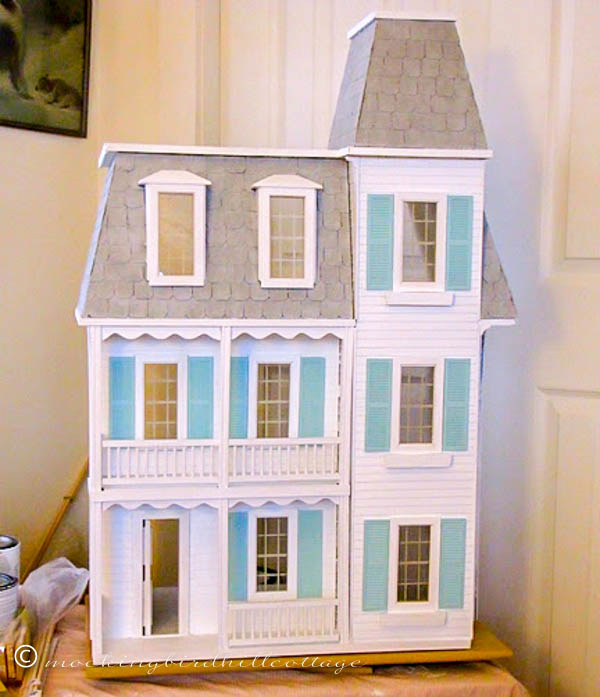
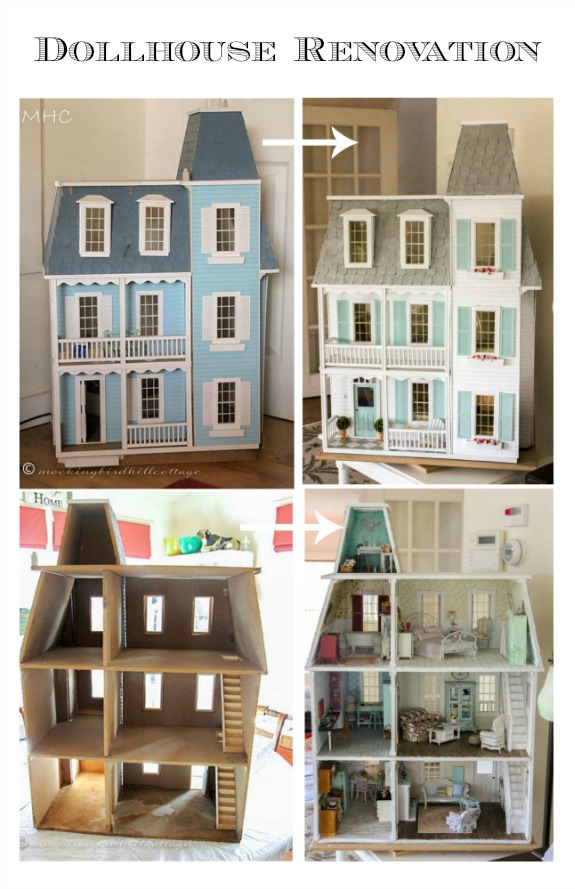
What to do with this? Gaps in the seams, water damaged floors, dingy walls, unfinished staircases?

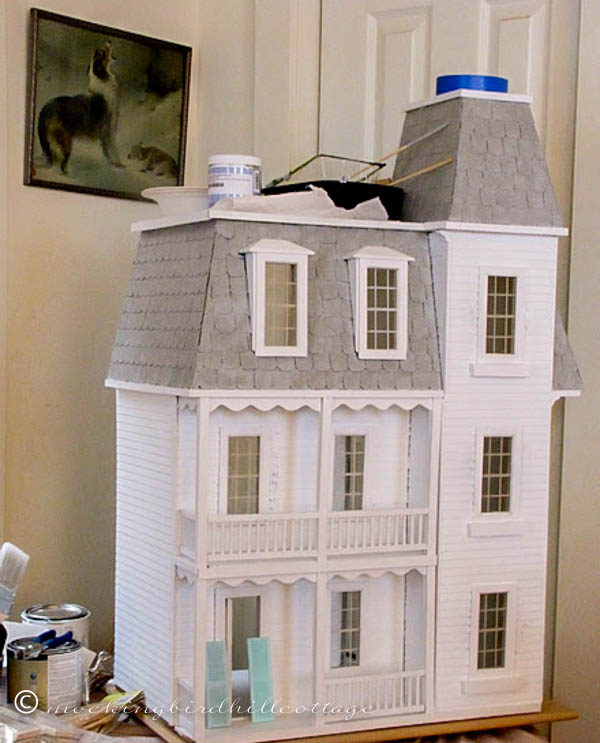
First of all, two coats of primer. Then, everything was covered with paint in whatever white I had on hand. I follow the same rule as the one I use in my real house: use what you have on hand, if at all possible.

I did so much research. Like many of you who are working on your own dollhouses, I scoured catalogs, read how-tos, looked at tutorials. Then I just went for it.  (I’m trying to re-create the exact order in which I did the various parts of the renovation. That’s when having a blog comes in handy – I have the facts and figures right at my fingertips!)

tuesstairs1

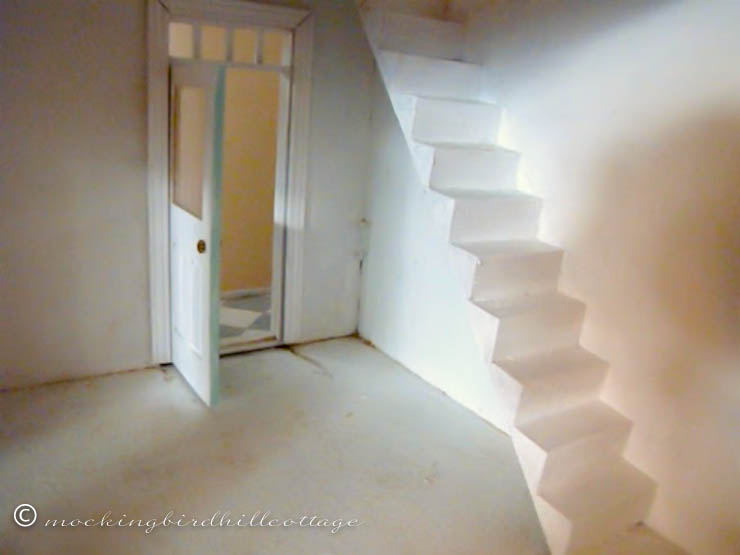
I decided to tackle the stairs first. I suppose I could have gone with the stairs as they were, but that was too modern for this dollhouse. So I ordered spindles, railings and newel posts. All were painted white. Then I fiddled with them, gluing the spindles onto the stairs, one by one, hoping I cut the railing accurately, adding the newel post. (Once again, I’m dealing with photos taken by my older camera, so bear with me. Oh, what a difference a good camera makes – especially with a dollhouse.)

tuesstairs2

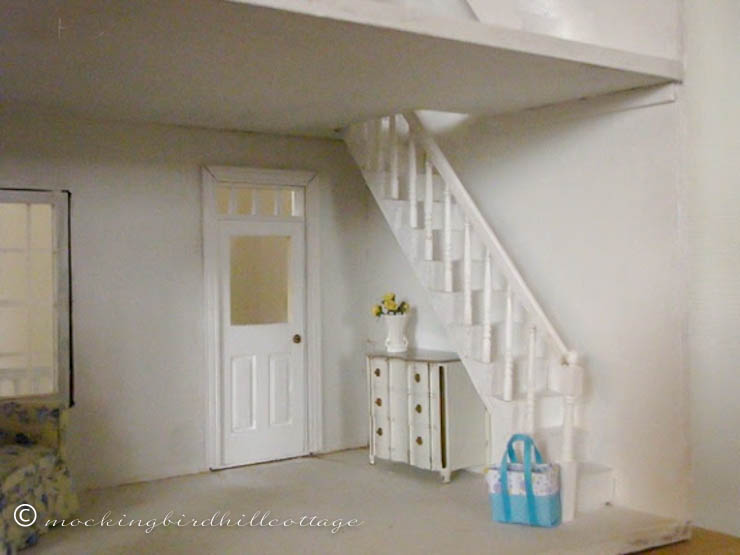
It worked! Since I was tackling the stairs, which were in the living room and den, I concentrated on those two rooms. After ordering some more spindles – I ran out – I did the stairs leading from the den to the bedroom next. This was the first really painstaking work I did on the dollhouse and I was worried I wouldn’t be able to pull it off. So it was a little triumph when I did.

Floors were up next. I had this idea rattling around in my head. Rather than buy a sheet of faux wood flooring (not there is anything wrong with that) I wondered if I could make my own wood floors. Popsicle sticks? Coffee stirrers? So I did some research and found a couple of miniaturists who had done that very thing in their dollhouses. A valuable piece of information surfaced: stain and/or paint the sticks before gluing them down. If you paint them after gluing them down, they can warp.

tuesfloor1

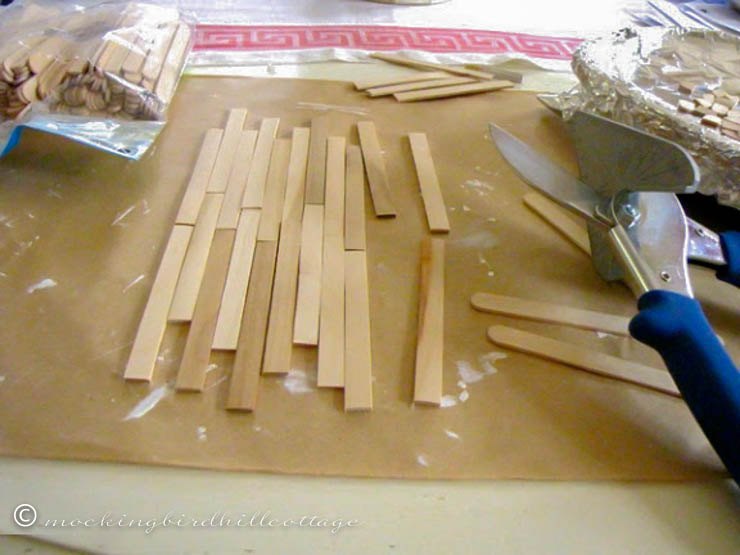
I ended up choosing narrow popsicle/craft sticks that I found at Michael’s – coffee stirrers were too narrow. I cut the rounded ends of each stick, then painstakingly stained each one. When I had stained several sticks, I played around with them on the living room floor.

tuesfloor2

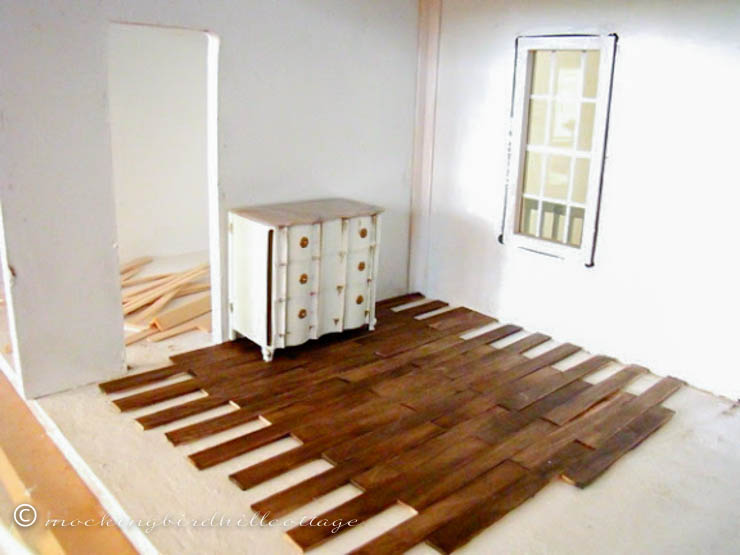
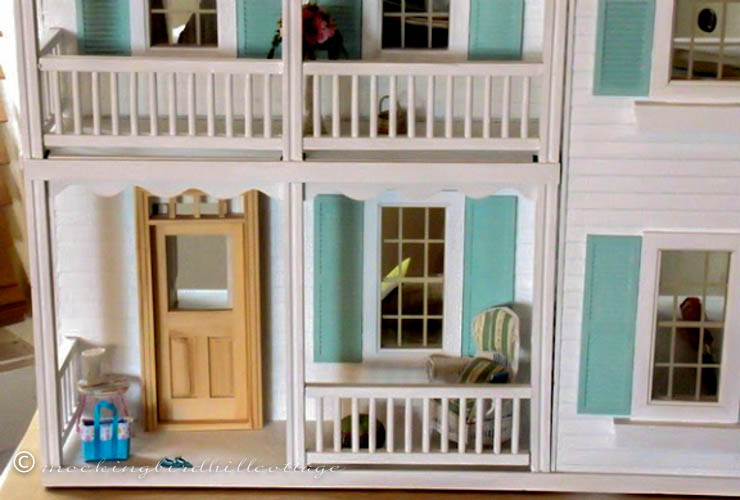
It was going to work. This was a long process, cutting, fitting, trimming and gluing. But what a difference it made. I really, really loved the look. By the way, I added that piece of wood in the corner to cover up a gap in the seam. I did that same thing in most every room of the dollhouse.

tuesfloor3

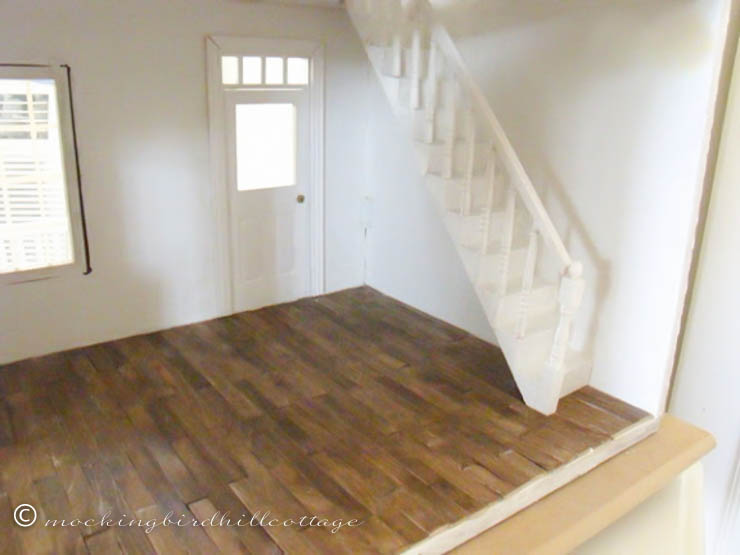
I cannot tell you how excited I was when this floor was finished. I wanted old, slightly worn, beautiful floors and I got them. I did the exact same thing in the den. Same stain (walnut, I believe), same look.

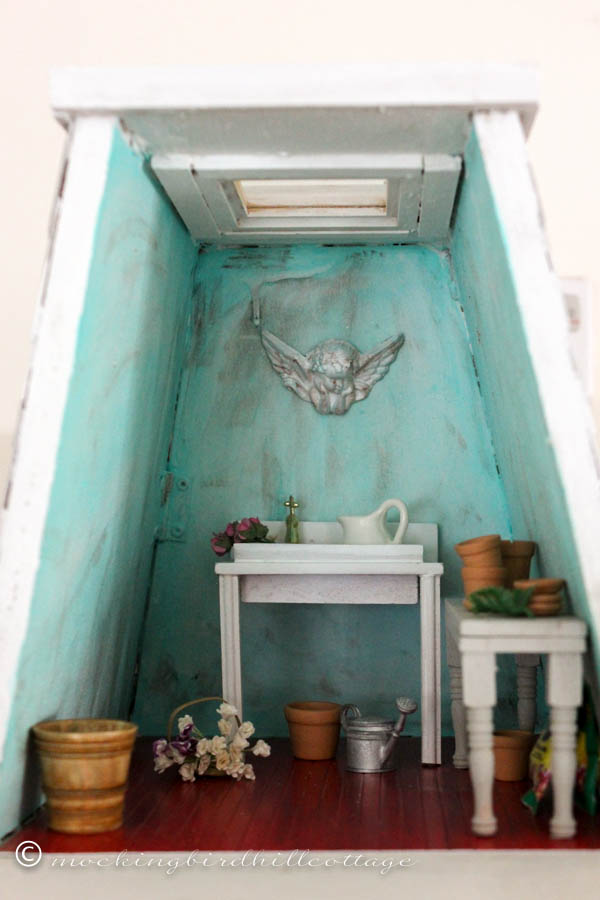
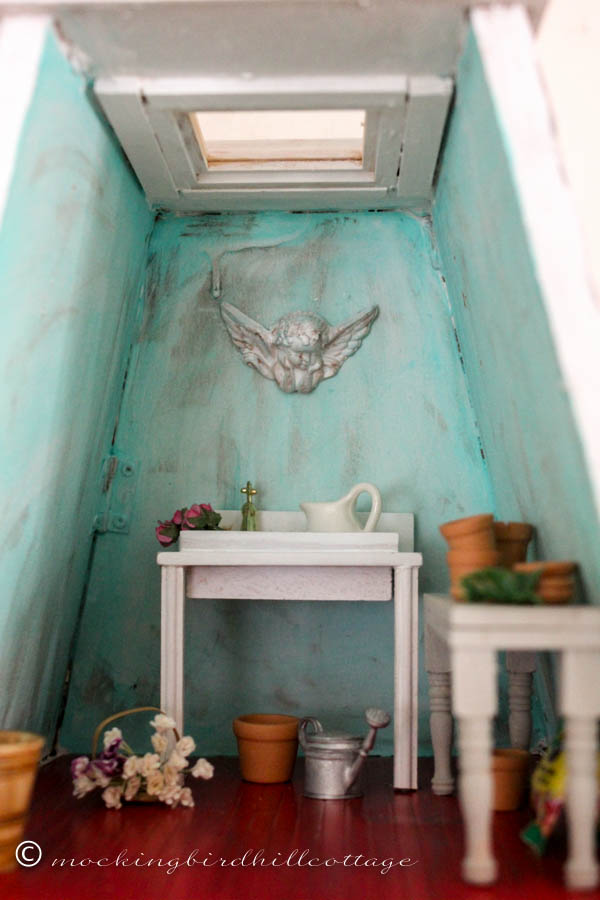
Then I decided to take a stab at what would be the kitchen. I wanted something different there, so I changed the direction of the wood sticks and painted them white with some gray dry brushed on top of the white.

tuesfloor5


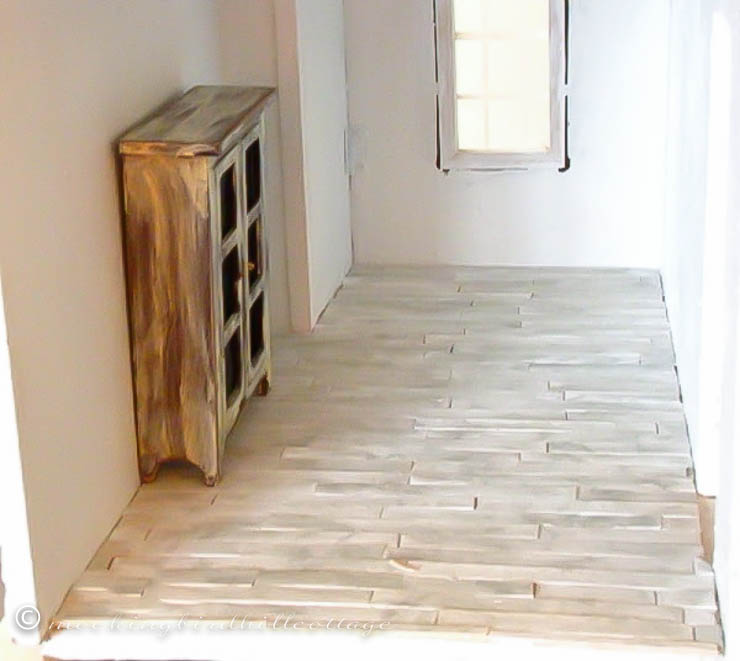
I wasn’t entirely sure this would work. (Again, sorry for the photo quality.) The floor underneath was warped from water damage. But I reserved judgement because I had a feeling that when I started to add in the kitchen fittings, wallpaper and trim, it would look just as I had envisioned. I wanted the look of a floor that was very old and was preserved by the new owner, who appreciates old and vintage.

The next post in the series will cover choosing wallpaper and trim in the kitchen, living room and den.

If you’re interested in a tutorial on laying a wood floor in your dollhouse, visit my post How to Make a Hardwood Floor for Your Dollhouse.

Update on me: I’m hanging in there. But it’s been very, very hard, of course. This morning found me crying once again. And Dad seemed very fragile yesterday. My heart breaks for him. He took flowers to the nursing home to thank everyone for the loving care they gave my mom. It was his first time visiting since the day before my mom died. He even went into her old room to introduce himself to the woman who is now occupying her bed. Very brave and very giving. But, of course, it drove home the reality that she is gone. And that left him shaken to the core.

My dear friend, Darko Tresnjak, the Artistic Director of Hartford Stage and the man I have worked alongside on twelve productions, both there and at the Old Globe, was nominated for a Tony Award today! His direction of A Gentleman’s Guide to Love and Murder garnered a nomination. The musical itself has ten nominations, the most nominations of any production this year. My friends and colleagues, Linda Cho and Alexander Dodge, are also nominated for costume design and scenic design. I’m thrilled for all of them.

Happy Tuesday.

ClaudiaSignature140X93

Filed Under: decorating, DIY, dollhouse 31 Comments

The Evolution of the Dollhouse – Part One

April 23, 2014 at 9:18 am by Claudia

dhevolutiongraphicI’m starting a small series about the dollhouse that will show the befores and afters of the exterior and interior. I think it will be fun for you (and me!) to see how far it has come since the day it came home to the cottage. Today? The exterior.

In 2009, I had a job that took me away from home to work in San Diego for six months. Now, I had been wanting a dollhouse for quite a while. I had been reading miniature blogs, gazing at dollhouses, looking at dollhouse kits, pricing kits (expensive!) and generally mooning about all things dollhouse. A good kit seemed to be an extravagance that we couldn’t afford at that time, so I started to look on eBay and Craig’s List. One day in June, I saw a house on Craig’s List that looked promising. The owner lived just a couple of towns away from our cottage. I emailed her, asked a lot of questions, and then pleaded with her to hang onto it until I could talk to Don. After a wee bit of cajoling, Don agreed to pick it up. It was $30. A steal! He brought it home and there it sat until I returned in July. The following photos were taken on my old camera and in some cases, you’ll see my old watermark. I’ve tweaked them a little, but bear with me.

weddollhouse

This is how it looked when it arrived. It was on a base that was funky, not level, and water damaged. It had a front porch step that didn’t seem to work, fake shutters, the upstairs windows had been put in incorrectly and were crooked, several of the shingles were damaged, and that tower was installed in the wrong place – it had been set back too far from the edge of the roof.

weddollhouse3

It was completely unfinished on the inside and the floors on the first floor had water damage. It had also been put together incorrectly and there were gaps between some of the walls and for some reason, some of the siding was on display in what would become the Master Bedroom.

weddollhouse2

I did a lot of research on the internet and asked a lot of questions of my miniature blogging friends. I learned that I could take those upstairs windows out more easily than I thought and that allowed me to reposition them. The ‘shutters’ (which were really pieces of wood with lines painted on them) were removed and new shutters were ordered. I replaced several shingles. Then I pried off the tower and moved it into the correct position. I also removed the funky base and step.

weddollhouse4

Most likely, this dollhouse (which is, frankly, a inferior copy of one made by Real Good Toys and manufactured by another company) came with the outside walls pre-painted. But it had taken a beating and I didn’t like the colors, so I gave it a few coats of primer. I also primed the inside at the same time.

weddollhouse6

It took several coats of paint to cover up the blue. I decided the roof should be gray but I wanted the gray to have a texture. I painted all the shingles in one shade of gray, then dry brushed another shade of gray onto the first layer.

The shutters arrived and I played with paint colors.

weddollhouse5

I never liked the front door. It looked cheesy, was too narrow, and it wouldn’t close. I knew I was going to have to replace it.

weddollhouse7

The shutters were painted and installed.

weddollhouse8

I bought this door. And I looked at it for a long time. It was wider and taller than the door that came with the dollhouse, so I knew I was going to have to deal with a saw. Research told me that I needed to invest in a keyhole saw and I did. The day I decided to bite the bullet and remove and replace the old door was definitely nervous making. Would I screw it up? I marked the new opening with pencil and I sawed and sawed and sawed again until I finally got it right. And dang it, it fit!

weddollhouse9

Ta da! I added a jewelry fitting for the door knob.

Which brings us to the porch. The porch was unpainted, had a very rough texture and some water damage. I decided that the best way to deal with that was to add some pattern. I’ve always loved painted floors, so I painted a diamond design in gray and white.

weddollhouse10

And there you have it. All of this took place over the course of several months, as I painted and replaced and researched and, in some cases, dithered a bit.

Just like rehabbing a real house, but much less expensive!

I know many of you are thinking of getting your own dollhouse and I want to assure you that you can take something less than beautiful and fix it up so that it looks like new. And you don’t need to pay full price, unless you want to. I paid thirty dollars for the dollhouse. I mean, really, how could I go wrong? You can find all sorts of deals out there. Judy found a gorgeous dollhouse at a craft fair for an incredible price. Another of my readers recently found a beautiful dollhouse for next-to-nothing. Check out Craig’s List and eBay and your local paper. You’d be surprised what’s out there.

I’ve had the most wonderful time working on this dollhouse. I can’t even begin to describe how much I love it.

There’s more coming in this series. Next time, we’ll start on the inside.

Speaking of the dollhouse, yesterday I received a package from Karen. It was rather large and heavy and I had no idea what was in it. When I started pulling things out of the box, I was stunned. So was Don.

dollhousegifts1

This is only a small portion of the contents. Accessories, furniture, furniture kits – treasure after treasure!

Thank you, Karen, for this incredible surprise and for your generous spirit. Bless you.

I am reminded of just how amazing my readers are on a daily basis. What a gift you are!

Happy Wednesday.

ClaudiaSignature140X93

Filed Under: decorating, DIY, dollhouse 30 Comments

Letting The Light In

April 11, 2014 at 8:32 am by Claudia

I’ve been working outside the last couple of days and it’s been wonderful but tiring. The fresh air, working for hours….I’m not used to it! Yesterday I cleared some of the saplings that sprout up around this property and are usually too close to already established trees. Then I started on the dreaded battle with the brambles/wild roses that take over our property, sometimes strangling the small trees that I do want to flourish.

My hands are full of wounds from the prickers (thorns.) We always called them prickers when I was a kid. Anyway, I’m going to have to continue this battle over the next few days. Yikes.

Then Don and I worked on the trail that we established several years ago in our woods. In the past few years, we let it languish. No more. We cleared branches, brambles, edged the paths with limbs that we found here and there on the floor of the forest. We love taking walks there, especially when the canopy of trees in full leaf creates a quiet getaway. We’re going to mark the trail and add some little touches that make it ours.

Lots of work. Exhausted. But happy.

Now, onto my potting shed in the dollhouse:

dhskylight

Notice anything new?

Yes! I’ve added a skylight.

A potting shed needs a source of natural light, don’t you think?

I came up with the idea a couple of weeks ago and then I ordered the window, along with the pots and potting soil. It sat here for several days until I made the decision to go for it. Since the walls of the dollhouse are MDF, they are a little tricky to work with. The only other time I used a keyhole saw on the dollhouse was when I enlarged the opening for the front door. And it wasn’t easy!

But I was determined to do it. The window came with a template for the opening, so I used a pencil to trace the template on the roof of the shed. I grabbed my drill and made a couple of holes that eventually gave me an opening in which to insert the saw. Don braced the house for a bit and kept asking me if I wanted him to help with the sawing, but stubborn girl that I am, I said no. I quickly realized I needed to move the dollhouse to the floor where I could work more easily. Then Don left me to it as he took Scout for a walk.

I wondered if I was making a mistake but my gut told me it would work. So I kept sawing. And finally, there was a square opening for the window. Would it fit? Yes, and with no adjustments necessary!

dhskylight2

Ah. Much more conducive to creative work in the shed!

I am very excited about this modification. In fact, I have a skylight in my studio upstairs, so it seemed only fair to install one in the potting shed. (And the owner asked me to. Very nicely.)

Oh, wait until I get to work on the roof garden!

dhplanters

I also added some flowering bushes to the urns by the front door.

Love.

I hope you’re enjoying the fact that Spring has sprung and that you’re able to spend some time outside, my friends.

Happy Friday.

ClaudiaSignature140X93


Filed Under: decorating, DIY, dollhouse, Don, nature 37 Comments

  • « Previous Page
  • 1
  • …
  • 6
  • 7
  • 8
  • 9
  • 10
  • …
  • 33
  • Next Page »
  • Email
  • Instagram

Welcome!

Welcome!

I live in a little cottage in the country with my husband. It's a sweet place, sheltered by old trees and surrounded by gardens. The inside is full of the things we love. I love to write, I love my camera, I love creating, I love gardening. My decorating style is eclectic; full of vintage and a bit of whimsy.

I've worked in the theater for more years than I can count. I'm currently a voice, speech, dialect and text coach freelancing on Broadway, off Broadway, and in regional theater.

Thanks for stopping by.

Searching?

The Dogs

The Dogs

Scout & Riley. Riley left us in 2012. Scout left us in February 2016. Dearest babies. Dearest friends.

Winston - Our first dog. We miss you, sweetheart.

Lambs Like to Party

Lambs Like to Party

A Note

Thanks for visiting! Feel free to browse, read and enjoy. All content is my own; including photos and text. Please do not use anything on this site without permission.

Disclosure/Privacy Policy can be found in the Navigation Bar under ‘About MHC.’

Also, I love receiving comments! I do, however, reserve the right to delete any comment that is in poor taste, offensive or is verging on spam. It’s my blog. If you’re a bot or a troll you’ll be blocked. Thanks!

Archives

All Content © 2008 - 2025 Mockingbird Hill Cottage · Log in

This website uses cookies to improve your experience. We'll assume you're ok with this, but you can opt-out if you wish.Accept Reject
Privacy & Cookies Policy

Privacy Overview

This website uses cookies to improve your experience while you navigate through the website. Out of these, the cookies that are categorized as necessary are stored on your browser as they are essential for the working of basic functionalities of the website. We also use third-party cookies that help us analyze and understand how you use this website. These cookies will be stored in your browser only with your consent. You also have the option to opt-out of these cookies. But opting out of some of these cookies may affect your browsing experience.
Necessary
Always Enabled
Necessary cookies are absolutely essential for the website to function properly. This category only includes cookies that ensures basic functionalities and security features of the website. These cookies do not store any personal information.
Non-necessary
Any cookies that may not be particularly necessary for the website to function and is used specifically to collect user personal data via analytics, ads, other embedded contents are termed as non-necessary cookies. It is mandatory to procure user consent prior to running these cookies on your website.
SAVE & ACCEPT