Mockingbird Hill Cottage

Mockingbird Hill Cottage

  • About MHC
    • Disclosure
  • Dollhouses/Minis
    • Hummingbird Cottage
    • The Studio (Formerly TSP)
    • Dove Cottage
    • The Lake House
    • The Folk Art Dollhouse
    • The Modern Dollhouse
    • Dollhouse Source List, Information and Tutorials
  • On the Road
  • Collecting
    • Roseville Pottery
    • McCoy Pottery
    • Egg Cups
    • Bakelite
  • Press
  • Privacy Policy
You are here: Home / Archives for decorating

Welcome to the Porch in Spring – A Tour

June 3, 2014 at 9:15 am by Claudia

porch-entrance

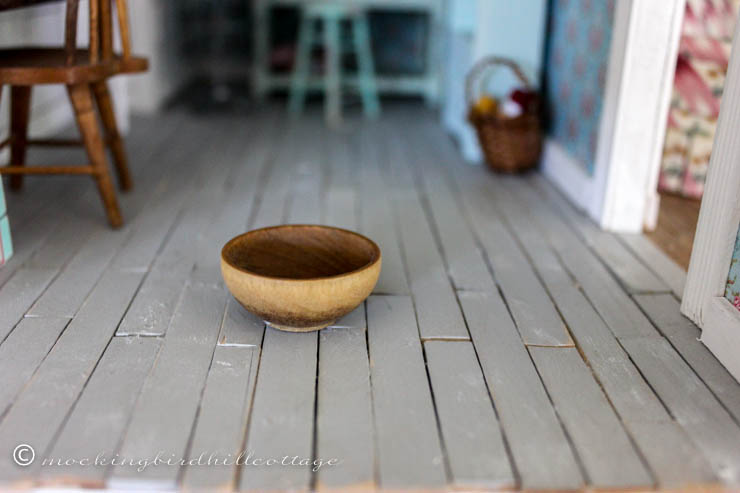
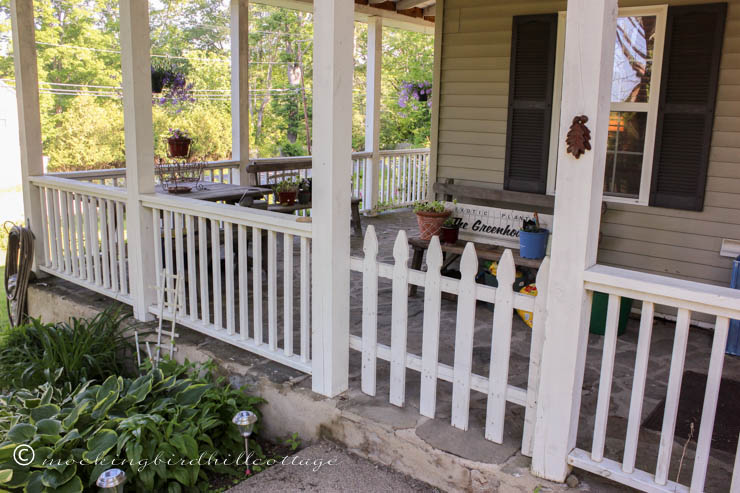
Welcome to the porch!

Imagine the end of a long day of house hunting. Imagine coming to view the last property on that day’s list and seeing this wrap-around porch.

I gasped when I saw it. I’ve always been a porch girl, I grew up with one. But years of living in apartments had denied me the pleasure of porch sitting for so long that I thought I might never have one again.

Until I saw this porch. It clinched the deal for me. (For Don the clincher was the kitchen with its high ceiling.)

The picket gate that you see was a later addition. I wanted something to secure the porch when the dogs were out there, so I used this section of picket fence, along with two metal pieces that allow the gate to be easily put in place and just as easily removed. You can find out more about it in this post.

The leaf door knocker was used at our previous rental. I nailed it to the post. No, that’s wrong. I screwed it to the post.

view-from-the-porch

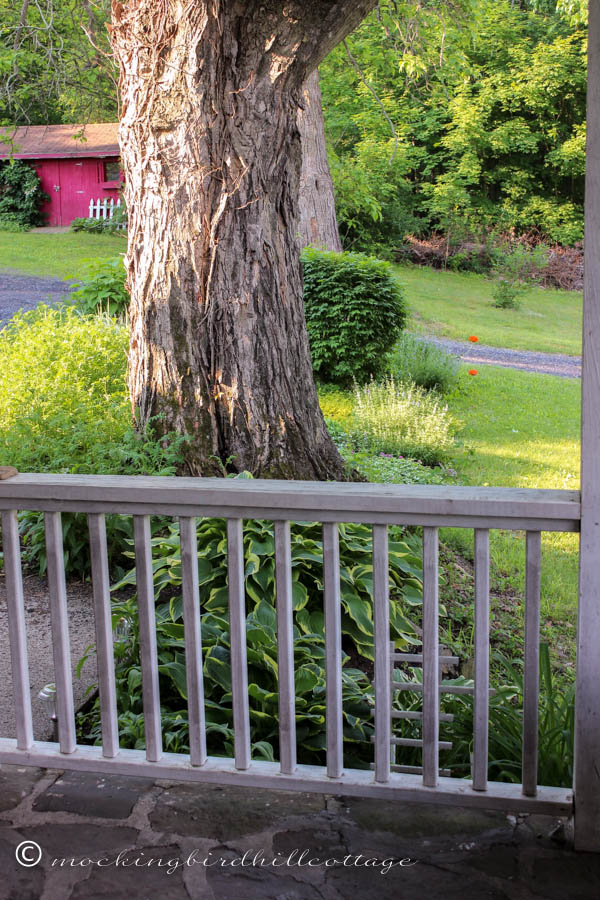
This is the view from just beyond the entrance to the porch. You can see the large garden bed and the shed and lots of hostas.

the greenhouse

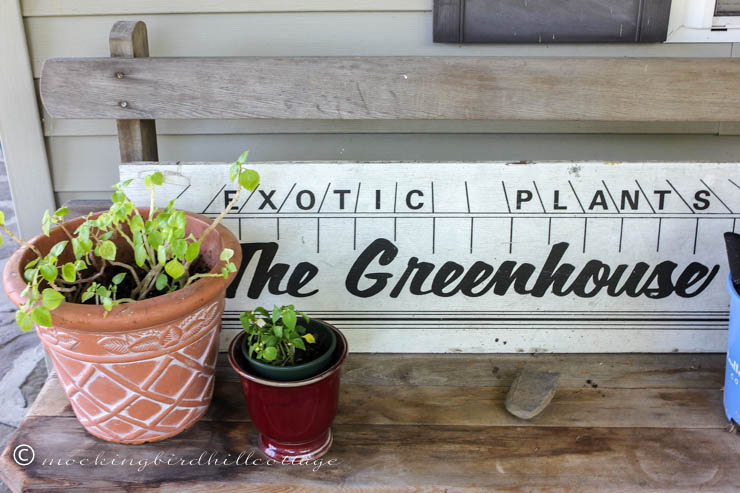
The first thing you see after arriving on the porch is this bench. I got that sign about 7 years ago at an antique shop.

But if you want the entire view of this bench, you’ll see why it functions as a potting/stash/supply area.

greenhouse-bench

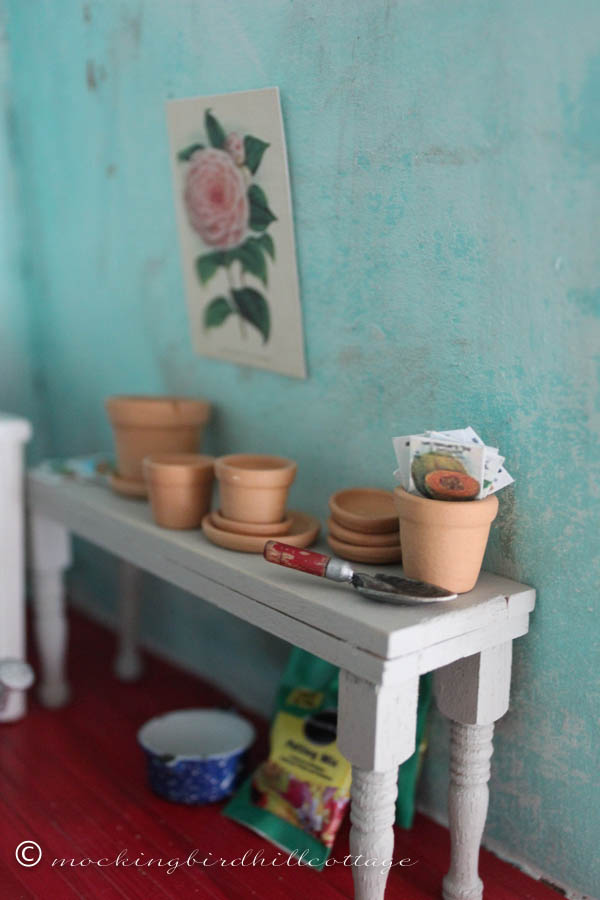
Bags of potting soil, tools, buckets, pots, garden gloves – you name it, it’s there. Unlike the owner of the dollhouse, I don’t have a dedicated shed/room for potting.

The teak furniture that you see was a Don find. Just down the road from us is another road where we would frequently take the dogs for a walk. There’s only one house on that road and the furniture (consisting of four benches- two with backs and two picnic benches, as well as a big picnic table) was sitting out near the road with a For Sale sign. Don negotiated with the owner and we got the whole shebang for $25.

picnic-table

That’s the picnic table.

wrought iron planter

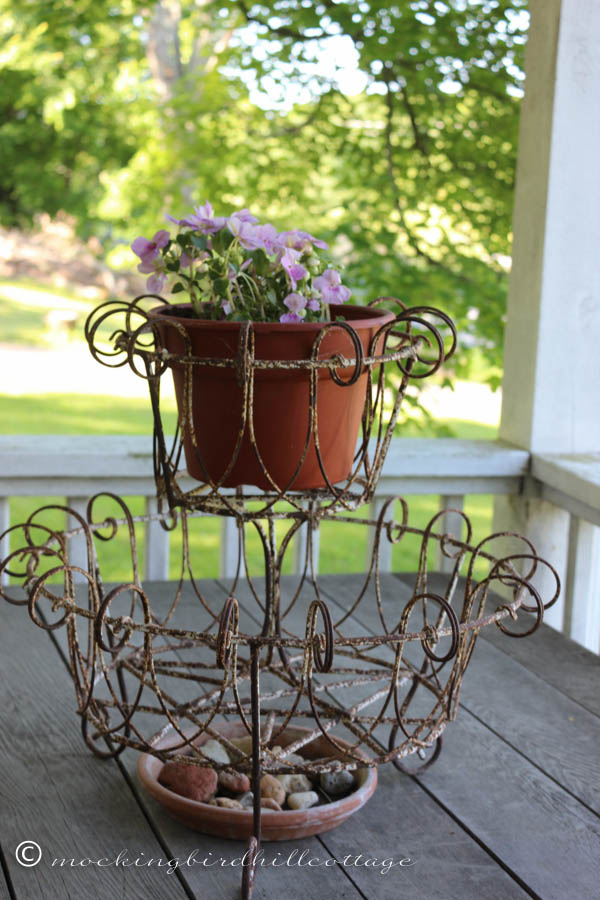
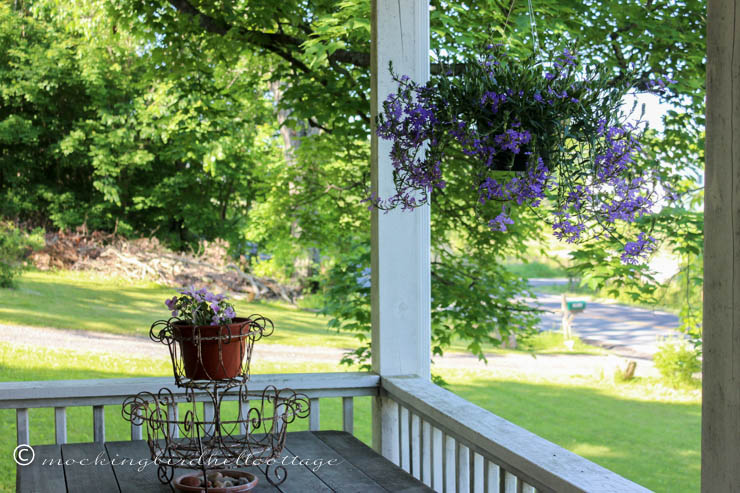
And that’s the wrought iron plant stand or Wrought Iron Thingy (its official name) that I bought several years ago while working in California. I had to ship it home, but it was worth it because I love the way it looks out here on the porch.

wicker-plant-bench

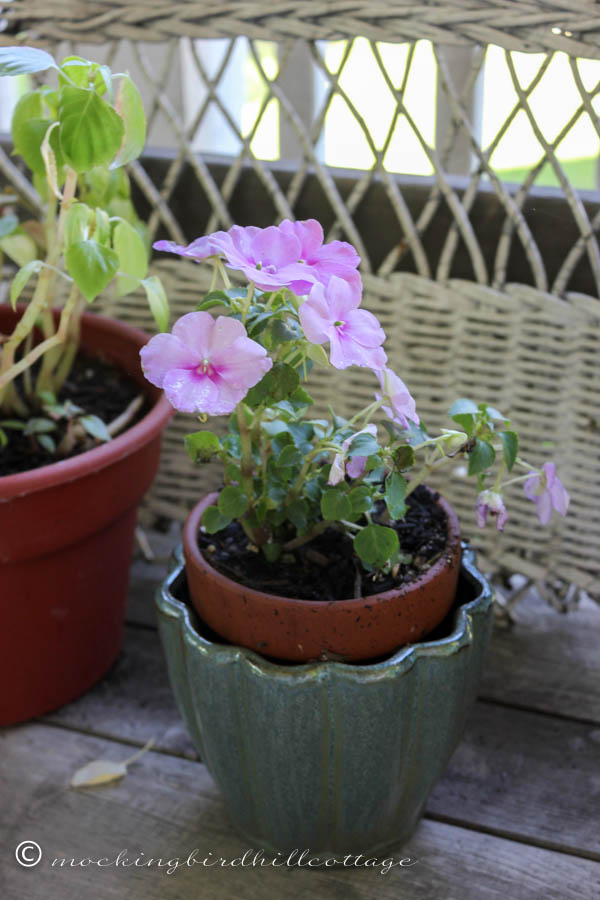
As you turn the corner, there is another bench filled with potted plants and a piece of vintage wicker.

peek-a-boo-clematis

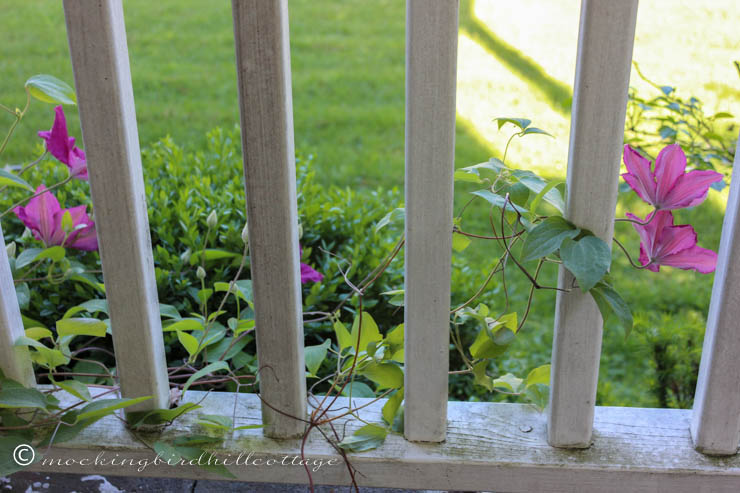
The clematis winds it way in and out of the porch railing. (No, I haven’t cleaned the porch railing yet. And I just may not!)

glider

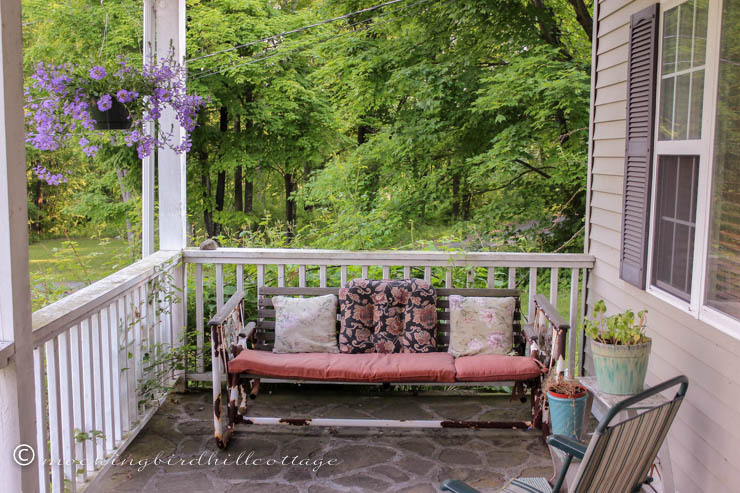
On the far end of the porch is the glider – another $25 Don find from our time living in San Diego. It’s rusty and funky from years of use. I’ve been tempted to paint it, but I like the rust. I like the vintage, weathered look of it. I spend lots of time on this glider. It’s also great for taking a nap. That’s a vintage wooden step stool on the right.

You can see the roses pushing their way through the porch spindles. The garden bed behind the glider is full of hydrangeas and roses and soon they will be framing this view. I’ll be sure to share that with you.

glider corner

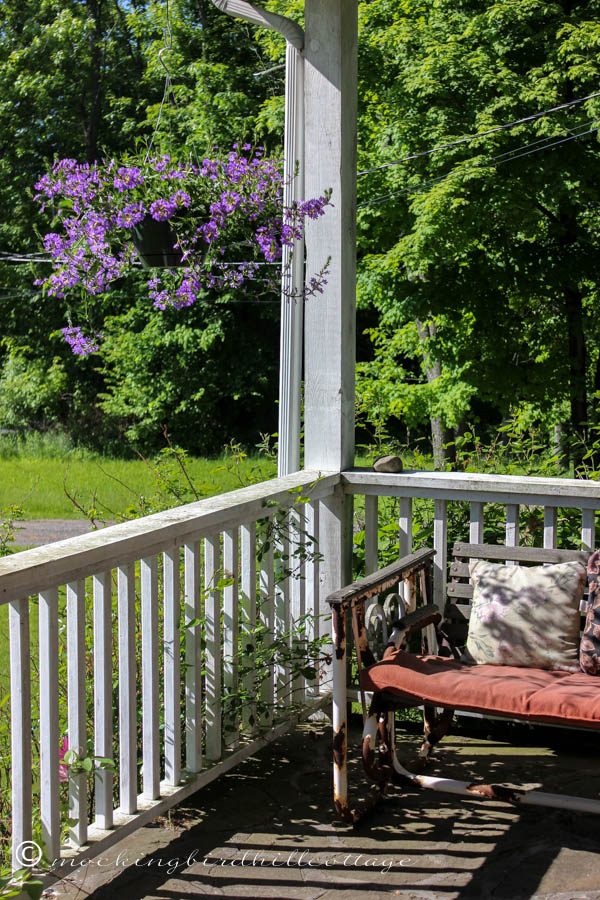
I’m on a strict budget. Actually, even a budget is non-existent at the moment, so I am limited in what I can add to the porch this summer. However, this porch is made for hanging baskets, so I limited myself to two.

I’ve chosen the same plants for the last few years.

scaevola

This is a Scaevola hybrid called Whirlwind Blue. It’s a gorgeous trailing plant and here’s the best part: it lasts all the way to the first hard frost. I have no choice but to be frugal, so I don’t want to use early spring blooming flowers that eventually die in the summer. That means I would have to buy more flowers. No can do.

These babies are beautiful and long-lasting and I don’t have to do a thing but water them.

scaevola-up-close

See? Gorgeous.

If I could, I would have a hanging plant in every framed opening on the porch.

Someday.

I see so many beautiful porches out there in blogland. Many of them have painted floors and never seem to get dirty. They have lamps and beautiful furniture. They have curtains wafting gently in the breeze. I can only surmise that those porches are more protected from the elements than mine. Since my porch is a wrap-around porch and it’s on a little hill, the wind and rain and snow that we get sweeps through, leaving leaves and dirt and snow and ice and rain behind. It’s just not practical for me to have anything too ‘decorated.’ That doesn’t work with our northeastern weather or with the way our cottage is situated. So I do my best to make it naturally beautiful and the teak pieces have been the perfect solution. Simple works best here.

You can see why this is a favorite place to read a book, do some crocheting, drink some early morning coffee or just rock gently on the glider.

The bluestone floor is simply beautiful. The view of the gardens and the property makes my heart sing.

Thanks for stopping by!

(The winners of tickets to the Country Living Fair are Arianna and Cherie. Congrats!)

Happy Tuesday.

ClaudiaSignature140X93

Filed Under: decorating, flowers, porch 61 Comments

Evolution of the Dollhouse – Part 5

May 29, 2014 at 9:30 am by Claudia

dhevolutiongraphic
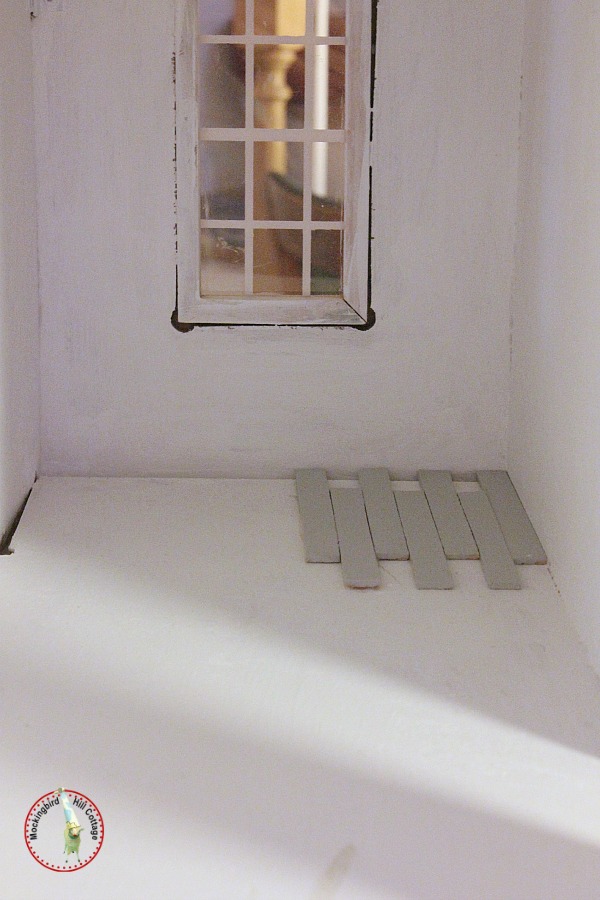
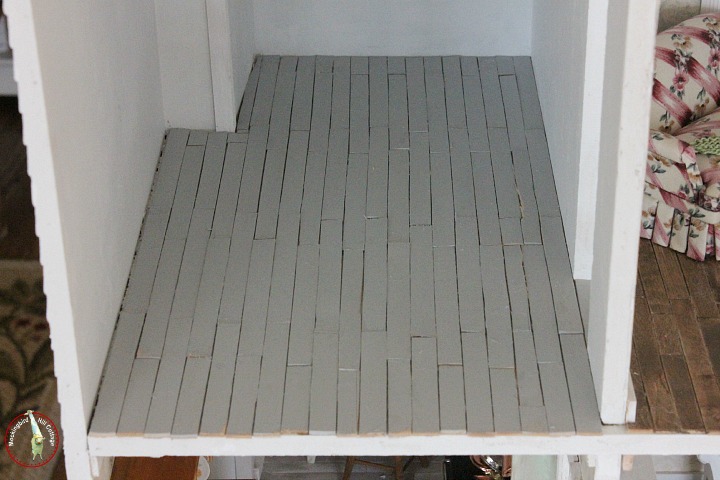
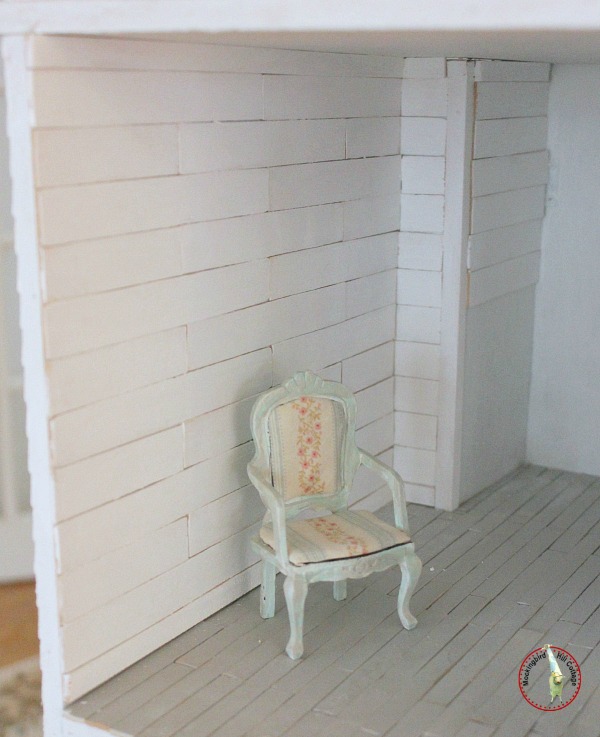
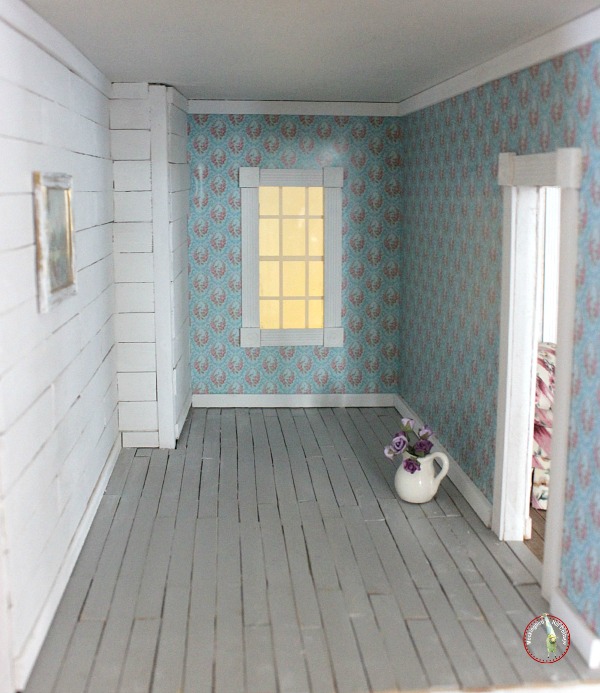
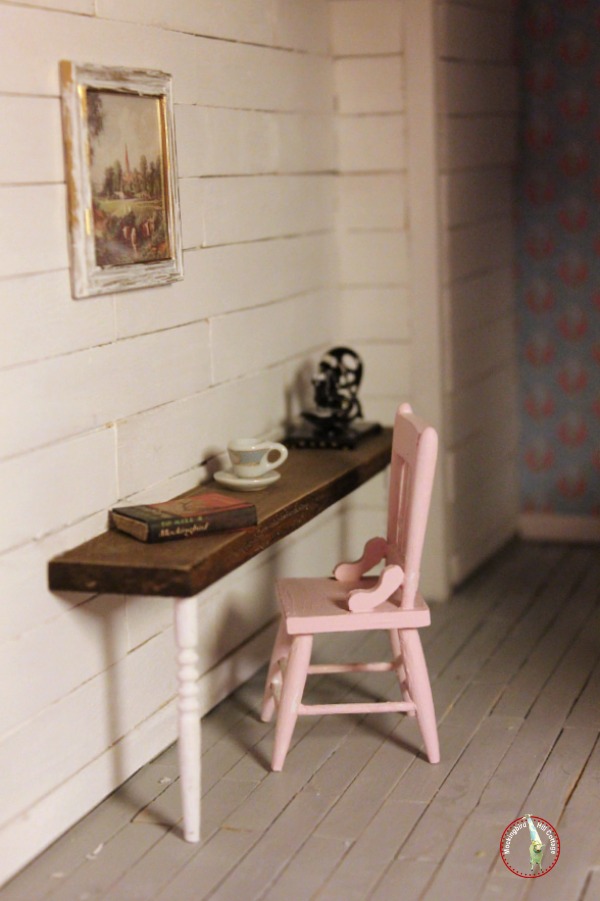
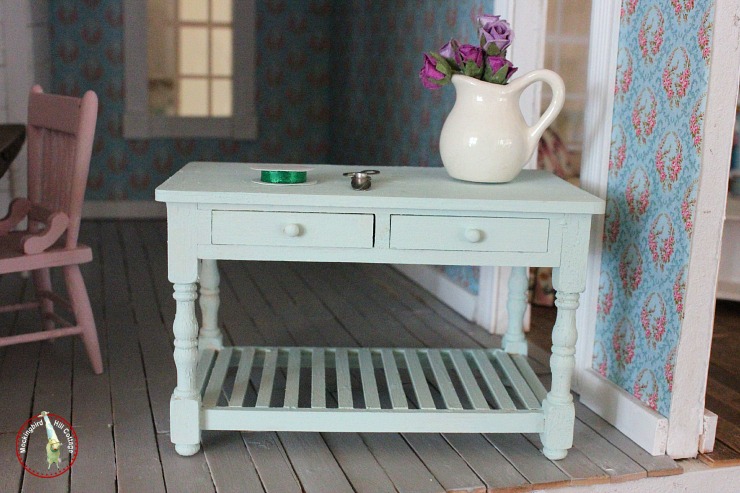
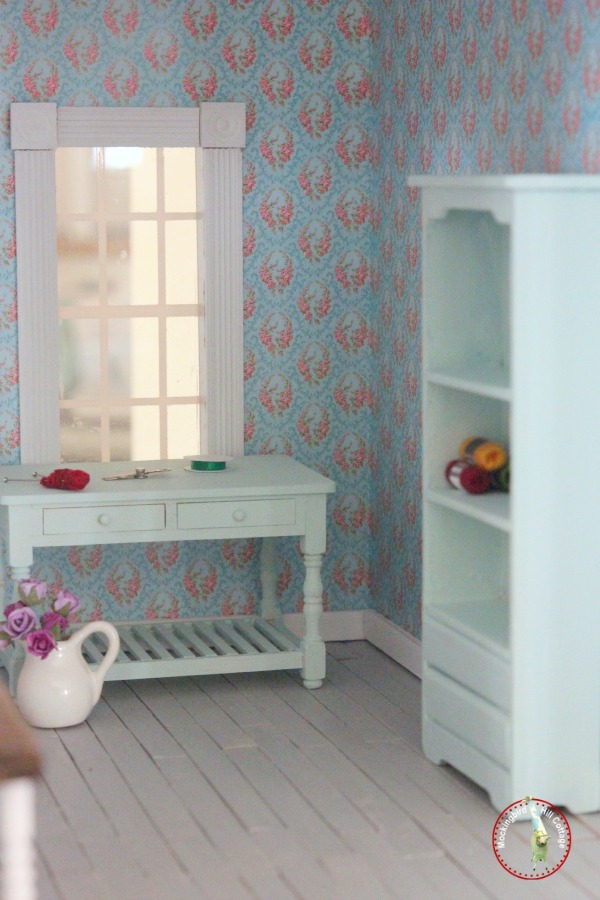
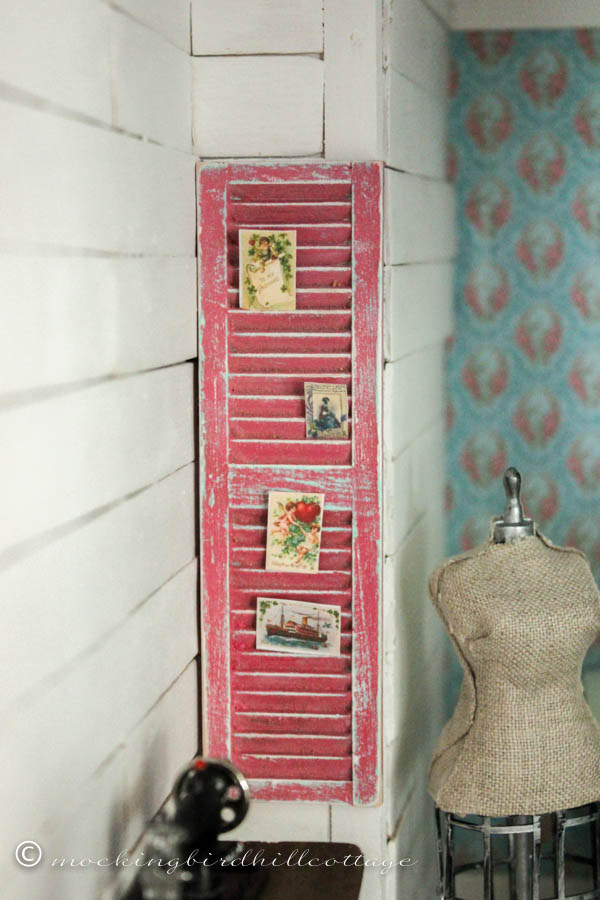
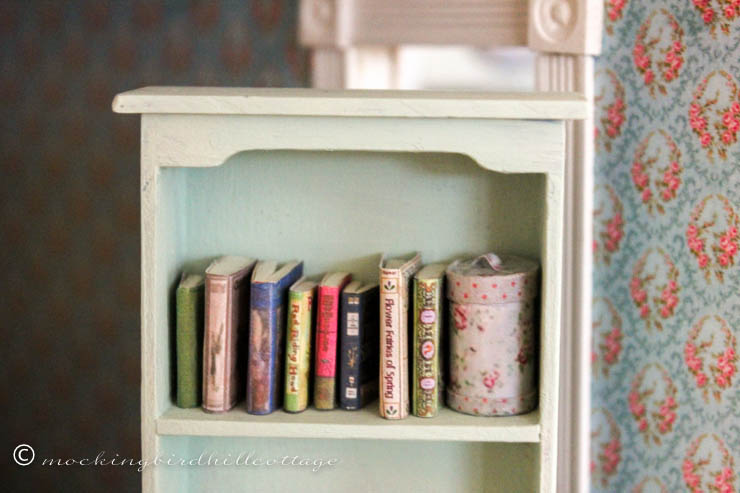
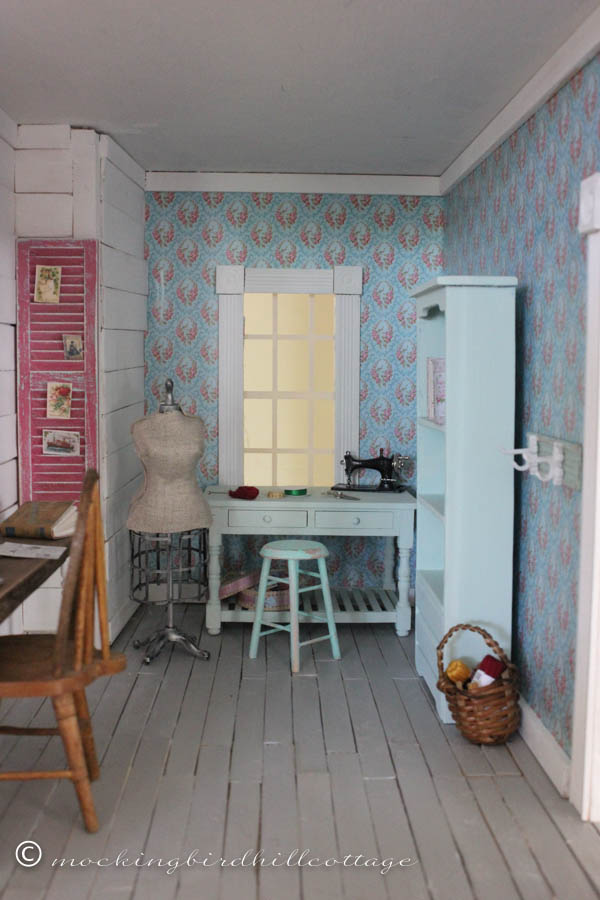
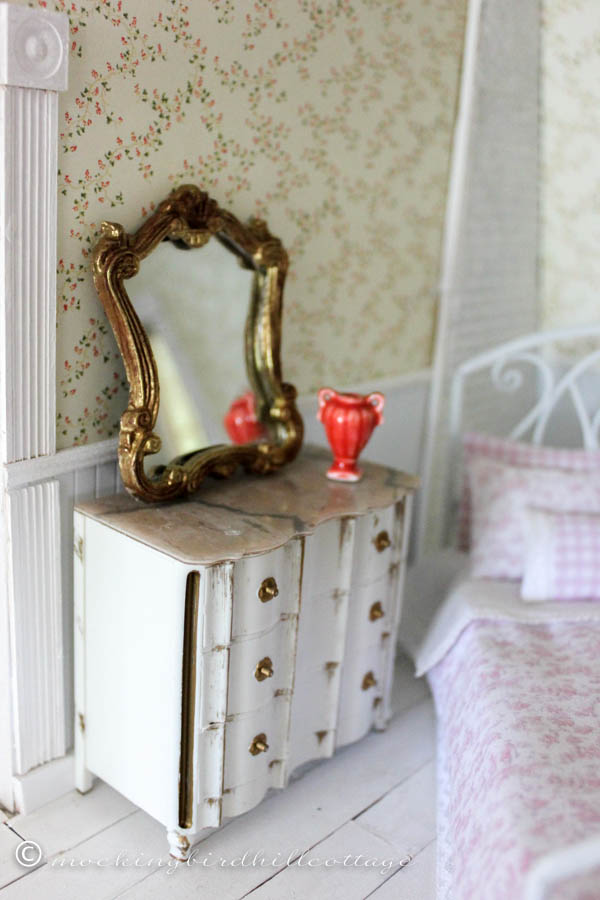
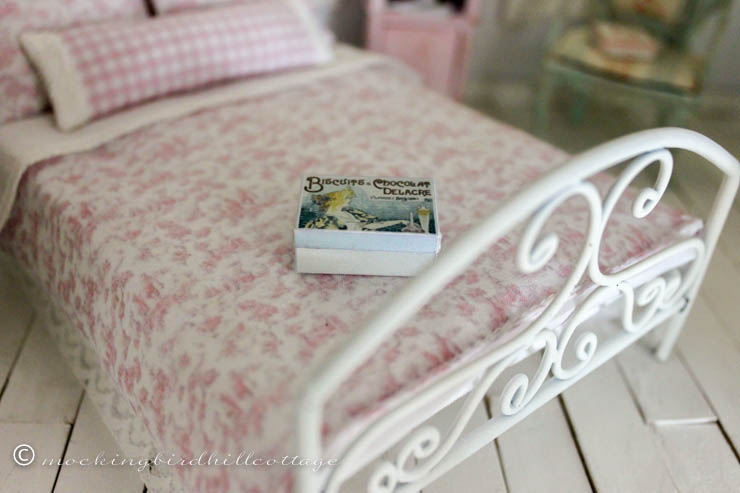
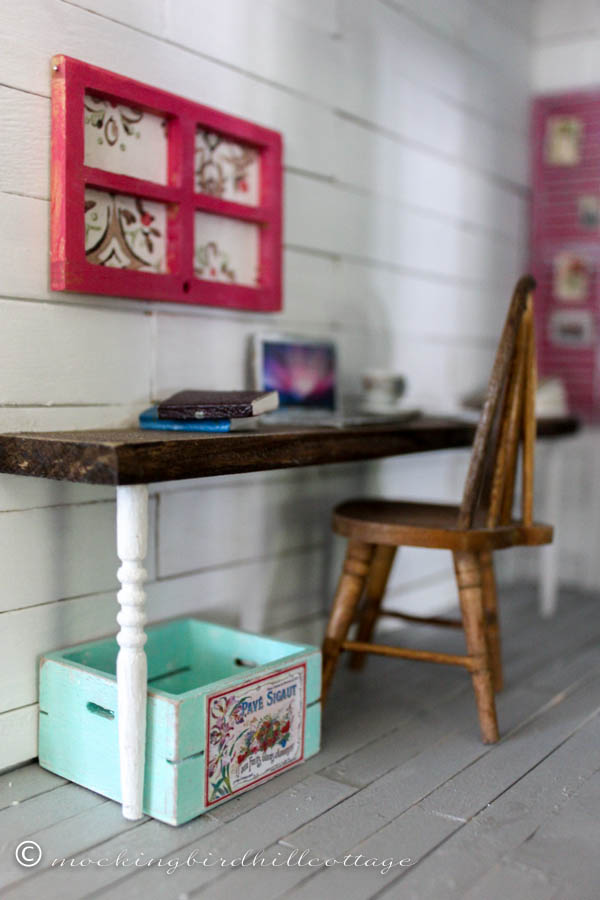
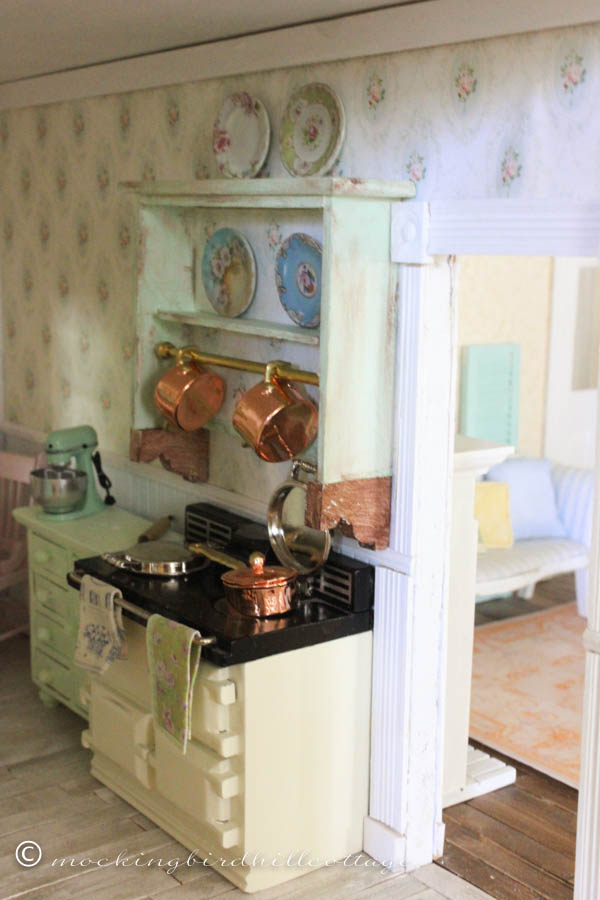
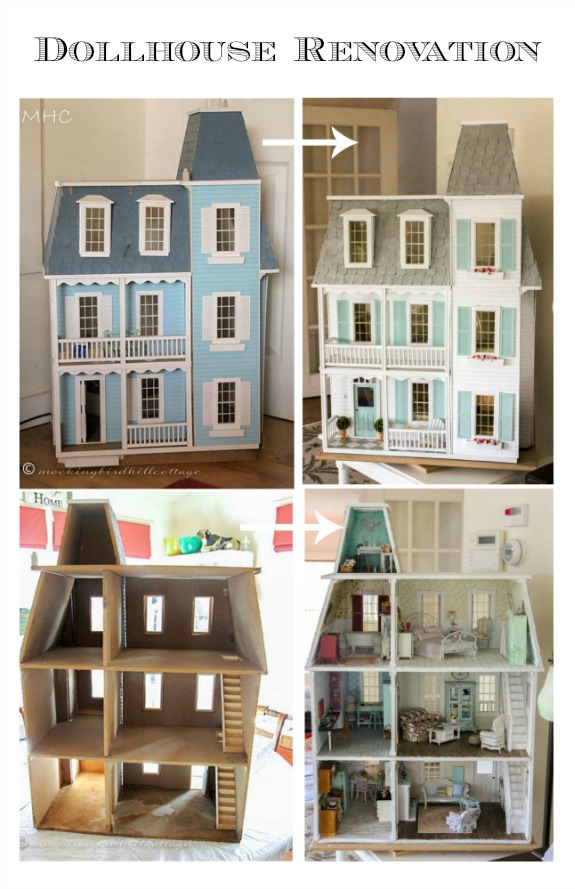
It’s no secret that I’m jealous of the owner of the dollhouse. She has several things that I – let’s just say it – covet. A fireplace, an AGA oven, a wrought iron bed, a potting room/shed and….an office/studio in its own enclosed space. Yes, I have a studio/craft area here at MHC but it’s in the upstairs hallway. So, charming as it is, I can’t go in there and close the door. You see? Envy.

I decided early on that the room on the left on the second floor would be an office/studio. I knew that much. But getting to it took a long time. I didn’t have a specific look in mind, so I wasn’t sure where to start. I decided to start with the floor.

frilayout4

I wanted a painted floor so I went with gray. The idea is that the house is old and a fixer-upper, so sometimes the owner paints the floors, like in the kitchen and bedroom, rather than have them redone.

frilayout3

There are several irregularities in this room. You can see that the corner is a bit wonky. That made for some fiddling with the sticks that make up the floor – cutting and shaping them so they would work.

Still uninspired, the room stayed in this condition for a while, until one day I had an idea. I thought about it for several days before I went for it. I wanted one of the walls to be a planked wall. I see them all over blogland and I love that look. Using craft sticks, this time the ones that are the size of a tongue depressor, I went for it.

dhplankwalls1

And there is the finished product. Adding this really made a difference. Though I flirted with the idea of doing all the walls that way, I decided to stay with one planked wall. So it was time to pick some wallpaper.

tueswallpaper3

I found this French-inspired design on Itsy Bitsy Mini. It would have been too busy for an entire room, especially one without wainscoting, but thanks to the planked wall, it works.

tueswallpaperwholeroom

Then I added the window and door trim, baseboard and molding.

What next? Another little idea I’d had noodling around in my head: a work surface that would extend the length of the planked wall. I measured and cut a thick piece of wood I found in a hobby shop, stained it, and this is what I came up with:

desk1

I used leftover spindles for the legs. My concept was that of a long desk that could be used for office work and sewing.

After that, the rest of the room took shape rather quickly. I bought an unfinished work table and painted it.

worktable

And then I found a bookshelf that was in my stash and painted it to match the worktable.

worktablebookshelf

Then it was time to add some fun details – all from my stash. I love the deep pink/rose color of the flowers in the wallpaper, so I played around with my paints until I came up with something close to that shade. I grabbed one of the many shutters I have in my stash. This one had already been painted aqua (from the early days when I was experimenting with colors for the shutters on the outside of the house,) so I painted it in the new shade, sanded it to reveal some of the blue and hung it on the wall.

mondhshutter

It can be used to hold postcards and notes and mementos. (Don thinks we should do something like this in MHC. I’m inclined to agree with him.)

Since I had the paint already mixed, I grabbed the other ‘window’ that I had on hand from an earlier project. It, too, got a coat of paint and was backed by some vintage wallpaper Elyse had given me.

mondhpinboard

Voilà! A pinboard for the owner, handily positioned above the desk.

And, of course, one of my favorite additions:

mondhdressformunfinished

That black plastic dress form that I fashioned into this:

mondhdressform

Speaking of fiddly work, this definitely falls in that category! But it was worth it. I painted the ‘metal’ part of the dress form with Rub n’ Buff in silver, made a spindle out of the wooden part of a Q-tip, and used some linen fabric that I had in my stash to cover the body.

mondhdressforminplace

I’ve also been making miniature books:

dhbooks

I have a lot more to go!

dollhouse-acupoftea

I made a MacBook Pro laptop (like the one I use to write this blog) from a printable I found online. Added a teacup and saucer and some paperwork. And, of course, the coat hook/rack that I made for the Mini Swap that I’m a part of.

dollhousestudio

And here you go! This is pretty much the current state of the room. Oh! I forgot the work stool that is a very recent addition. I got it unfinished from miniatures.com and painted/sanded it to make it look nicely aged.

Still have to get a rug. And some lights. And some bolts of fabric. And make more books. And….and….

You get the picture. It’s always a work in progress.

Part 6 will concentrate on the Potting Room/Shed.

Happy Thursday.

ClaudiaSignature140X93

Tagged With: decorating, dollhouseFiled Under: decorating, DIY, dollhouse 50 Comments

Interiors

May 21, 2014 at 8:14 am by Claudia

Because I’m in the mood…some interior views of the dollhouse:

mirrorindollhousebedroom

dollhousestudio

boxofbiscuitsondollhousebed

The box of biscuits was made by Norma.

dollhouse-acupoftea

dollhousearmoireinden

dollhousecrateunderdesk

dollhouseaga

dollhousekitchenandbowl

dollhousewoodenbowl

A closer look at that wooden bowl. From Weston Miniatures/Etsy.

dollhousepottingtable

dollhouse-bluebirdcup

dollhouseknittingbasket

Capturing dollhouse details can be a challenge, but it’s awfully fun. I haven’t done very much with the dollhouse in the past week or two. Funds are a little tight at the moment; in fact, I had a potential Etsy order all ready to be submitted when I decided to put it on hold. And, of course, the outdoors and my garden are calling me much of the time. As it should be.

We took another five mile hike yesterday. The last quarter mile or so is the hardest. At that point, both Don and I find ourselves hoping against hope that the end of the trail is just around the bend. But we did it. It was a gorgeous day and perfect for hiking.

The county is doing some work on our road in preparation for repaving it in the next month or two. So they’ve been working on all the culverts that run beside the road. We have one in front of our house. As I saw the machinery they were using yesterday (they haven’t reached our culvert yet) I got a little panicked because the peonies and a hickory tree and our bridalwreath spirea are all right next to the culvert. Don talked to the guys and they assured us that all would be safe, but not before I had made a little sign asking them to be careful when working around the plants. The peonies have been there for years and I couldn’t bear it if something happened to them.

I mean, look what I saw yesterday:

peonybud

Peony buds, complete with the obligatory ant.

Soon!

Happy Wednesday.

ClaudiaSignature140X93

Filed Under: decorating, DIY, dollhouse, Peonies 60 Comments

  • « Previous Page
  • 1
  • …
  • 32
  • 33
  • 34
  • 35
  • 36
  • …
  • 90
  • Next Page »
  • Email
  • Instagram

Welcome!

Welcome!

I live in a little cottage in the country with my husband. It's a sweet place, sheltered by old trees and surrounded by gardens. The inside is full of the things we love. I love to write, I love my camera, I love creating, I love gardening. My decorating style is eclectic; full of vintage and a bit of whimsy.

I've worked in the theater for more years than I can count. I'm currently a voice, speech, dialect and text coach freelancing on Broadway, off Broadway, and in regional theater.

Thanks for stopping by.

Searching?

The Dogs

The Dogs

Scout & Riley. Riley left us in 2012. Scout left us in February 2016. Dearest babies. Dearest friends.

Winston - Our first dog. We miss you, sweetheart.

Lambs Like to Party

Lambs Like to Party

A Note

Thanks for visiting! Feel free to browse, read and enjoy. All content is my own; including photos and text. Please do not use anything on this site without permission.

Disclosure/Privacy Policy can be found in the Navigation Bar under ‘About MHC.’

Also, I love receiving comments! I do, however, reserve the right to delete any comment that is in poor taste, offensive or is verging on spam. It’s my blog. If you’re a bot or a troll you’ll be blocked. Thanks!

Archives

All Content © 2008 - 2025 Mockingbird Hill Cottage · Log in