Mockingbird Hill Cottage

Mockingbird Hill Cottage

  • About MHC
    • Disclosure
  • Dollhouses/Minis
    • Hummingbird Cottage
    • The Studio (Formerly TSP)
    • Dove Cottage
    • The Lake House
    • The Folk Art Dollhouse
    • The Modern Dollhouse
    • The Beacon Hill Dollhouse
    • Dollhouse Source List, Information and Tutorials
  • On the Road
  • Collecting
    • Roseville Pottery
    • McCoy Pottery
    • Egg Cups
    • Bakelite
  • Press
  • Privacy Policy

The Reveal: Doily/Industrial Swag Light

February 3, 2012 at 9:00 am by Claudia

Yesterday: I’m home sick with a bad cold, Don leaves for an audition in the city, I stare at the doily covered lampshade sitting on kitchen table. I blow my nose. And stare some more. About 30 seconds later, I am out of the blogging chair and on my way outside for the ladder. Then I’m measuring cautiously and wondering just where to drill. Then, true to form, I just go for it. I install the toggle bolt in the ceiling (pretty easy, after all) and after much adjustment, the lamp is up!

It was an impossibly gloomy day, but I was excited to show you some photos so I went ahead and took some anyway.

I originally had the cord swagged to the right of the window. However, that stretched the 15 foot red cord so much that I was going to have to use an extension cord. And if I used an extension cord, the original red cord wouldn’t be as taut as it needs to be. So after much drilling and redrilling (now I have to spackle those holes) I ended up swagging the cord to the left. I rather like it swagged at an angle.

The lamp is hanging a bit lower now than it was when I took this picture. I’m still tweaking.

It’s so much easier for me to embark on these DIY adventures when Don isn’t around. I wonder why that is? I guess I don’t have to answer questions or explain myself and I can make a mess without worrying that I’m disturbing him. And then when he comes home, it’s done, without discussion. I know you understand.

From the other side of the table. By the way, I attached the doilies with some hand quilting thread, which is nice and strong. I tacked them to various parts of the frame and to each other.

Another view. I promise to take more photos when it’s sunny.

I briefly considered going with a drum shade. I like the look of them. But, they’re everywhere nowadays and, for better or worse, if everyone is doing something I tend to go in the opposite direction.

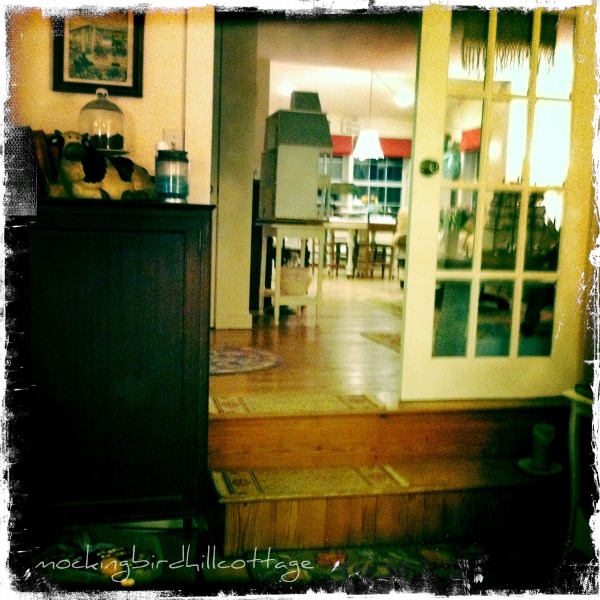
I really love this funky little light. And when I look at it from the den, I see that it hangs smack dab in the middle of the archway that leads into the kitchen. Perfect.

Cost:
Lamp frame: I had it on hand. I ripped off the old fabric, which was stained and ugly.
Doilies – I think one was $3 and the other was $2. The third doily was in my stash.
The cloth covered cord and socket kit from Shandell’s was my biggest expense, but it was worth it. Where else could you get a red cord, I ask you? I chose the 15′ cord which was a bit higher in price. The cost of the kit was $49.00.

By the way, I’ve looked at various other hanging cords and they are all plastic and look like they should be hidden behind a table or covered with those cloth sleeves that people use to disguise hanging cords. Susan’s cords are cloth-covered and handsome. They enhance the lamp.

So, basically, I got a hanging light for my kitchen without the cost of an electrician. The whole thing was a little over $50.00.

A little later in the day. Note spackle on table.
If you’d like, I can put together a tutorial in a few days. Let me know.
Even though I was home sick, I sure had a lot of fun! Don came home around 7 p.m. I arranged it so that just the hanging light was on – he loves it.


Filed Under: decorating, DIY 49 Comments

Thrifty Living 2012 – Saving Money on Gas

February 2, 2012 at 9:00 am by Claudia

Ah yes. Gasoline. It keeps going up, up, up in price. As does home heating oil. We use both. I don’t know what gas prices are in your neck of the woods, but it’s about $3.72/gallon here. $3.65 if you pay with cash. Right off the top of my head, here are my ideas about saving money on gasoline.

Tip #1 – Pay at the pump with cash if you can. We are guilty of using our card when we buy gas. Today, I had to put some gas in the car and I had some cash in my wallet. I definitely saved a bit of money.

Tip #2 – Get your oil changed regularly. We have an older car – a 2001 Honda CR-V. Hondas are great cars and ours is pretty solid. One thing we make sure we do is get the oil changed every 3000 miles. Someone once told me that if the only thing you do is get your oil changed regularly, you’re way ahead of the game with your car. Dirty oil has an affect on gas mileage.

Tip #3 – Make sure your tires are inflated correctly. Tires that are overinflated or underinflated can mess with your gas mileage. And with your tires.

Tip #4 – Do all your errands at one time. This is a big one for me. We have one car. Don uses it to go back and forth to work and that uses up a lot of gas. When he was training for his job, he would encourage me to drop him off, take the car home, and then go back at the end of the day to pick him up. I did it occasionally when I needed the car. But mostly, I actively discouraged doing it because that made for two round-trips instead of one. A waste of gasoline.

Here’s another example: Yesterday, I went to Trader Joe’s. I was sick with a cold, knew I had to get some food in the house and decided to do it sooner rather than later, as I tend to feel worse the second or third day of a cold. So I sat down and figured out what else I needed: to go to Michael’s, Lowe’s, the bank and Target. All quick stops and all on the way to the highway that takes me to Trader Joe’s. It made for a long day, but I ultimately saved on gas because I did everything at once.

If we need to deposit a check in our local bank, I have Don do it at the branch that is on his way to work, rather than make an extra trip in the other direction to our home branch.

Tip #5: No fast starts and stops. Steady is the key. I learned that a long time ago, as I used to have a lead foot. Those starts and stops waste a lot of gas.

Tip #6: If you can shop online, do that rather than use gas for endless trips to the mall. It’s far less stressful, to boot. You can sit, sipping tea, at your home computer. No traffic jams, no crazy drivers. Less money spent on gas.

Tip #7: Think twice before you hop in the car. Don and I often decide whether or not we should do something (drive into the city, go to Trader Joe’s) by how much gas the trip might use. The only way I can validate a trip to TJ’s is if I run other necessary errands along the way. We no longer take spontaneous drives (unless it’s in the neighborhood.)

Tip #8: If you can, get rid of your gas-guzzler. Some cars are just plain gas eaters. And no one except the wealthy can afford that nowadays.

As for home heating oil, which I’m including in this post because it’s all oil, many, many homes out here in the East use home heating oil. I grew up in Michigan where we had a gas furnace. Not here. So we have regular deliveries of heating oil to pay for. And if gasoline prices are going up, you can rest assured that home heating oil prices are also going up. Thankfully, this mild winter has saved us some money.

Tip #9: Keep your heat turned down and wear layers. Definitely turn your heat down at night. You’ll save a lot of money. Also, do the usual energy checks: are there drafts, is cold air leaking in anywhere? We use those draft snakes at the base of both our outside doors. They really make a difference. Turning the thermostat down a degree or two will make a big difference in your heating oil costs.

Please feel free to share any tips you might have on this subject. We can all learn from each other. And please visit Brenda, Jen, Elaine and Diane (the rest of the Frugal Five) for their ideas on this subject.

Filed Under: thrifty, thrifty living 2012 36 Comments

Photo Editing, Flannel PJ’s & a Cold

February 1, 2012 at 10:44 am by Claudia

:: That darn husband of mine has passed his cold on to me – for the second time in six months. I could feel it coming on last night. Most years, I don’t get a cold – this year? Two.

:: Other than that, the hanging lamp has been tweaked and I love it. I have to hang it today or tomorrow and promise to show you photos as soon as I can. Thank you for all your support – isn’t it wonderful having a lot of friends all over the world to share projects with? Kindred spirits are treasures, indeed. By the way, when I showed the lampshade to Don, this was the conversation:

Me: Do you like it?
Silence.
Me: Do you hate it?
Don: I don’t hate it.
Me: Well, what do you feel?
Don: I’m…neutral.
Me: I’ll take neutral.

:: Before I forget, please drop by and visit my friend Regula. She read the post about flannel pajamas, which are apparently hard to find in Switzerland. So she made some! I think that makes her an honored member of the Flannel Pajamas Club, don’t you? They’re really cute and she looks adorable in them.

:: I promised to update you as I found more photo editing software online. Today, I played with Pixlr and Pixlr Express. Pixlr reminds me of Photoshop Elements and works much the same way. To tell the truth, it was a tad confusing (to me) and has a bit of a learning curve. But it’s free.

Howeve, Pixlr Express was fast, fun and easy. I’ve been trying to take good photos for Etsy. (I’ll share that story with you another time.) So I had this photo on hand and thought it would be fun to play with.

This is a little toothpick holder I plan to sell.

Here’s what I came up with. I resized the photo. (Always remember to resize your photos so that they don’t take up too much storage space!) I used an effect called Hagrid to get this vintagy kind of look. Then I added a border design called Wispy. And a watermark. Not necessarily what I would do normally, but I like to play on these new-to-me sites.

Pixlr Express has the basic necessities: color, contrast, crop, resize, touch-up, auto-fix. It also has lots of fun effects and borders. It’s extremely user-friendly.

I did all this in about 3 minutes, because that’s all the exploration time I have today. I think you might like this site. At the very least, it’s another possibility for our online photo editing needs.

I’m off to blow my nose. The nose that will turn red shortly. It always does.

Filed Under: blogging tips, decorating, DIY 29 Comments

  • « Previous Page
  • 1
  • …
  • 1549
  • 1550
  • 1551
  • 1552
  • 1553
  • …
  • 1850
  • Next Page »
  • Email
  • Instagram

Welcome!

Welcome!

I live in a little cottage in the country with my husband. It's a sweet place, sheltered by old trees and surrounded by gardens. The inside is full of the things we love. I love to write, I love my camera, I love creating, I love gardening. My decorating style is eclectic; full of vintage and a bit of whimsy.

I've worked in the theater for more years than I can count. I'm currently a voice, speech, dialect and text coach freelancing on Broadway, off Broadway, and in regional theater.

Thanks for stopping by.

Searching?

The Dogs

The Dogs

Scout & Riley. Riley left us in 2012. Scout left us in February 2016. Dearest babies. Dearest friends.

Winston - Our first dog. We miss you, sweetheart.

Lambs Like to Party

Lambs Like to Party

A Note

Thanks for visiting! Feel free to browse, read and enjoy. All content is my own; including photos and text. Please do not use anything on this site without permission.

Disclosure/Privacy Policy can be found in the Navigation Bar under ‘About MHC.’

Also, I love receiving comments! I do, however, reserve the right to delete any comment that is in poor taste, offensive or is verging on spam. It’s my blog. If you’re a bot or a troll you’ll be blocked. Thanks!

Archives

All Content © 2008 - 2026 Mockingbird Hill Cottage · Log in