Mockingbird Hill Cottage

Mockingbird Hill Cottage

  • About MHC
    • Disclosure
  • Dollhouses/Minis
    • Hummingbird Cottage
    • The Studio (Formerly TSP)
    • Dove Cottage
    • The Lake House
    • The Folk Art Dollhouse
    • The Modern Dollhouse
    • Dollhouse Source List, Information and Tutorials
  • On the Road
  • Collecting
    • Roseville Pottery
    • McCoy Pottery
    • Egg Cups
    • Bakelite
  • Press
  • Privacy Policy
You are here: Home / Archives for dollhouse

Your Dollhouse Questions Answered (An Occasional Series)

May 24, 2014 at 9:42 am by Claudia

dollhousequestions

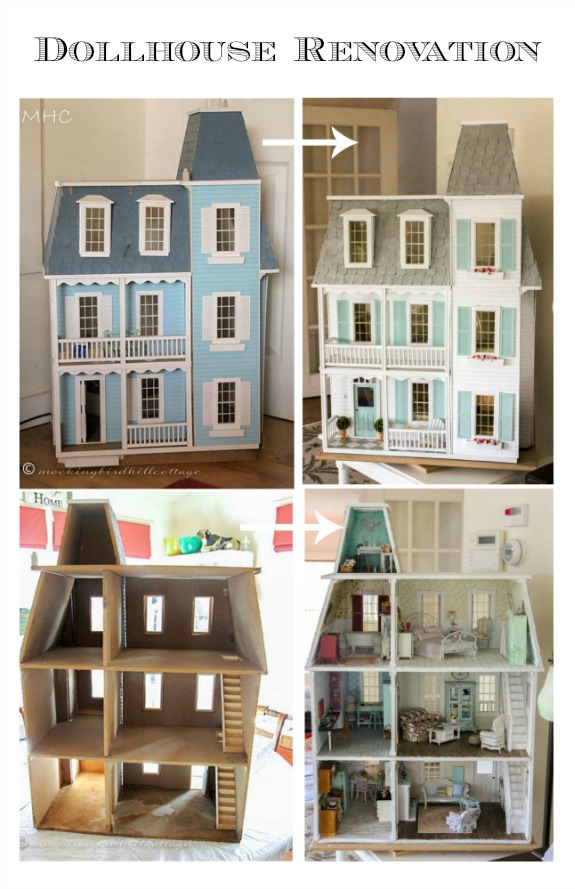
I often get questions from you concerning dollhouses and miniatures. Many of you are just about to rehab an existing dollhouse or are searching for a dollhouse of your very own. Most of you are beginners, just like me (though I can now say I have a little experience under my belt!)

Not long ago, I asked you to email me with any questions you might have and Debbie from Oregon did just that. Today, I will focus on her questions and, hopefully, provide you with some basic information.

Okay, Debbie, take it away!

1. When you did your wallpaper, how did you keep it from sticking to your already installed doors and windows?

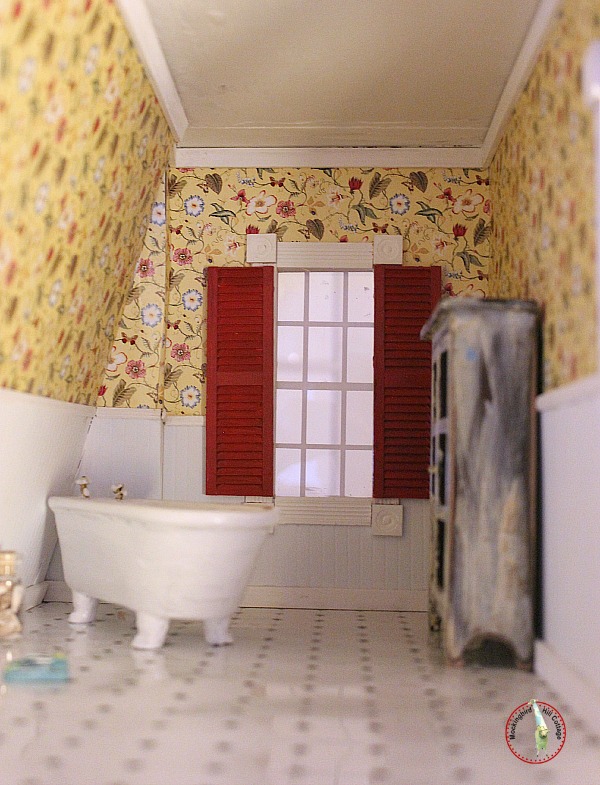
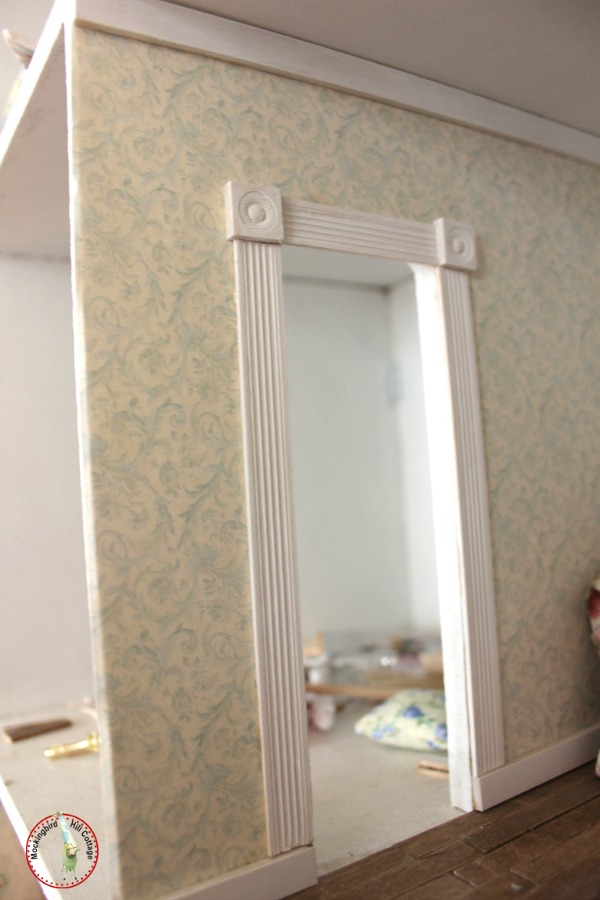
Good question! If you’re assembling a dollhouse, you are often advised to paint the walls and/or wallpaper before you put a room together. But what about those of us who find a used dollhouse, already assembled? We have to work with what we’ve got. In my case, the windows are doors were already there, but were untrimmed. So I made a template of each wall and cut the wallpaper to match the template. I used dollhouse wallpaper paste and attached the wallpaper, smoothing it with the side of a credit card. Then I took an exacto knife and cut around the window frames, as well as the doors. The only door that might have been a potential problem was the front door but I managed to work around it without any paste getting on the door. Then I attached the window and door trim.

You can also make a template that allows for the windows and doors. Take a piece of paper, trace the dimensions of the wall on the paper and at the same time, trace each window and door. Make sure you also take measurements so that when you fine-tune your template, the dimensions of the windows and doors are accurate. Then cut out your template. You can then take an exacto knife and cut out the openings for the doors and windows and transfer all of that to the wallpaper itself, making the same cuts for the windows and doors.

Some miniaturists attach wallpaper to card stock and paste the card stock to the wall.

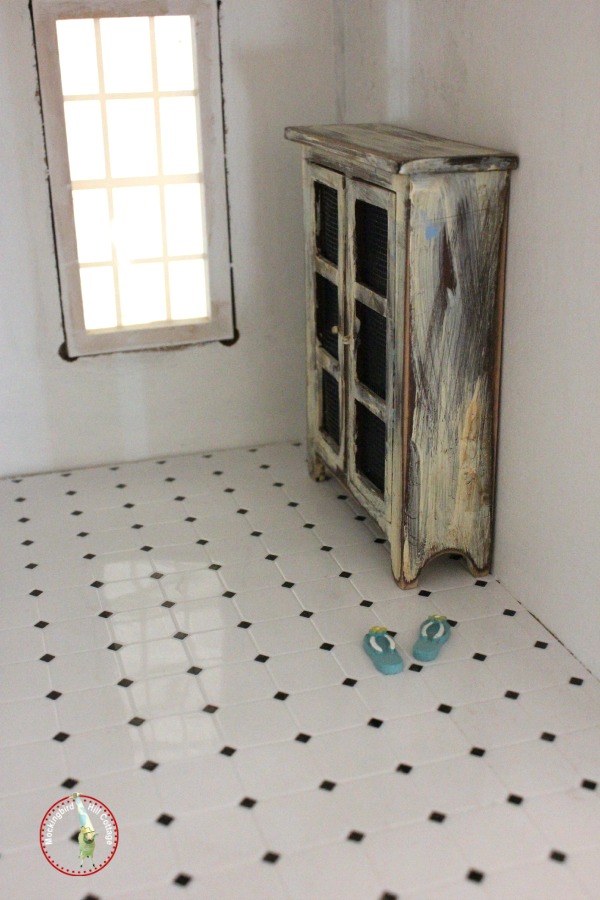
2. Do you recall the name of the glue you used to do your repairs/re-gluing of things like your outside shutters and such? I have quite a few repairs to make to the outside of my dollhouse. Even though it was packed well for shipping, my entire front porch fell off! None of the pieces are broken, but I want to use a good adhesive when I start the repairs.

glues for miniatures

There are many adhesives out there and miniature websites carry a wide variety of them. Early on, I searched the web for advice on just this subject and ended up using these products.

Quick Grip is an all-purpose permanent adhesive with the consistency of airplane glue and I use it all the time. You can find this at any craft store.

Tuff & Tacky is a white glue that dries clear.

I tend to use Quick Grip for the heavy duty things – I used it when I moved the tower at the top of the house to its proper place. I used it on all of the shutters. I used it when I replaced the front door. I’m pretty sure I used it when I was building the staircases. And I used it when I installed the skylight in the ceiling of the potting shed.

I use Tuff and Tacky, too. It just depends on the job. I like the white glue for working on furniture.

Every miniaturist has a favorite adhesive and a quick search of Google will give you even more possibilities.

3. How do you decide what to attach permanently and what to attach with the sticky museum wax stuff? Did you permanently attach your fireplace? Your kitchen sink/counter unit?

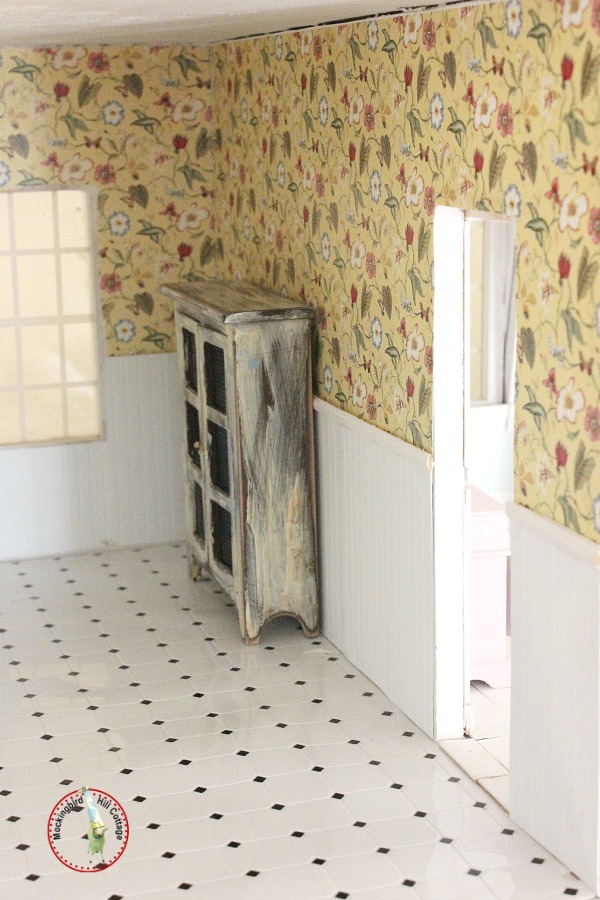
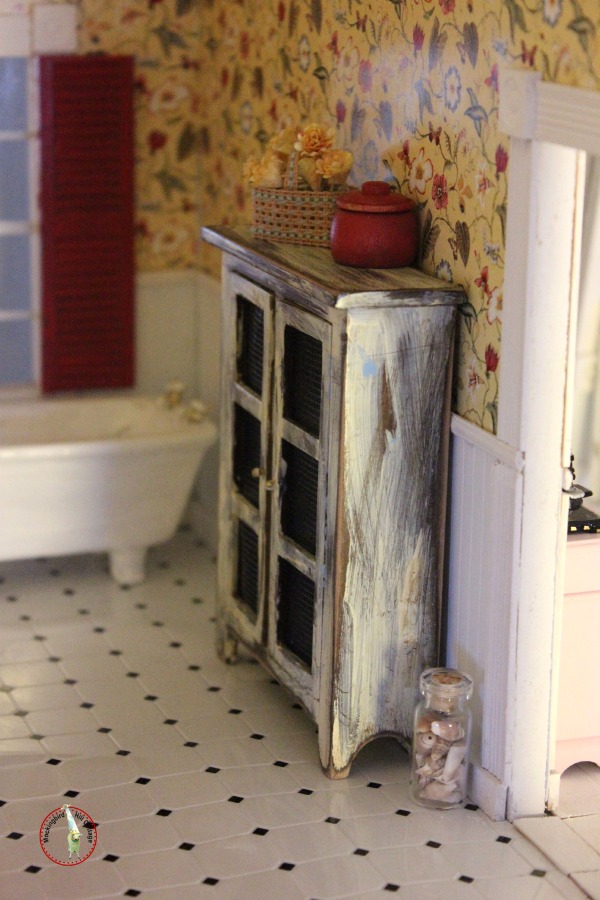
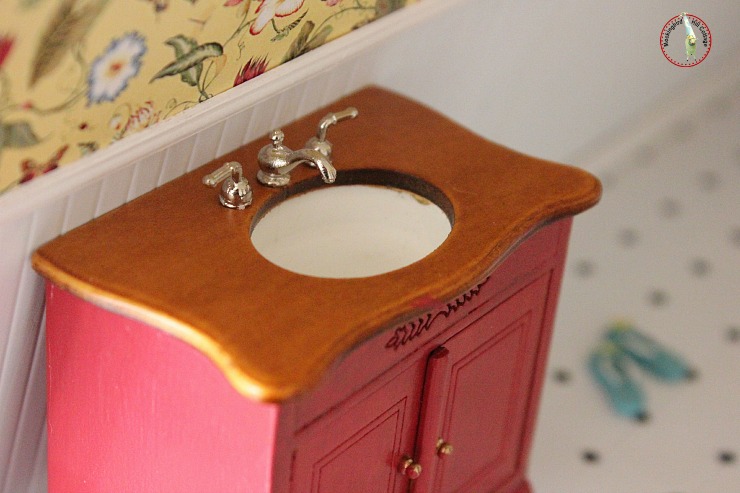
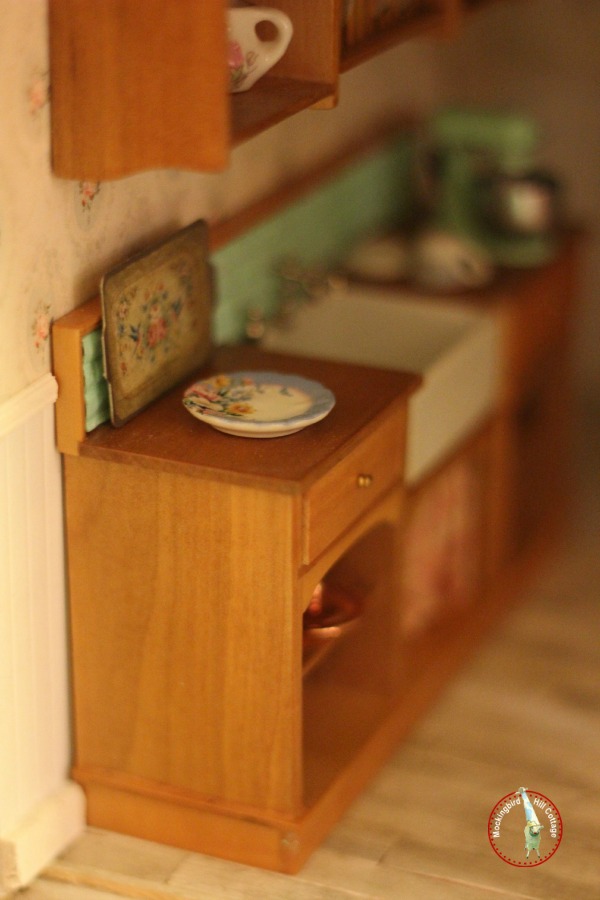
Oh, what a good question! The answer will most likely be different for everyone. I have not attached the kitchen unit or the fireplace permanently. I want to be able to get to them and the kitchen unit is in a very confined space. Adding things to it is tricky – my fingers can’t always reach the areas under the sink. Being able to pull it out and add things is much easier.

Same for the fireplace. It has little shelving nooks on the far end and I could never get to them if it was glued in place.

I think you have to allow yourself the room to be flexible. What if I wanted to move the fireplace to another wall? If it was glued in place, moving it would impact the wallpaper and the floors.

Having said that, I use this stuff all the time:

wax

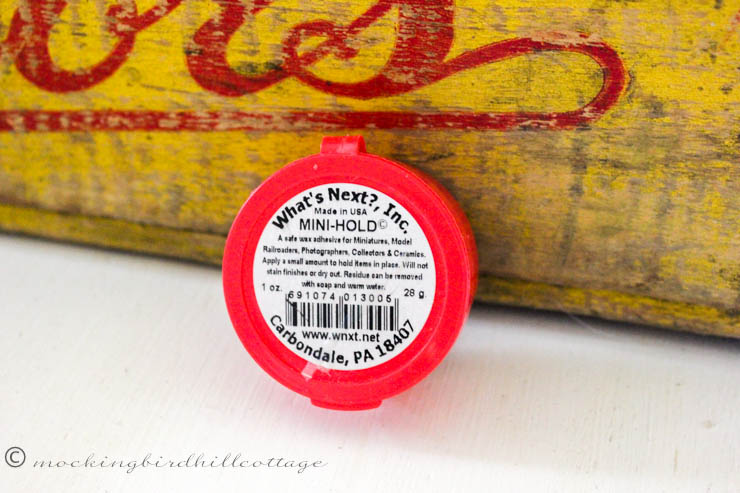
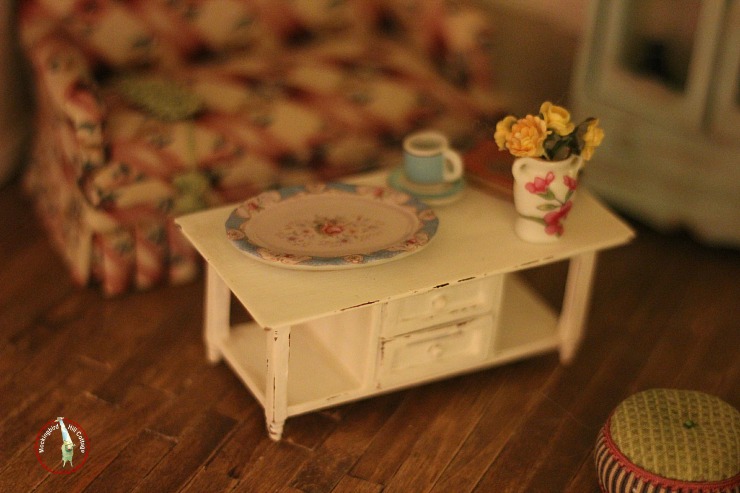
I got it through miniatures.com and it lasts a long time. You can also use museum wax. This particular wax doesn’t leave any residue on floors or wallpaper. I use it to hang plates and pictures, to keep little things like vases and cups from falling from table surfaces. Since my dollhouse is still in the ‘creation’ stage, I don’t always attach things because I often haven’t settled on a permanent solution. I’m still playing. But this reminds me that I want to use some wax to attach those planting pots to the surface of the potting table. I’ve already had a couple of them break.

If you move your dollhouse around a lot, then you might want to attach furniture and pieces like the fireplace with some wax. Sometimes Don or I bump into the dollhouse and all the little pieces that are on tables and countertops fall and that can be annoying!

4. What did you use to attach the flowers to your window boxes? And where did you find the flowers you used? I’ve looked for flowers at Michael’s and in the craft section of Walmart, but can’t find what I like that is small enough.  I know they have a lot of options on miniature sites, but those flowers seem a bit spendy.

Another good question, Debbie! Early on, I was fortunate to be given a gift by a blogger who is a fantastic miniaturist. She sent me all sorts of things that she had in her stash and among them were lots of flowers. Wasn’t I lucky? I quickly learned that there is a difference between the kind of small flowers you can get at Michael’s and flowers that match the 1:12 dimensions of a dollhouse.

contrasting flower sizes

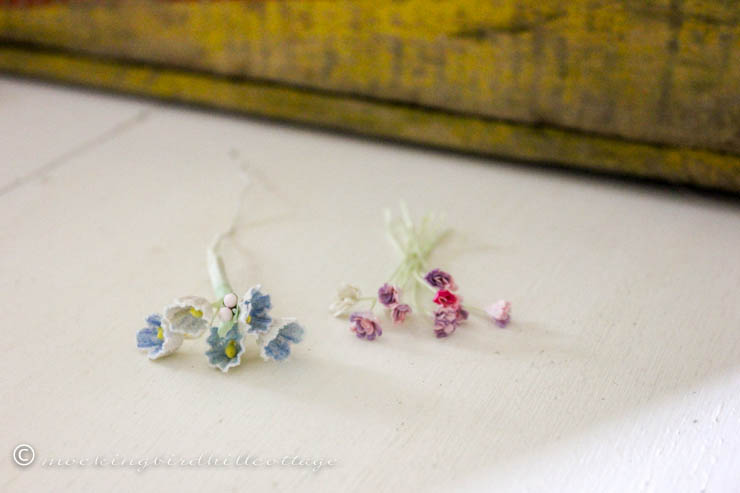
On the left, sweet flowers that many of us use for crafting. I used to add some of these to all my Etsy packages. I love them. And they can be used in a dollhouse but they’ll always be a bit off in scale. The flowers on the right were purchased through miniatures.com. They are the same as some of the miniature flowers I found among the flowers that Jayne sent me. I grabbed a vase from the dollhouse to show you the difference:

min vase with large flowers

(The light around here has been less than perfect. It’s been raining for 3 days. Sorry!)

The Michael’s kind of flower in the vase. They’re okay but not to scale. And they don’t look all that real, nor are they meant to.

min vase with smaller flowers

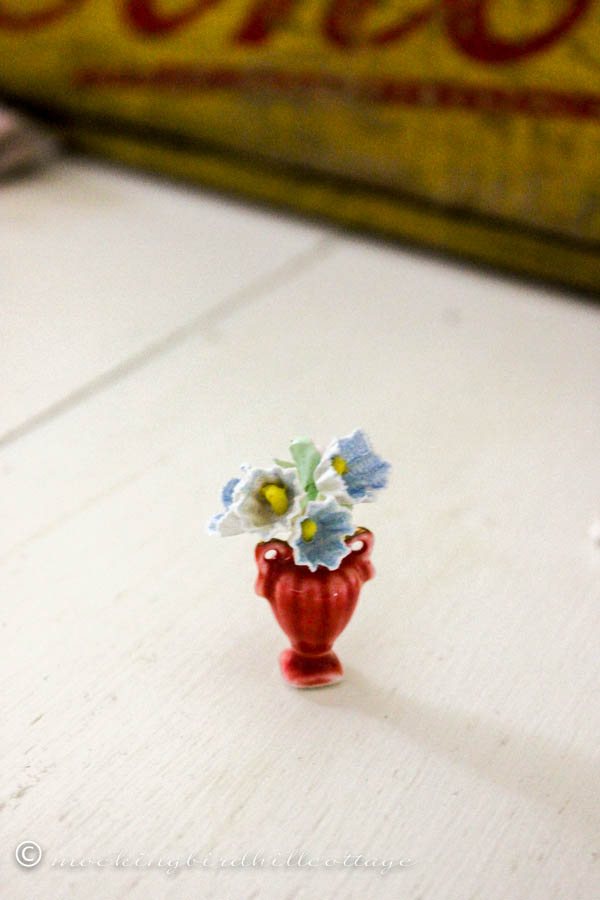
The mini flowers. This isn’t the most artful arrangement because I didn’t want to cut the stems for this shot. But it gives you an idea of the difference in scale.

Yes, they are spendy. But you can also buy kits to make flowers and there are lots and lots of tutorials on the web on how to make flowers for your dollhouse.

As for attaching the flowers to the window boxes, the window boxes that came with this house are really solid blocks of wood. Unlike other window boxes, there’s no well in which to sink the flowers. So I cut the stems off of several different varieties of flowers and attached them with the wax I mentioned in #3. Fiddly work, but worth it. If you have a window box with a well, I bet you could use small pieces of floral foam as well.

5. Could you remind me of the phrase/words you use to find your good miniature images? For some reason, I’ve not hit on a good word combo.

Of course. I google “Free dollhouse printables.” You will be surprised at how many printables pop up on your screen!

I hope this answers your questions, Debbie. I’ve learned by googling, visiting the blogs of miniaturists and dollhouse enthusiasts and reading lots of tutorials. And by trial and error.

Keep your questions coming!

Happy Saturday.

ClaudiaSignature140X93

Tagged With: dollhouse, miniaturesFiled Under: DIY, dollhouse, miniatures 18 Comments

Evolution of the Dollhouse – Part 4

May 16, 2014 at 9:01 am by Claudia

dhevolutiongraphic

During my first few years of working on the dollhouse, I concentrated mainly on three rooms: the living room, the den, and the bedroom. The spaces that would eventually be the bathroom and the studio/office were blank canvases. They’d been painted white, but that was all.

In fact, I dithered over whether the bathroom should be on the second floor or on the third floor. If it was to be on the third floor, the owner would have to run up two flights of stairs to take care of business. If it was on the second, she was going to have to go down a flight of steps in the dark for those nighttime bathroom visits. The memory of our rental when we first moved East and its bathroom off the kitchen (our bedroom was upstairs) steered me toward my final decision. Getting out of bed, going down the steps, walking through the living room and kitchen – all of this before we could use the bathroom during the night – was a pain in the tush. The third floor won.

dollhouse8

I decide to go with a vinyl tile floor instead of the wood floors that are in every other room of the house. I think I bought this sheet at a craft store that carried a few dollhouse items. As always, I made a template of the floor by tracing it on a sheet of paper and used that template to cut the vinyl.

The bathroom suffers a bit from corners that don’t join as tightly as they should, from irregularities that are the result of a sometimes poorly assembled dollhouse. So I had to work around these tiny and not-so-tiny glitches as I put the room together.

I knew I wanted beadboard in the bathroom, so the next big thing was to pick a wallpaper design that I liked. I went bolder this time, thinking that the owner might like a more striking pattern in this space – something a little exotic.

dhbathroom1

The house has a lot of pastels and this yellow wallpaper proved to be the perfect contrast. (It’s actually a bit darker than you see in the photo above.) It wouldn’t have worked if each wall was entirely covered with wallpaper, but the beadboard nicely counterbalances the pattern. I added a chair rail, as well.

bathroomcabinet11

The windows were trimmed out, baseboards and molding were added. One day, I decided that adding interior shutters to the window might be a good idea. The bathroom, kitchen and studio/office are long narrow rooms. The window wall in each of the rooms is usually the most dimly lit, since it is at the end of a sort of tunnel-like space.

dhbathroomshutters

I had become fond of the red flowers in the wallpaper, so I painted the shutters red. That was just the pop that the room needed.

faucetsdh

So when I found a sink/cabinet that was good for the space, I painted it in the same red (except for the top.)

fridaydhtoilet3

I had been on a hunt for a bathtub and toilet that looked somewhat realistic. I already had a bathtub and toilet that had flowers painted on them – these came courtesy of a bag of dollhouse furniture that Heidi found and passed on to me – but I hesitated about using them. The flowers drove me crazy. But I decided they might work in the meantime if I painted over the flowers, so out came some white ceramic paint. Just as I do in my real house, if at all possible, I use what I have.

mondhbathroomrug

I made the little chair from a tutorial and it seemed perfect for the bathroom. I just added the rug a couple of weeks ago.

There are touches I still need to add: a shower curtain, some necessary accoutrements like a toilet paper holder, and a towel rack. I’m thinking of adding a dressing table, as well, because there’s quite a gap between the sink and the back wall of the room.

A word about trim: Dollhouse websites and catalogs have all sorts of trims available. You will need to trim out the interior of the windows and doors, as well as the moldings and the baseboards. Make sure you measure accurately before you order. I always order more than I need because, let’s face it, mistakes happen.

I went for a specific, consistent look for the windows and doors inside the dollhouse.

firdoors2

Here you can see the look I was going for. I love the corner blocks because they suit the style of the house and, more importantly, they eliminated the necessity for cutting mitered corners! I’ll save that for the next house.

dhrenovationdenwallpaper

Here’s a look at the same materials used to trim out the windows.

A quick story: I trimmed out the windows when I finished wallpapering each room. Then I went about the business of adding furniture, etc. I was sure that part of the process was over and finished. It wasn’t until much, much later that I looked at the open doorways that exist between rooms and had a smack-me-upside-the-head moment.

I hadn’t added any trim to the doorways. It hadn’t even occurred to me that I should.

Something about them had always bothered me and I felt like an idiot when I realized what I had (or hadn’t) done. Yikes. I got to work on that right away and the difference it made was enormous!

More in the series next week.

Several of you are about to set out on a dollhouse renovation or are about to build a dollhouse. I’m so happy for you! If you have any questions, send them to me. I’ll do my best to answer them and if I can’t, I’ll try to point you in the right direction. I think a question and answer post would be fun and informative.

A final note: I just read that one of my favorite authors, Mary Stewart, died yesterday at the age of 97. In my teens, I devoured every one of her romantic suspense books. I loved The Ivy Tree and Nine Coaches Waiting and The Moonspinners and The Gabriel Hounds and This Rough Magic. Her heroines were always smart and savvy and sophisticated. They smoked cigarettes in those days where it was the cool thing to do. There were references to Shakespeare and poetry and Greek mythology sprinkled among the chapters. Not only did I (a diehard romantic) love the stories, I learned a lot as well. She didn’t dumb down her writing, but expected that her audience was entirely capable of following her metaphors and references and intricate story lines. I have many of her books in my permanent library. She also moved into a different genre when she wrote a series of novels centered on Merlin that were highly successful.

Thank you, Mary Stewart, for hours and hours of reading pleasure. What a difference your stories made to a young girl moving through her teenage years. Rest in peace.

Happy Friday.

ClaudiaSignature140X93


Tagged With: DIY, dollhouse, Mary StewartFiled Under: books, decorating, DIY, dollhouse 38 Comments

Misadventures & Miniatures

December 12, 2013 at 8:33 am by Claudia

thurslittletree

Yesterday? A day fraught with challenges. For starters, I’m still struggling with this sinus thing and I feel yucky much of the time. Nevertheless, I looked at our upcoming schedule, along with the predictions of a significant snow event Saturday into Sunday and figured it was time to get the Christmas tree. That went smoothly. We had the tree picked out in no time. When we got home, we stopped to have some lunch and then we hauled the Christmas decorations out of the shed, along with the tree stand. Along the way, I realized I had wrenched something in my lower back, which was evident when I was going up and down the stairs. Drat.

thursornamentboxes

Then it came time to bring the tree inside and fit it in the stand. This requires crouching on all fours on my part. Stuffed up head. Aching back. Try as we might we couldn’t get the stand to lay flat. The legs were uneven, which was perplexing as we had used the stand plenty of times in the past. We tried bending them this way and that and eventually Don started putting pressure on the legs with his booted foot to try and right the situation. He didn’t have his glasses on and stomped on a metal leg while my middle finger was still under it. I screeched in pain. There was a lot of bleeding and a chunk of skin missing from the tip of my finger, but thankfully, nothing was broken. It’s painful and my finger is covered in bandaids, making typing a wee bit difficult. Don felt terrible, of course, but it wasn’t his fault. These things happen.

He had to go back out and buy a new stand.

Decorating the big tree will not happen until tonight or tomorrow night. But it’s very pretty. The little white tree, as you can see from the first picture, has been put up and looks lovely.

The other day, my little package from Spain arrived. Spain! How exciting! What was in it?

thursplates

Be still my heart. Miniature plates made out of ceramic, in the most luscious vintage patterns.

thursbirdcup

A cup and saucer.

thursteacupsaucer

Another cup and saucer.

thursplatter

And a matching platter.

Oh my lord. Clearly the owner of Hummingbird Cottage loves china, especially vintage china. She swoons over beautiful, old-fashioned patterns. She haunts antique stores and flea markets, looking for more china for her collection.

Does that sound like anyone else you know?

I’m not sure where these will eventually end up but I’ve been playing with them.

thursplatesonrack

thurscupsaucercounter

thursplateoncounter

thursplatterontable

These pieces are so beautifully done, I can barely stand it. Swoon-worthy. Just as in my life-sized house, there is limited space here in the dollhouse for china.

Will that stop me? No.

These pieces of china came from Sofia’s Etsy Shop – Twelvetimesmoreteeny. She does exquisite work. Stop by and feast your eyes on the loveliness. I could go nuts there.

Happy Thursday.

ClaudiaSignature140X93

Tagged With: dollhouse, miniaturesFiled Under: Christmas, dollhouse, miniatures 52 Comments

  • « Previous Page
  • 1
  • 2
  • 3
  • 4
  • Next Page »
  • Email
  • Instagram

Welcome!

Welcome!

I live in a little cottage in the country with my husband. It's a sweet place, sheltered by old trees and surrounded by gardens. The inside is full of the things we love. I love to write, I love my camera, I love creating, I love gardening. My decorating style is eclectic; full of vintage and a bit of whimsy.

I've worked in the theater for more years than I can count. I'm currently a voice, speech, dialect and text coach freelancing on Broadway, off Broadway, and in regional theater.

Thanks for stopping by.

Searching?

The Dogs

The Dogs

Scout & Riley. Riley left us in 2012. Scout left us in February 2016. Dearest babies. Dearest friends.

Winston - Our first dog. We miss you, sweetheart.

Lambs Like to Party

Lambs Like to Party

A Note

Thanks for visiting! Feel free to browse, read and enjoy. All content is my own; including photos and text. Please do not use anything on this site without permission.

Disclosure/Privacy Policy can be found in the Navigation Bar under ‘About MHC.’

Also, I love receiving comments! I do, however, reserve the right to delete any comment that is in poor taste, offensive or is verging on spam. It’s my blog. If you’re a bot or a troll you’ll be blocked. Thanks!

Archives

All Content © 2008 - 2025 Mockingbird Hill Cottage · Log in

This website uses cookies to improve your experience. We'll assume you're ok with this, but you can opt-out if you wish.Accept Reject
Privacy & Cookies Policy

Privacy Overview

This website uses cookies to improve your experience while you navigate through the website. Out of these, the cookies that are categorized as necessary are stored on your browser as they are essential for the working of basic functionalities of the website. We also use third-party cookies that help us analyze and understand how you use this website. These cookies will be stored in your browser only with your consent. You also have the option to opt-out of these cookies. But opting out of some of these cookies may affect your browsing experience.
Necessary
Always Enabled
Necessary cookies are absolutely essential for the website to function properly. This category only includes cookies that ensures basic functionalities and security features of the website. These cookies do not store any personal information.
Non-necessary
Any cookies that may not be particularly necessary for the website to function and is used specifically to collect user personal data via analytics, ads, other embedded contents are termed as non-necessary cookies. It is mandatory to procure user consent prior to running these cookies on your website.
SAVE & ACCEPT