Mockingbird Hill Cottage

Mockingbird Hill Cottage

  • About MHC
    • Disclosure
  • Dollhouses/Minis
    • Hummingbird Cottage
    • The Studio (Formerly TSP)
    • Dove Cottage
    • The Lake House
    • The Folk Art Dollhouse
    • The Modern Dollhouse
    • Dollhouse Source List, Information and Tutorials
  • On the Road
  • Collecting
    • Roseville Pottery
    • McCoy Pottery
    • Egg Cups
    • Bakelite
  • Press
  • Privacy Policy
You are here: Home / Archives for dollhouse

Evolution of the Dollhouse – Part 4

May 16, 2014 at 9:01 am by Claudia

dhevolutiongraphic

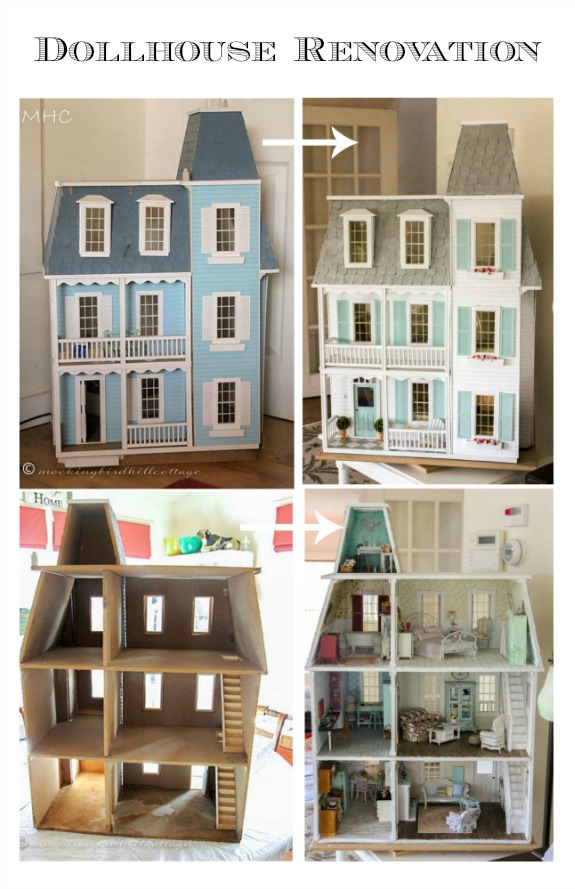
During my first few years of working on the dollhouse, I concentrated mainly on three rooms: the living room, the den, and the bedroom. The spaces that would eventually be the bathroom and the studio/office were blank canvases. They’d been painted white, but that was all.

In fact, I dithered over whether the bathroom should be on the second floor or on the third floor. If it was to be on the third floor, the owner would have to run up two flights of stairs to take care of business. If it was on the second, she was going to have to go down a flight of steps in the dark for those nighttime bathroom visits. The memory of our rental when we first moved East and its bathroom off the kitchen (our bedroom was upstairs) steered me toward my final decision. Getting out of bed, going down the steps, walking through the living room and kitchen – all of this before we could use the bathroom during the night – was a pain in the tush. The third floor won.

dollhouse8

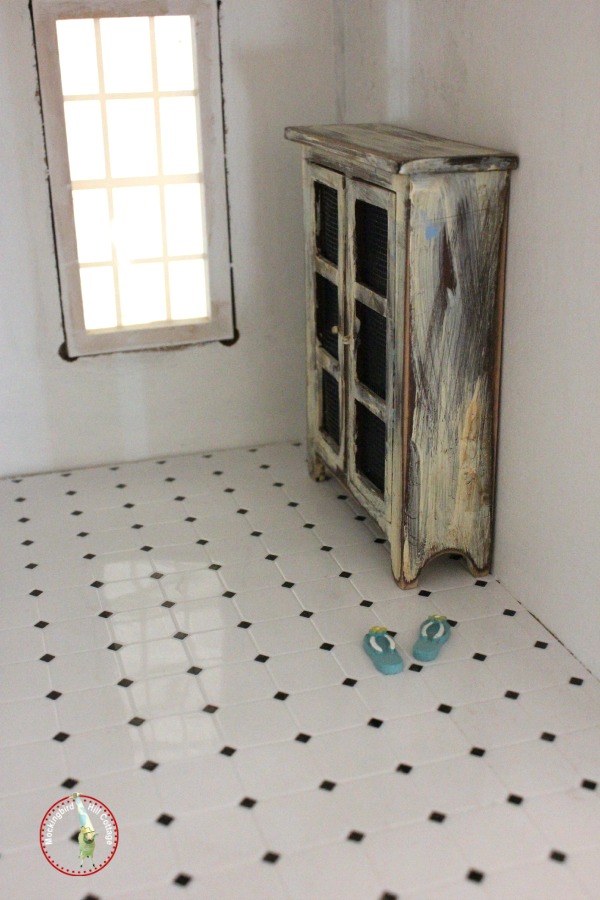
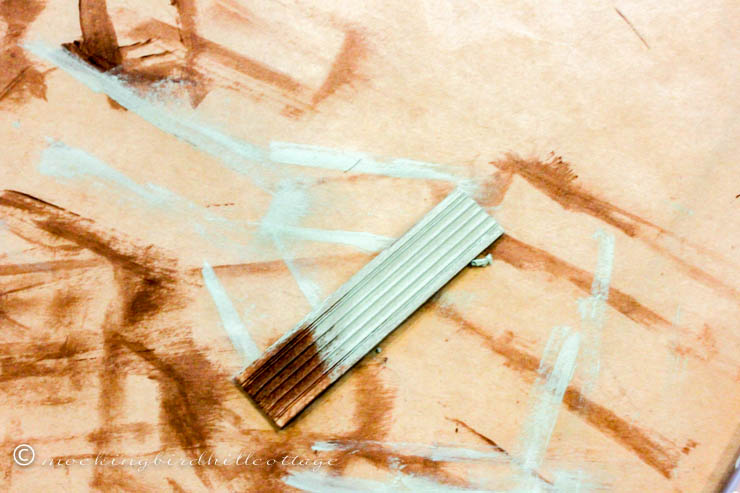
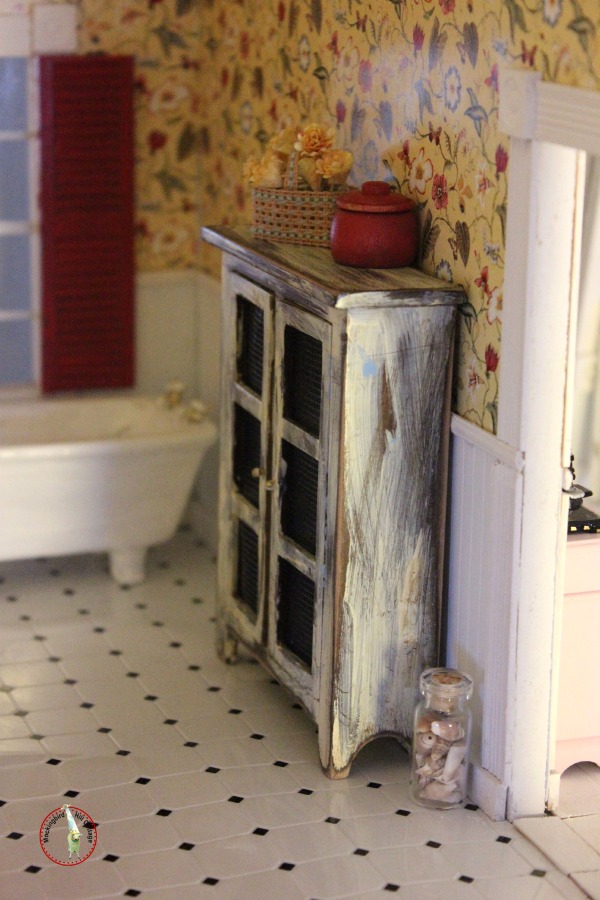
I decide to go with a vinyl tile floor instead of the wood floors that are in every other room of the house. I think I bought this sheet at a craft store that carried a few dollhouse items. As always, I made a template of the floor by tracing it on a sheet of paper and used that template to cut the vinyl.

The bathroom suffers a bit from corners that don’t join as tightly as they should, from irregularities that are the result of a sometimes poorly assembled dollhouse. So I had to work around these tiny and not-so-tiny glitches as I put the room together.

I knew I wanted beadboard in the bathroom, so the next big thing was to pick a wallpaper design that I liked. I went bolder this time, thinking that the owner might like a more striking pattern in this space – something a little exotic.

dhbathroom1

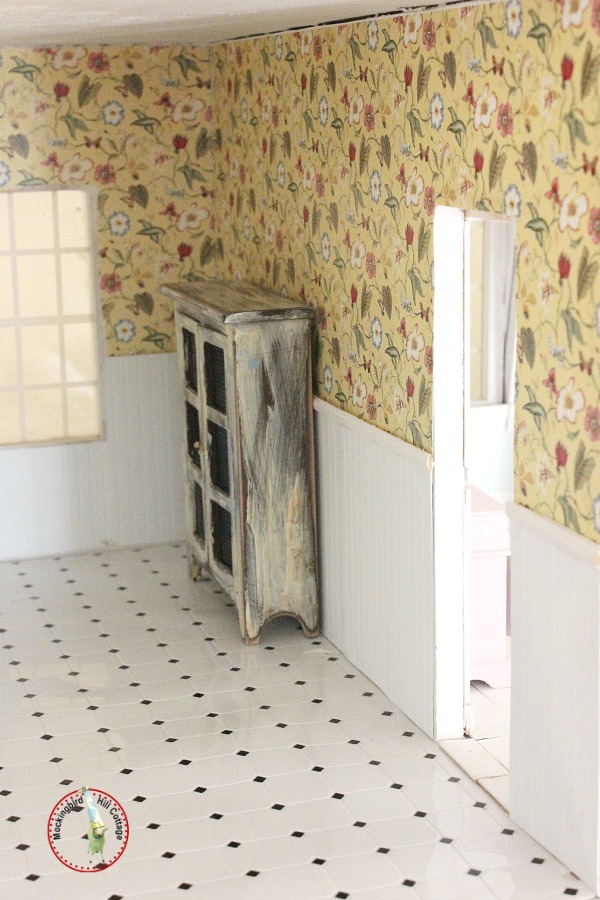
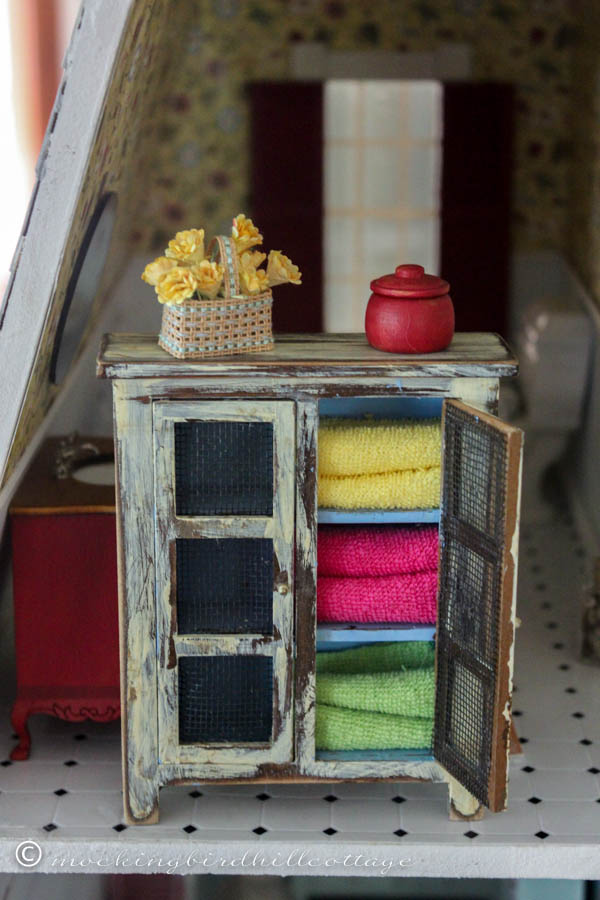
The house has a lot of pastels and this yellow wallpaper proved to be the perfect contrast. (It’s actually a bit darker than you see in the photo above.) It wouldn’t have worked if each wall was entirely covered with wallpaper, but the beadboard nicely counterbalances the pattern. I added a chair rail, as well.

bathroomcabinet11

The windows were trimmed out, baseboards and molding were added. One day, I decided that adding interior shutters to the window might be a good idea. The bathroom, kitchen and studio/office are long narrow rooms. The window wall in each of the rooms is usually the most dimly lit, since it is at the end of a sort of tunnel-like space.

dhbathroomshutters

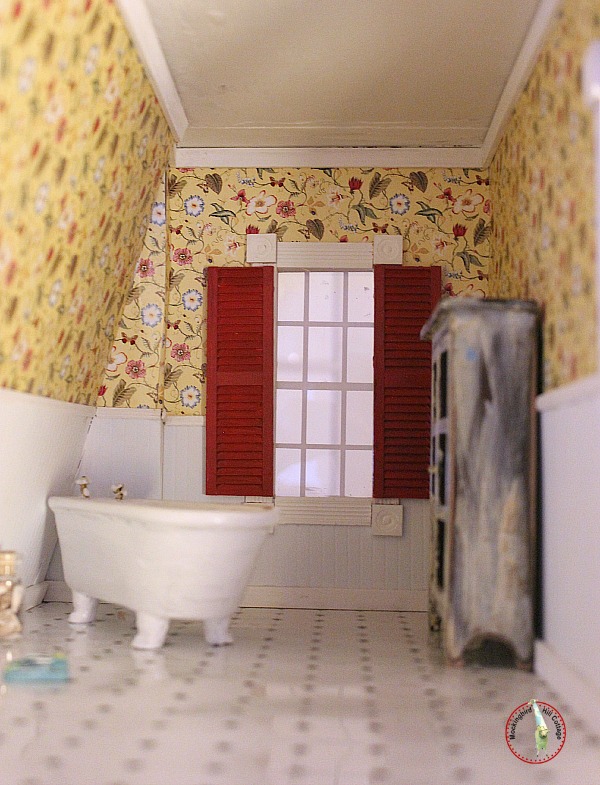
I had become fond of the red flowers in the wallpaper, so I painted the shutters red. That was just the pop that the room needed.

faucetsdh

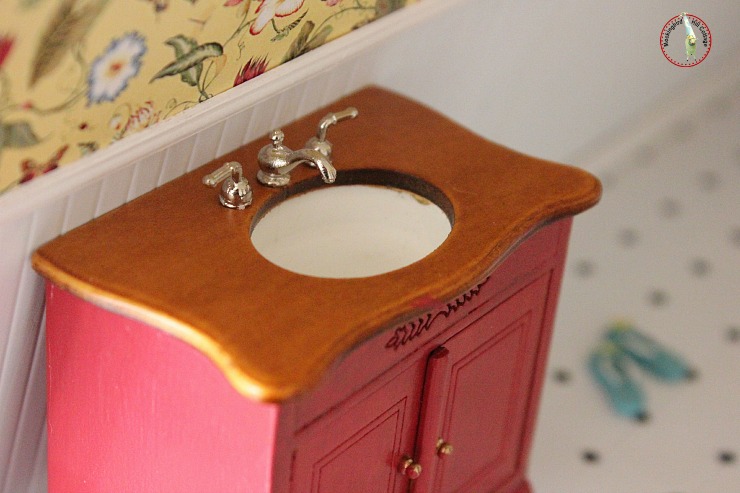
So when I found a sink/cabinet that was good for the space, I painted it in the same red (except for the top.)

fridaydhtoilet3

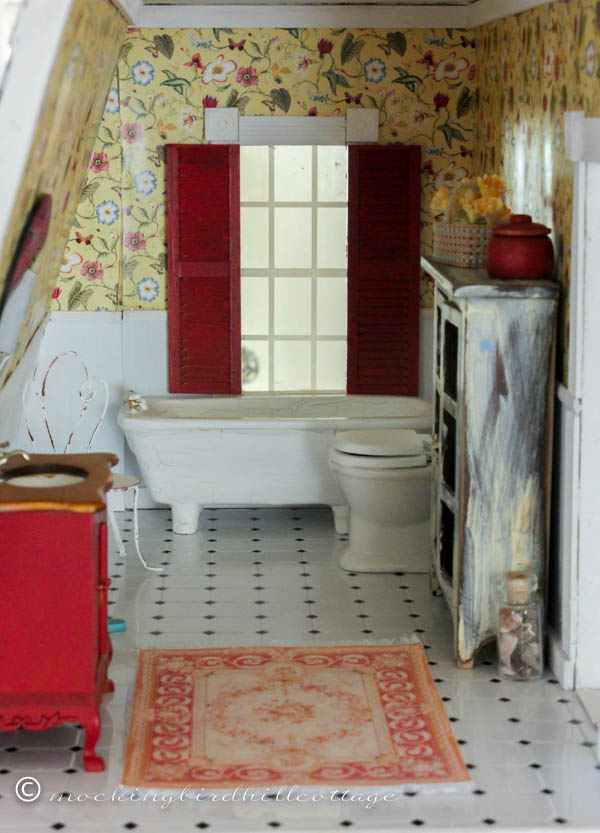
I had been on a hunt for a bathtub and toilet that looked somewhat realistic. I already had a bathtub and toilet that had flowers painted on them – these came courtesy of a bag of dollhouse furniture that Heidi found and passed on to me – but I hesitated about using them. The flowers drove me crazy. But I decided they might work in the meantime if I painted over the flowers, so out came some white ceramic paint. Just as I do in my real house, if at all possible, I use what I have.

mondhbathroomrug

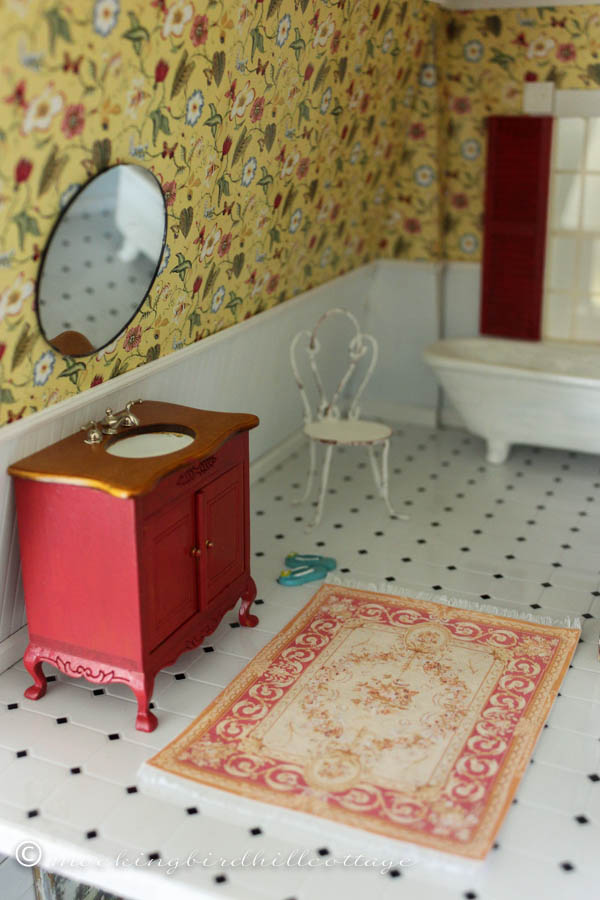
I made the little chair from a tutorial and it seemed perfect for the bathroom. I just added the rug a couple of weeks ago.

There are touches I still need to add: a shower curtain, some necessary accoutrements like a toilet paper holder, and a towel rack. I’m thinking of adding a dressing table, as well, because there’s quite a gap between the sink and the back wall of the room.

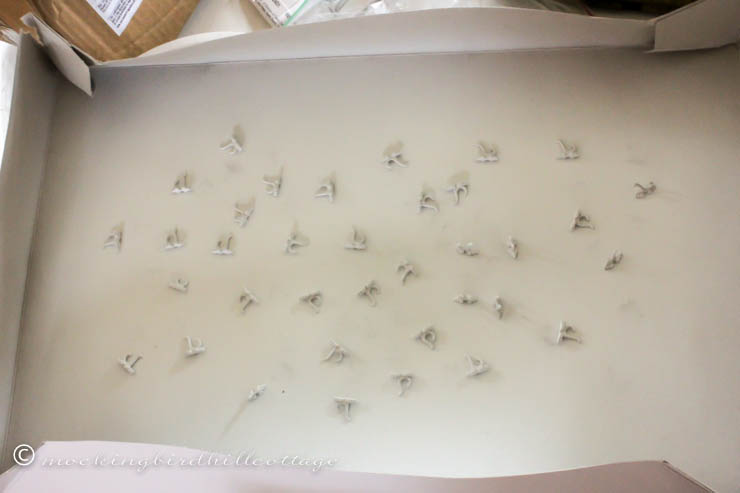
A word about trim: Dollhouse websites and catalogs have all sorts of trims available. You will need to trim out the interior of the windows and doors, as well as the moldings and the baseboards. Make sure you measure accurately before you order. I always order more than I need because, let’s face it, mistakes happen.

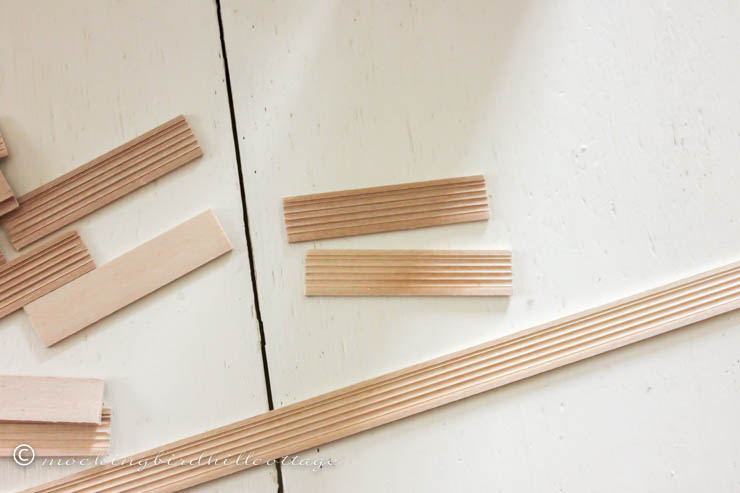
I went for a specific, consistent look for the windows and doors inside the dollhouse.

firdoors2

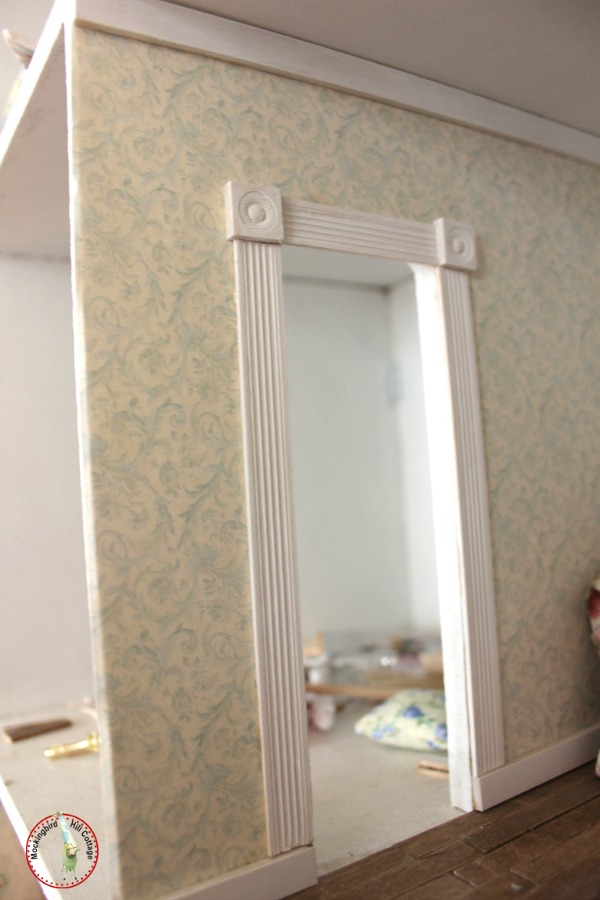
Here you can see the look I was going for. I love the corner blocks because they suit the style of the house and, more importantly, they eliminated the necessity for cutting mitered corners! I’ll save that for the next house.

dhrenovationdenwallpaper

Here’s a look at the same materials used to trim out the windows.

A quick story: I trimmed out the windows when I finished wallpapering each room. Then I went about the business of adding furniture, etc. I was sure that part of the process was over and finished. It wasn’t until much, much later that I looked at the open doorways that exist between rooms and had a smack-me-upside-the-head moment.

I hadn’t added any trim to the doorways. It hadn’t even occurred to me that I should.

Something about them had always bothered me and I felt like an idiot when I realized what I had (or hadn’t) done. Yikes. I got to work on that right away and the difference it made was enormous!

More in the series next week.

Several of you are about to set out on a dollhouse renovation or are about to build a dollhouse. I’m so happy for you! If you have any questions, send them to me. I’ll do my best to answer them and if I can’t, I’ll try to point you in the right direction. I think a question and answer post would be fun and informative.

A final note: I just read that one of my favorite authors, Mary Stewart, died yesterday at the age of 97. In my teens, I devoured every one of her romantic suspense books. I loved The Ivy Tree and Nine Coaches Waiting and The Moonspinners and The Gabriel Hounds and This Rough Magic. Her heroines were always smart and savvy and sophisticated. They smoked cigarettes in those days where it was the cool thing to do. There were references to Shakespeare and poetry and Greek mythology sprinkled among the chapters. Not only did I (a diehard romantic) love the stories, I learned a lot as well. She didn’t dumb down her writing, but expected that her audience was entirely capable of following her metaphors and references and intricate story lines. I have many of her books in my permanent library. She also moved into a different genre when she wrote a series of novels centered on Merlin that were highly successful.

Thank you, Mary Stewart, for hours and hours of reading pleasure. What a difference your stories made to a young girl moving through her teenage years. Rest in peace.

Happy Friday.

ClaudiaSignature140X93


Tagged With: DIY, dollhouse, Mary StewartFiled Under: books, decorating, DIY, dollhouse 38 Comments

Let’s Take A Walk

May 14, 2014 at 8:36 am by Claudia

Let’s take a little walk around the property and see what’s growing and blooming in this late-to-get-going Spring.

wwildhoneysuckle

The wild honeysuckle that grows all over this property is blooming, much to the delight of the bee population.

wbigshotofhydrangea

The climbing hydrangea that I planted about 6 years ago is taking over the shed. It’s supposed to start blooming after 4 or 5 years but nary a bloom has been sighted.

wclimbinghydrangea

Until now. I couldn’t believe my eyes. In fact, I had just finished a sentence that included the words, “I guess this will never bloom,” when I saw these. Only two, but who cares? A small victory.

wlilacs

The lilacs have bloomed. I walk over to that side of the driveway several times a day and inhale. What a glorious scent.

wfield

Our woods open up to this big field, which is owned by my fellow blogger Breida and her husband. I walk through our woods daily and always take a moment to stand and gaze out at this vista.

wwoodpile

To the left is the back of our neighbor’s property. He’s been busy stacking enough wood to last him through the apocalypse. Check out his beautiful lilac bush.

wwhiteflowerstree

This tree is on the edge of my other neighbor’s property, which also abuts Breida’s field. Isn’t it pretty?

wquince

The flowering quince is still blooming.

wtulips3

My delicate yellow tulips are open. These were planted long before we moved here, as were the daffodils and a couple of the hostas and sedum.

wedbiggardenbed

The big garden bed on April 30th.

Wgardenview

On May 7th.

wbiggardenbed3

And on May 13th. As you can see, the trees have really filled in, there’s green everywhere, and the perennials are much bigger.

I planted lots of morning glory seeds the other day, as well as zinnias. I haven’t filled my barrels or my galvanized planter with flowers yet – my budget is very, very tight – and I haven’t bought any hanging plants for the porch. Those things will have to wait a bit. Waaah! I want them now!

whihoparking

When my friend Heidi’s shop (which was called Hi Ho Home Market) closed, she gave me one of her signs, which we have placed in front of the birdbath – right where we park our car. Sort of perfect for the funky patio area, don’t you think? We love signs and if they can be used with a sense of humor, all the better.

wtowelsdh

I made some towels for the dollhouse bathroom by using baby washcloths, a tip I picked up somewhere on the Internet. I think they look neat but they’re too bulky at the moment. I’m going to trim them down a bit.

Today I have to mail off all the items I made for the swap. I spent most of yesterday morning wrapping each item and figuring out how to pack everything so that nothing is damaged. Can’t wait to see what everyone else has created!

Happy Wednesday.

ClaudiaSignature140X93


Filed Under: dollhouse, flowers, garden, spring, trees 41 Comments

Crafting Minis for a Swap. Yes, I Did!

May 9, 2014 at 7:28 am by Claudia

I’ve been awake since 4:45 am. I’m not real happy about that. Lack of sleep, the inability to concentrate or remember things, a short temper, spontaneous tears; all are, I’m sure, part of the grieving process. Don has to fill in the blanks for me when I say something like, “You know….that series with Kevin Spacey….the one we like…. you know…”

“House of Cards?”

Frustrated. “Yes. Why can’t I remember that?”

And so it goes.

But, hey, it’s 6:34 am and I’m already writing my post for the day while Scout snoozes in the ‘Tunnel.’ That can’t be all bad.

Let’s talk about what I did yesterday for seven hours straight, in my painting clothes, hair unwashed. Because once I get going on something I am like a dog with a bone, I push myself beyond the point at which I should stop.

The talented Amy Powers, who blogs at Inspire Co., created Club Little House (for all of us who love miniatures) several years ago and occasionally, she conducts a swap. The last one I can remember was when I was first getting into my dollhouse and I didn’t feel remotely qualified to take part. I still don’t.

But when Debby told me that Amy had a new swap going on, I bit the bullet and signed up. Now, I am really not a miniaturist. I tweak, I play, I build a few things, but I’m very much a beginner. In this swap, we are to come up with some miniature that we can make 12 of. We send our creations to Amy and she puts everything together and soon we are opening a box with 12 different miniatures created by members of the swap. Sounds like fun, doesn’t it?

I racked my brain trying to come up with something. When I finally did, I had to order some supplies that took a while to get here because they were sent from England, though I somehow didn’t get that fact because this website has an American version as well, so I thought everything was being shipped here. I was a little panicked about whether my supplies would arrive in time. But they did. Everything arrived on Wednesday.

My first idea was to make a small hanging/coat/hook/rack. The mini hooks were brass, so the first thing I did was spray paint them white.

frihooks

fripiecesofwood

Then I used some of the wood trim I had on hand and cut several pieces 2¼” long – since the scale is 1:12, that means that one mini inch equals one foot in the real world. So this would be 2¼’ long in reality.

fripaintedwood

I stained and painted each piece of wood. Then I sanded the painted pieces down in order to give them a more rustic look.

Then I glued the hooks on.

frif12hangers

Twelve hanging hook/coat/racks. (I never know what to call them.)

I made a prototype for myself and here is what it looks like in the dollhouse:

frihangersondhwall

I think I’ll make one to hang towels on in the bathroom.

The other mini that I made was inspired by the wooden crate I bought from a seller on Etsy. He did such a nice job with it. The same miniature site that had the hooks in stock also had mini crates, so I ordered them as well. I searched the internet for free printable miniature images and finally settled on a label that I really liked. I finally figured out how to print several of the same image on one page (I know. It’s probably perfectly obvious to you. But not to me.) I cut out each of the labels with the aid of a metal ruler and an Exacto knife.

Here’s the prototype I made:

friprototypecrate

friprototypecrate2

Because French labels are pretty. They just are. There is a label on the front and the back.

Each crate was first painted with a base coat of white.

frilotsofcrates

Then they were painted in aqua and the corners were sanded to age them a bit. Next, I glued the labels on to each crate.

And voilà!

frifinishedcrates

Nothing complex or intricate; nevertheless, it took me a long time to add each element, to paint, layer, sand and glue .

I’m pretty happy with these and I’ll wrap them up and send them off to Amy on Monday. Can’t wait to see what other swap participants have created!

Happy Friday.

ClaudiaSignature140X93


Filed Under: DIY, dollhouse, Fellow bloggers, miniatures 65 Comments

  • « Previous Page
  • 1
  • …
  • 93
  • 94
  • 95
  • 96
  • 97
  • …
  • 129
  • Next Page »
  • Email
  • Instagram

Welcome!

Welcome!

I live in a little cottage in the country with my husband. It's a sweet place, sheltered by old trees and surrounded by gardens. The inside is full of the things we love. I love to write, I love my camera, I love creating, I love gardening. My decorating style is eclectic; full of vintage and a bit of whimsy.

I've worked in the theater for more years than I can count. I'm currently a voice, speech, dialect and text coach freelancing on Broadway, off Broadway, and in regional theater.

Thanks for stopping by.

Searching?

The Dogs

The Dogs

Scout & Riley. Riley left us in 2012. Scout left us in February 2016. Dearest babies. Dearest friends.

Winston - Our first dog. We miss you, sweetheart.

Lambs Like to Party

Lambs Like to Party

A Note

Thanks for visiting! Feel free to browse, read and enjoy. All content is my own; including photos and text. Please do not use anything on this site without permission.

Disclosure/Privacy Policy can be found in the Navigation Bar under ‘About MHC.’

Also, I love receiving comments! I do, however, reserve the right to delete any comment that is in poor taste, offensive or is verging on spam. It’s my blog. If you’re a bot or a troll you’ll be blocked. Thanks!

Archives

All Content © 2008 - 2026 Mockingbird Hill Cottage · Log in